Overview
In my last part-1 blog of this vCAV 3.5 C2C DR topic, we have already configured the vApp “ERP-2” replication task of type “Protection” from vCD Site-A to vCD Site-B. Now in this blog, I’d like to walk you through the second part of this topic, to perform “test failover” and actually “failover” of our protected vApp to the DR destination site as the tenant administrator.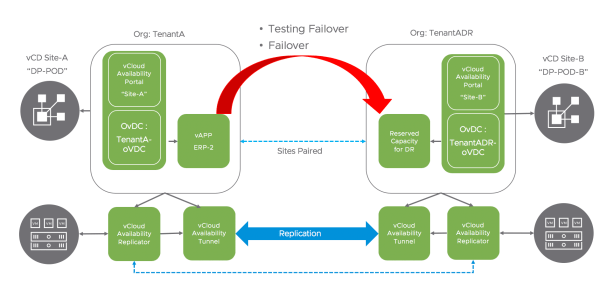
Test Failover
You may periodically perform the DR drill testings, in vCAV 3.5, you can leverage the “Test Failover” capability for that purpose.
In order to perform the DR drill, you open vCloud Availability GUI in the DR site, in the left pane, choose a replication direction: under “Incoming Replications” click “from Cloud”, choose ERP-2 to test failover a vApp, click the “vApp” button, select the ERP-2 vApp to fail over and click “Test Failover“.

In the “Test Failover” wizard, configure our selected workload for the failover test.
On the “Recovery Settings” page, configure the recovered workload and click Next.
- Select “Apply preconfigured network settings on failover”, to assign the network configured during the virtual machine replication.
- Select “Connect all VMs to network” and from the drop-down menu select a network to connect the replicated virtual machines to, here we select “DR-Testing-NW-1” network in the vCD DR site.

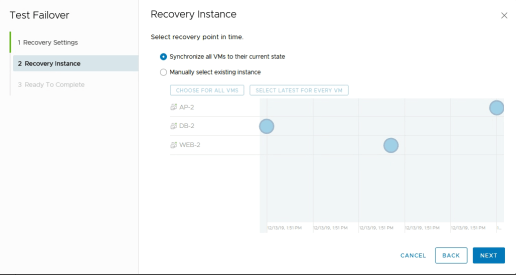
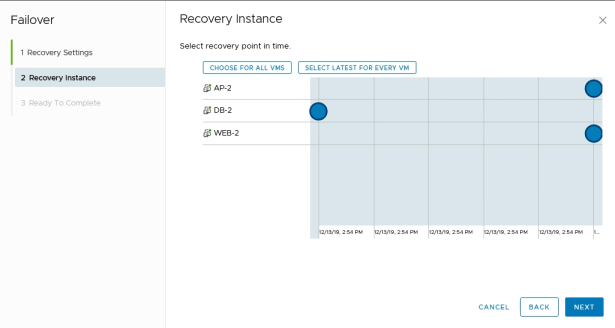
On the Recovery Instance page, configure the recovery point in time and click “Next”.
The options we got for “point in time” are :
- Synchronize all VMs to their current state: Creates an instance of the powered on workload with its latest changes and uses that instance for the test failover.
- Manually select existing instance: Select an instance without synchronizing the data for the recovered workload.
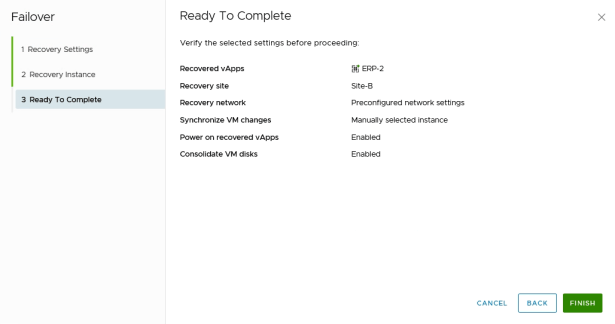
On the “Ready To Complete” page, review the test details and click “Finish”.

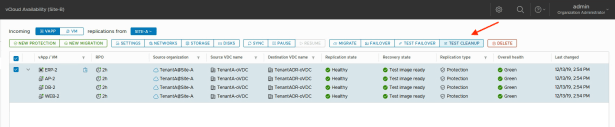
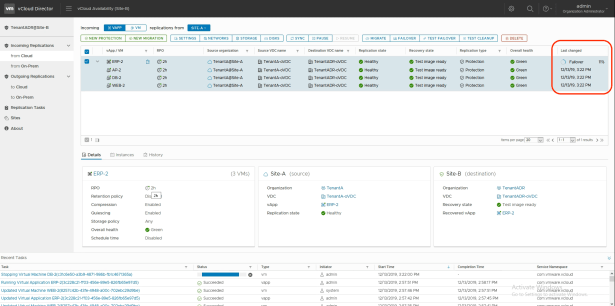
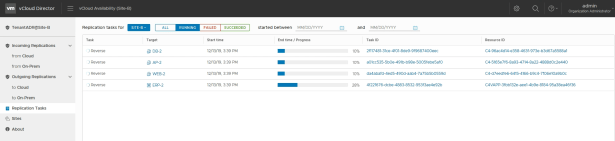
In the Last changed column, you can monitor the progress of the test.
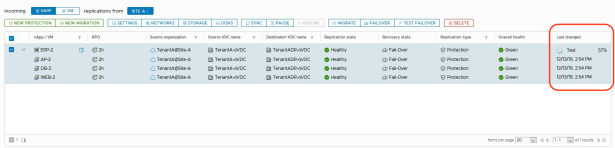
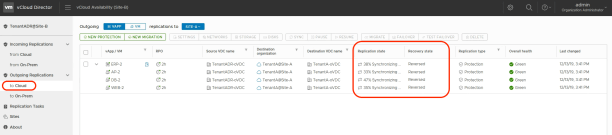
After the test finishes, for the ERP-2 vApp and its three virtual machines in the “Recovery state” column you see a Test image ready state.

You can switch to Site-B DR vCD Datacenters view to examine if all those three VMs are running without any problem, and check the organization network the vApp connected is “DR-Testing-NW-1”. This makes sure that the running vAPP won’t affect the production ERP-2 services since it is automatically connected to a DR testing network.
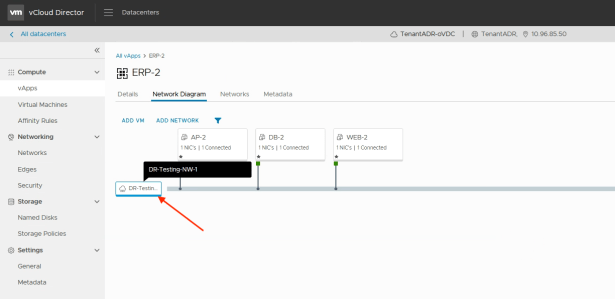
Again, all three VMs, WEB-2, AP-2 and DB-2, are receiving IP addresses from the DR testing network IP static range,

You can perform a failover, test cleanup, or edit the replication settings. If you no longer have to protect the workload, you can delete the replication to remove it from the vApp and virtual machine list.
We choose to perform the “TEST CLEANUP” task to delete the testing workload and release related testing resources.
Edit the replication settings
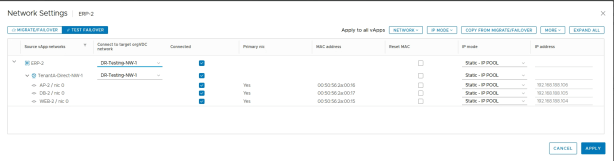
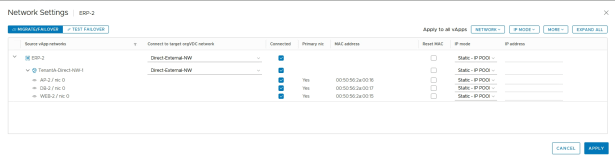
For the cloud to cloud replications, you can modify the automatically discovered network settings of the vApp or virtual machine. After a migration, failover, or a test failover, vCloud Availability attaches the selected network settings in the target cloud site.
Under , click vApp or VM
Select the cloud to cloud replications for which you want to view the discovered network settings and click the “Networks” button.
In the “Network Settings” window, configure the target network settings of the selected replications
Perform a Failover Task
If the protected source site is unavailable, in the destination site perform a workload disaster recovery operation.
Select the protected vApp or virtual machine to fail over and click “Failover”.
In the Failover wizard, configure your selected workload for the failover.
If we click the “Consolidate VM disks”, we’ll get a better performance of the recovered virtual machines, but the failover task taking longer to complete.

On the “Recovery Instance” page, configure the recovery point in time and click “Next”.
On the “Ready To Complete” page, review the task details and click “Finish”.
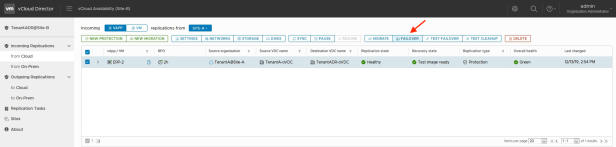
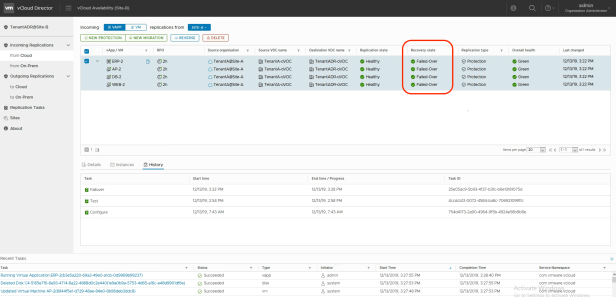
You’ll see the “Failover” status in the “last changed” showing the overall failover progress.
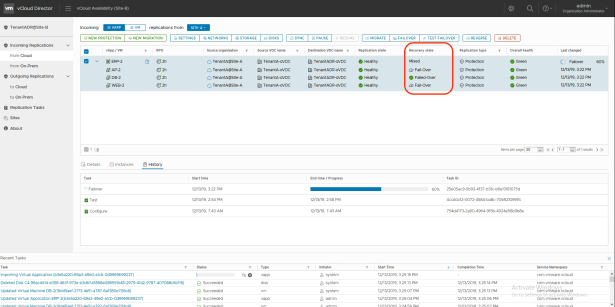
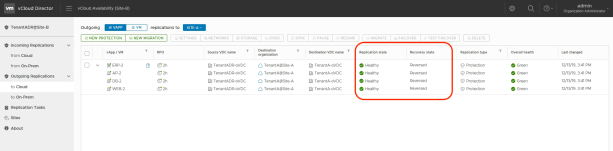
After the failover task finishes, the failed over workload is running in the destination site and the workload is no longer protected upon the task completion. For the ERP-2 vApp and its virtual machines, in the Recovery state column you see a Failed-Over state.
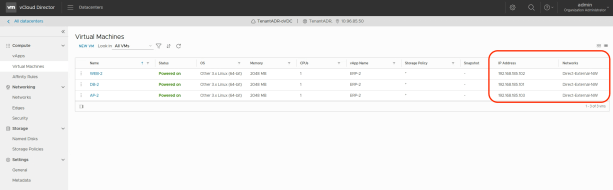
Check the VMs are connected to the actual DR network and associated with DR production IP addresses.
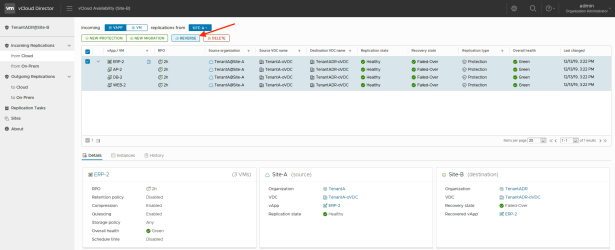
Now we have failed over our ERP-2 vApp (Service) to the DR cloud site, you can choose to do the following tasks:
- You can reverse and reprotect the workload back to the source site.
- You can permanently stop the replication traffic and remove all retained workload instances, by clicking Delete to remove the replication from the vApp and virtual machine list.
Perform a Reverse Task
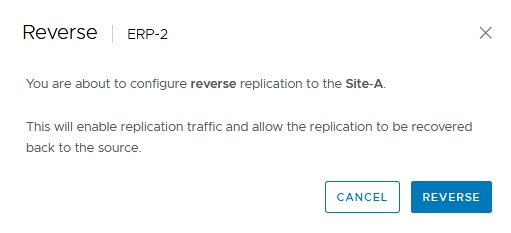
After a failover from the source site to the destination site, the migrated workload runs on the destination site. A subsequent reverse task replicates the recovered workload data back to the source protected vApp or virtual machine.
Select the ERP-2 vApp that are failed over and click “Reverse”.
In the Reverse window, click Reverse.
In the left pane monitor the progress of the Reverse task, by clicking “Replication Tasks”.
You can also check the overall reverse task in the outgoing replications panel.
You can test or fail over the workload back in the original source site if you like.
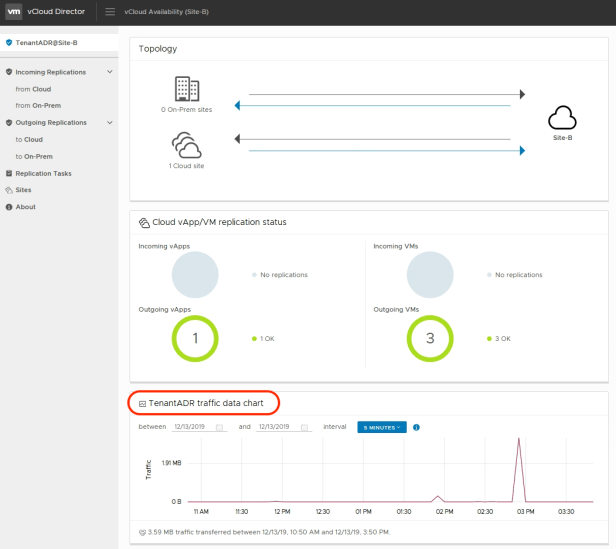
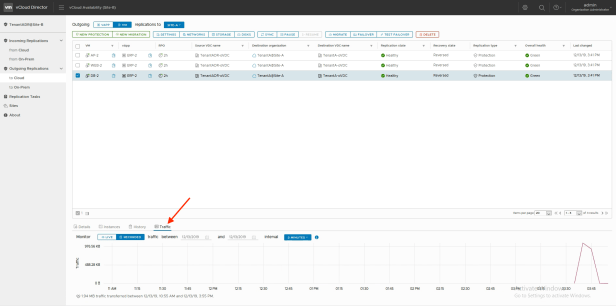
Monitor Tenant Traffic
As a tenant, you can see a traffic data chart for your organization. The chart shows the bytes of transferred data for the last five hours, up to two months.
Monitor the Traffic of a Virtual Machine Replication
Select a virtual machine replication for which you want to see the traffic information.
This concludes my second part of this using vCAV Cloud to Cloud DR blog series, you know how easy it is to configure and perform the DR related tasks in the cloud, feel free to reach out to me on Twitter if you have any additional questions or comments. Thanks for the read!
