Hey there! This blog is all about showing you how to use the awesome Google Cloud Backup and DR (GCBDR) managed service. It’s gonna teach you how to easily backup or restore your VMware VMs, whether they’re chillin’ on your own on-premises VMware setup or hangin’ out in the Google Cloud VMware Engine.
So, you know how there are a bunch of ways to backup or restore VMware VMs, right? Well, check out this diagram that shows you how you can use a 3rd-party backup tool to back up all your VMware VMs data (whether it’s on-prem or in GCVE) to Google Cloud Storage. It’s a pretty neat setup!

Regarding how to backup VM in GCVE, VMware Engine has validated the following backup solutions for compliance: (you can refer to this link for the detail information)
- Cohesity DataPlatform
- Dell EMC Data Protection Solution
- Veeam Backup & Replication
- Commvault Backup & Recovery
- Rubrik Cloud Data Management
But, today we are going to specifically guide you through the steps of discovering and protecting a VMware VM running in Google Cloud VMware Engine and finally mounting a fully-functional new VMware VM from a backup image using Google Backup and DR service.
GCBDR allows you to store multiple copies of your backups in different places for added reliability. It offers options like OnVault, which saves backups to Cloud Storage, and StreamSnap, which duplicates snapshots to another backup appliance. The system also checks the integrity of your data through automatic checksums.
GCBDR uses snapshots to backup your data. It creates a backup of all your VMDKs attached to a VM, which you can use for various purposes.
- Mount that data to create a new VMware VM. See Mount a VMware image.
- Mount that data as a new disk(s) attached to a selected VM (either the source VM or a different physical host or VM). See Mount a VMware image.
- Restore that data to either all or selected disks attached to the source VMware VM. See Restore a VMware VM.
- Clone that data to either all or selected disks attached to a new target VMware VM. See Restore a VMware VM.
Today we will see how GCDBR help us in Restore and Clone use cases, so, let’s dive right in and get started!
VMware VM Onboarding
Assuming you have already started the GCBDR service and installed the corresponding backup appliances, the first thing we need to do is add the vCenter host to the GCBDR management console, so that GCBDR can automatically discover the VMs already present in GCVE environment.
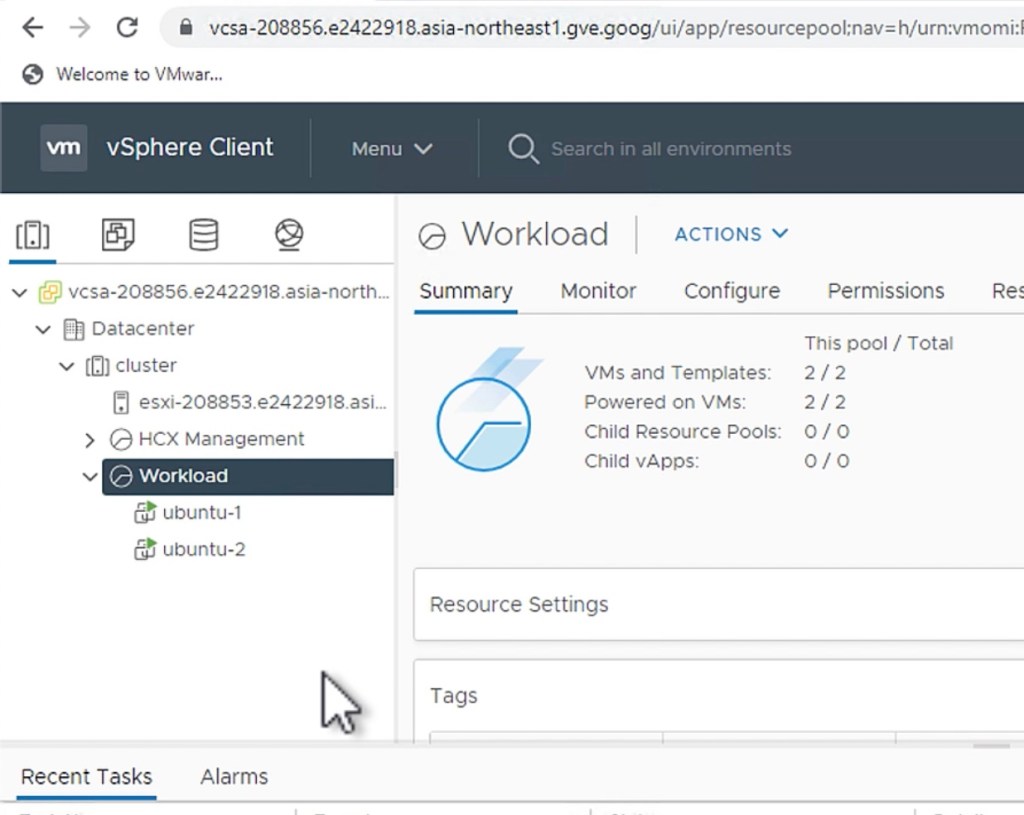
Now, I have set up a VMware environment using GCVE, with two VMs inside. (ubuntu-1, ubuntu-2), now I want to use GCBDR to backup my ‘ubutu-2’ VM.

In the GCBDR management interface, select ‘Backup and Recovery,’ then choose ‘VMware Engine.
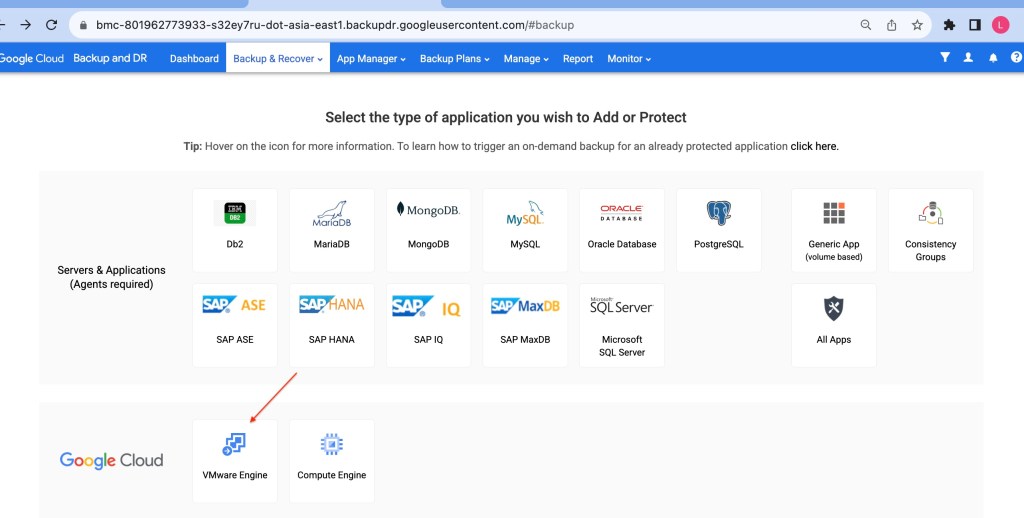
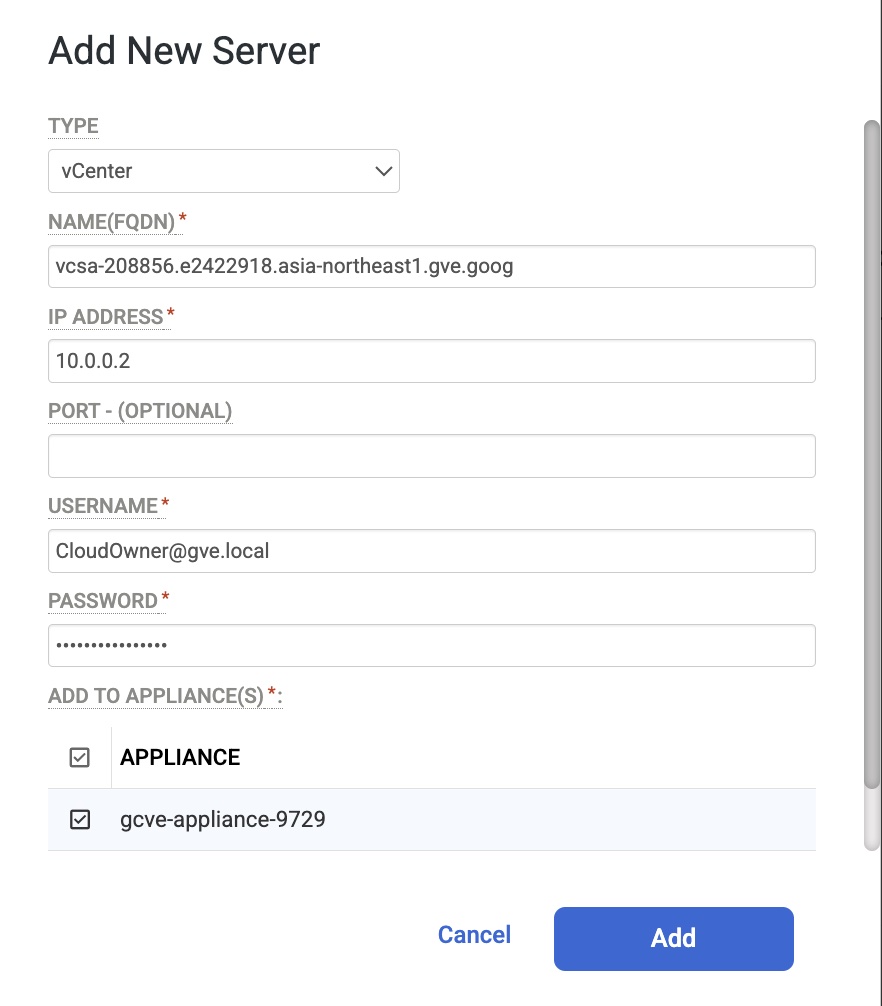
Click “Add New Server”.

select vCenter, enter the IP address of the vCenter server appliance in IP address.
In the Appliances section, select the management console managed appliances that you want to serve this host.
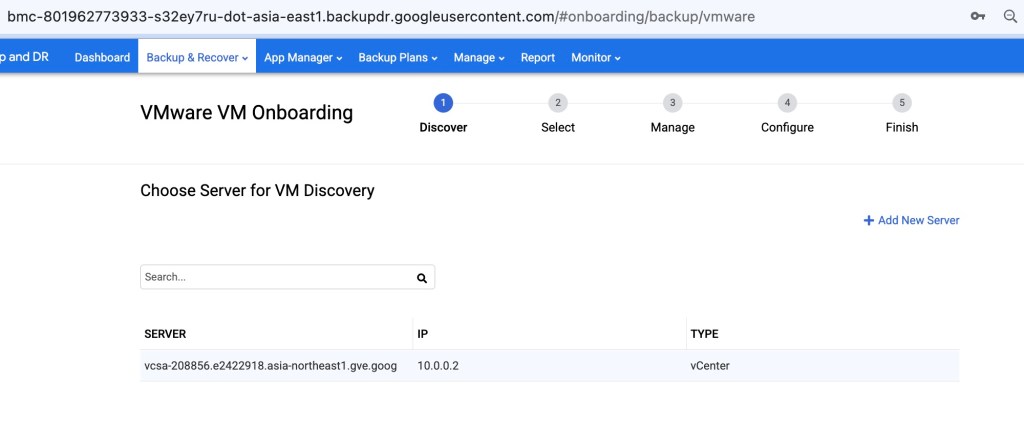
Now you have configured your vCenter host which you want to discover from, you can see there’s one vCenter server exists in Discover step.
Discover and protect VMs
Select VM
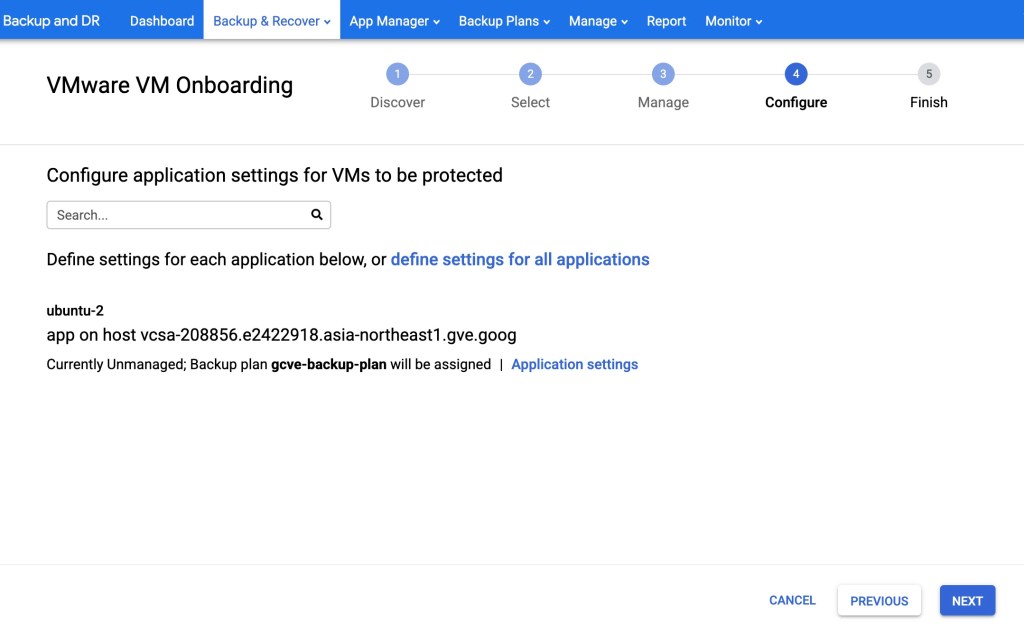
In the VMware VM Onboarding windows, first select vCenter server then expand Datacenter/cluster and select which VM you want to backup. In this example, I select “ubuntu-2”.
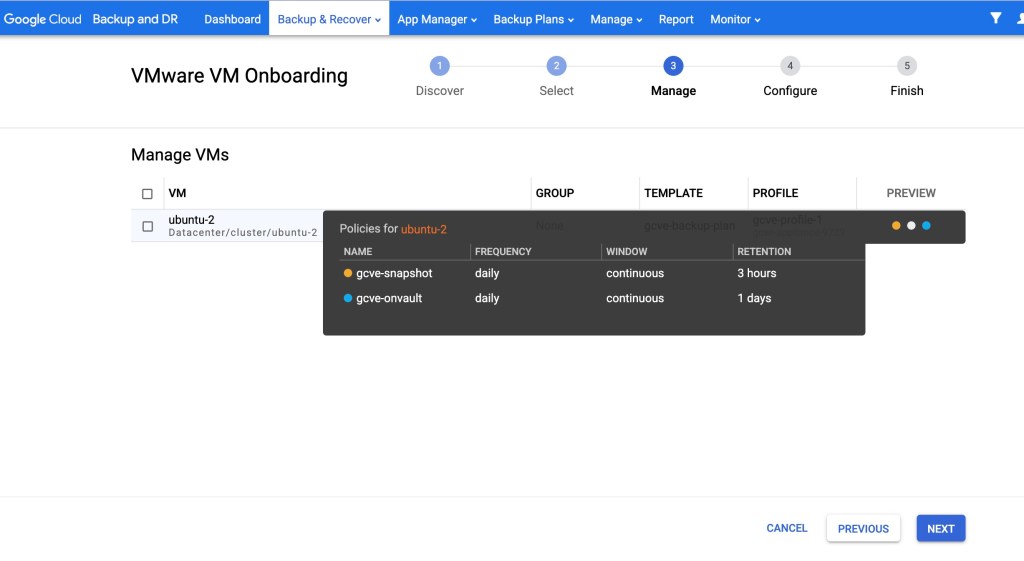
Manage VM
Select what backup plan and backup profile you want to apply to your selected VM.

You can mouse over to the “PREVIEW” column to preview the backup policies for this VM as well.
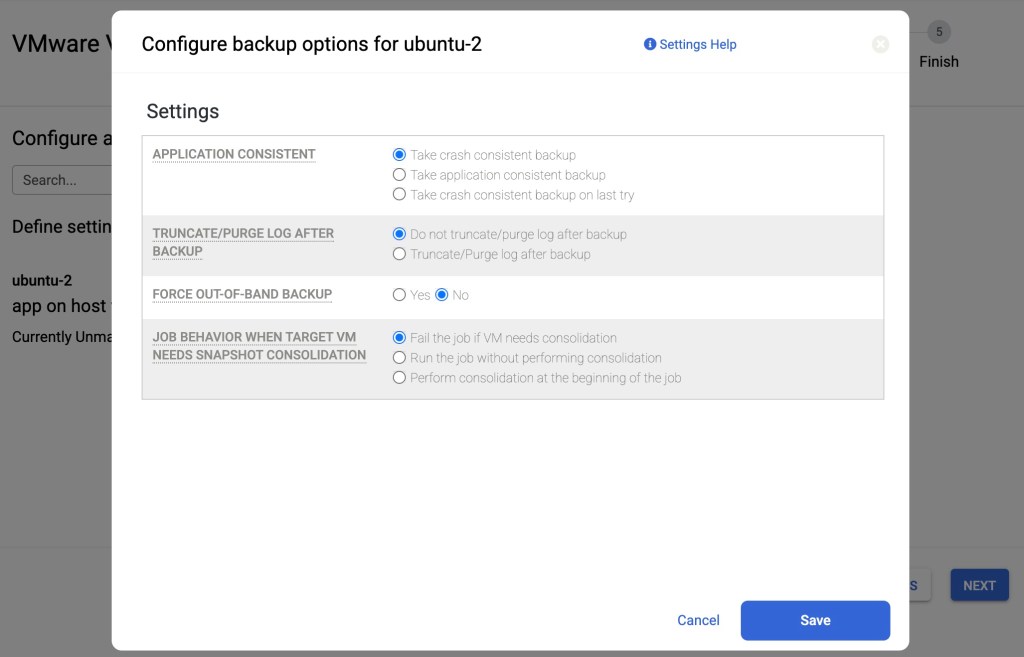
Configure VM
The fourth step entails configuring the application settings pertinent to the protection of your virtual machines (VMs). Pay attention to modifying these settings as they determine the backup options available for your VMware VMs. Precisely configuring the application settings ensures optimal data protection. Remember to carefully save any changes made after customization is complete.
For detailed information on each application setting, please refer to the official documentation provided by Google Cloud. You can find the relevant descriptions here.
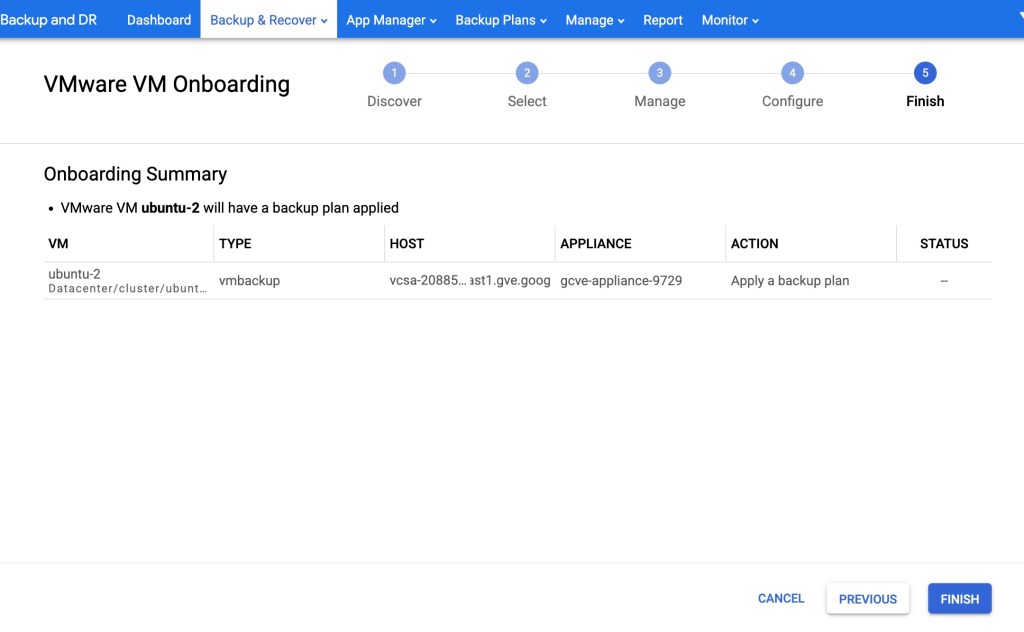
Finish onboarding
Alright, you’ve got your VMs all set up for backups now that you’ve completed the onboarding steps. Good job!
Restore a VM
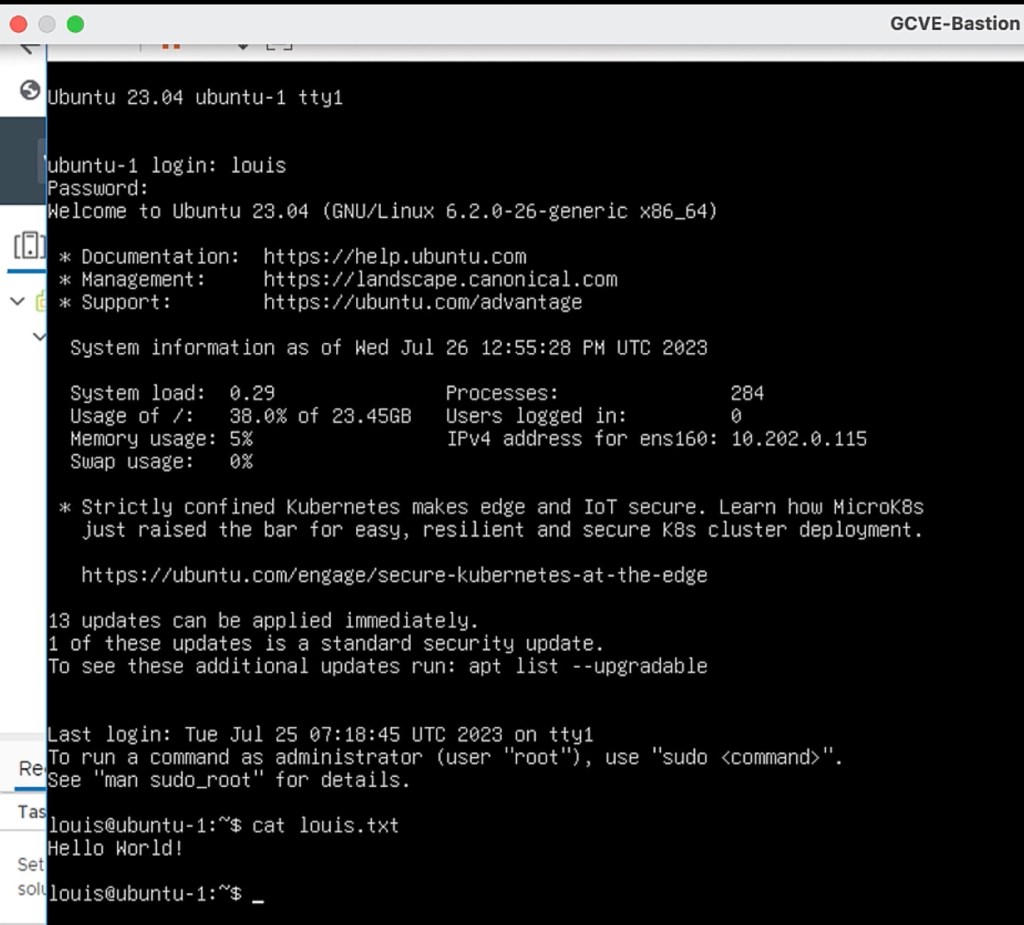
In order to test and see the effect, we first delete the ‘louis.txt’ file before we perform the restore job’
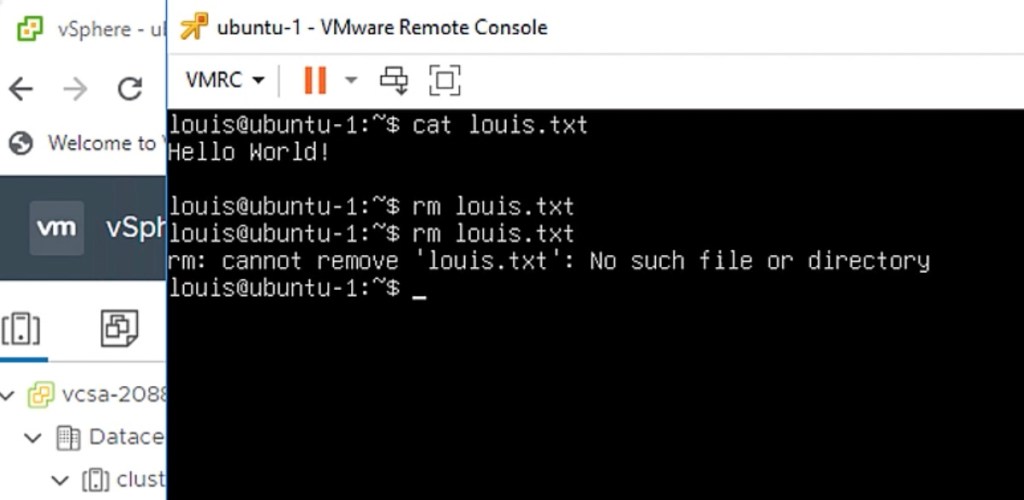
The file ‘louis.txt’ has gone, this is to simulate how we can recover this file using a point-in-time image recovery feature.
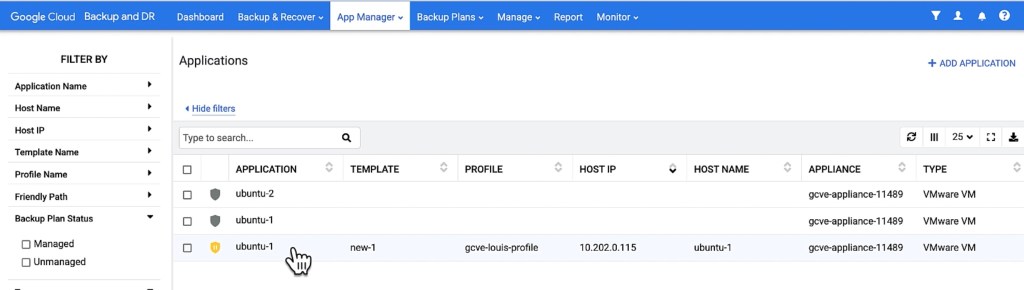
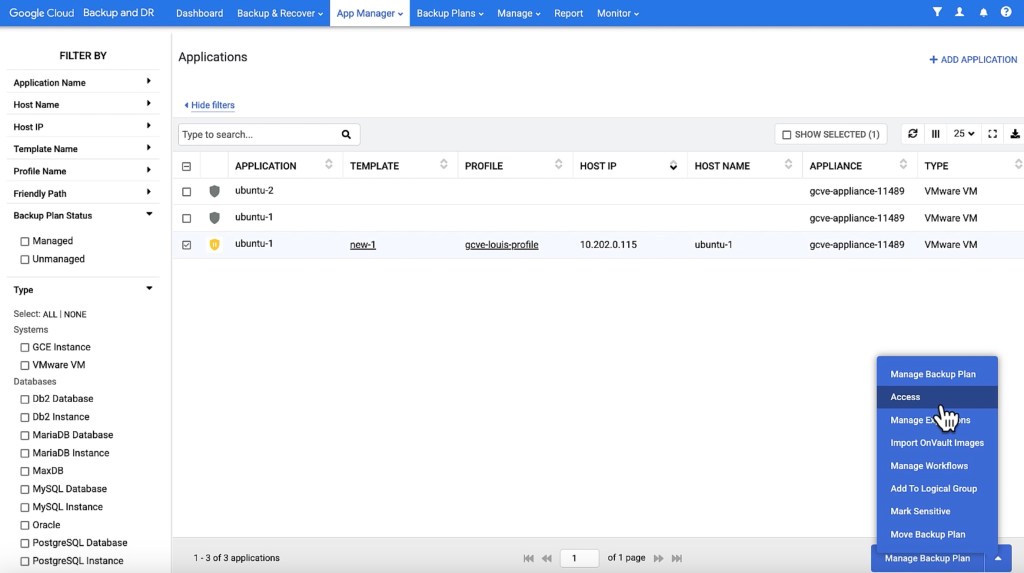
Click the App Manager tab and select Applications from the drop-down menu. Select ubuntu-1.
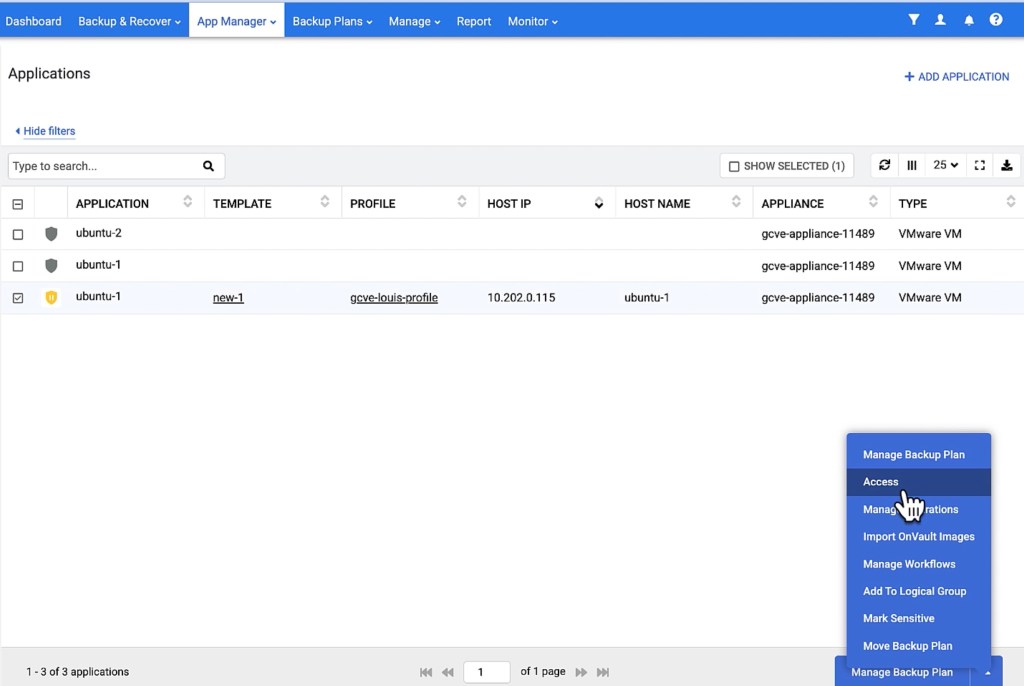
choose Access from the drop-down list at the bottom of the Applications page.
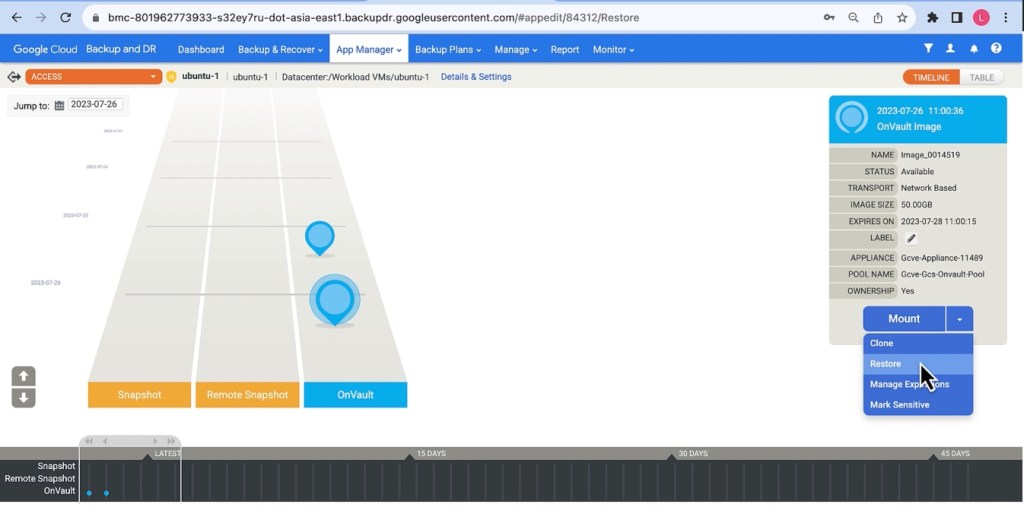
The Access page opens listing captured images appear in the Timeline ramp view.
Select the desired image then select Restore from the list of access operations.
Select a single volume or multiple volumes to restore. Click Submit.

A warning dialog appears. Read it and then enter DATA LOSS to confirm.


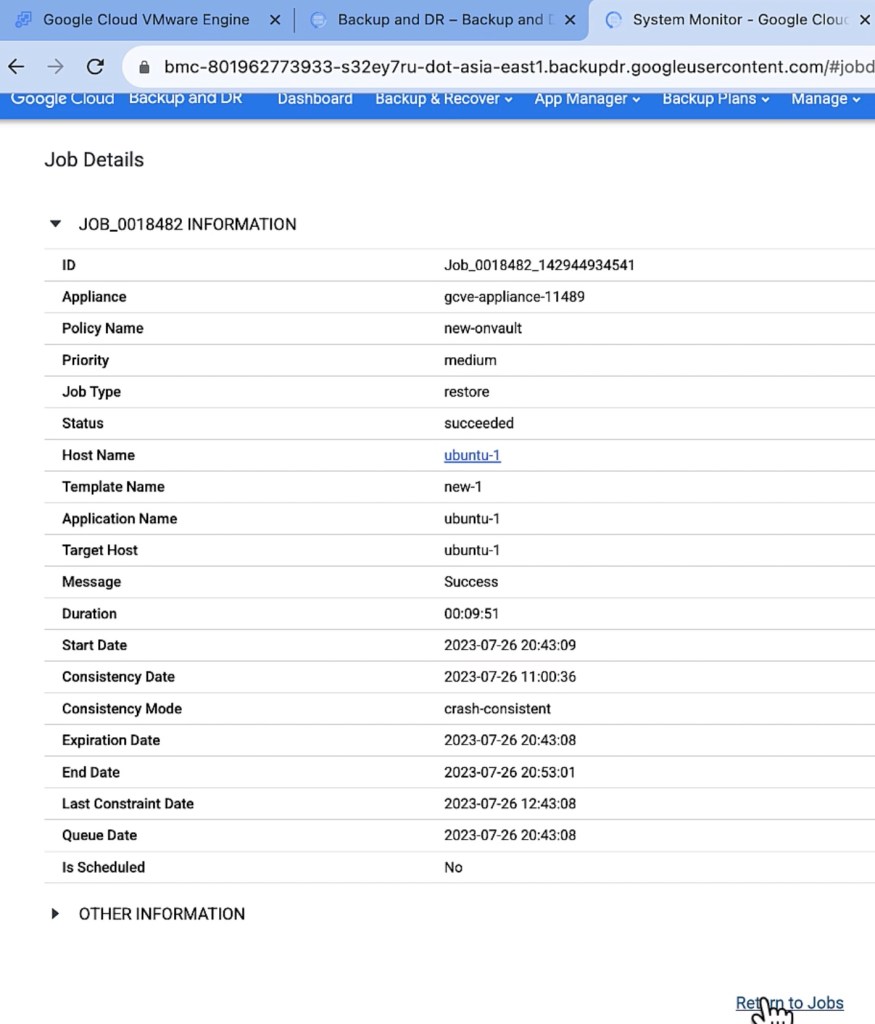
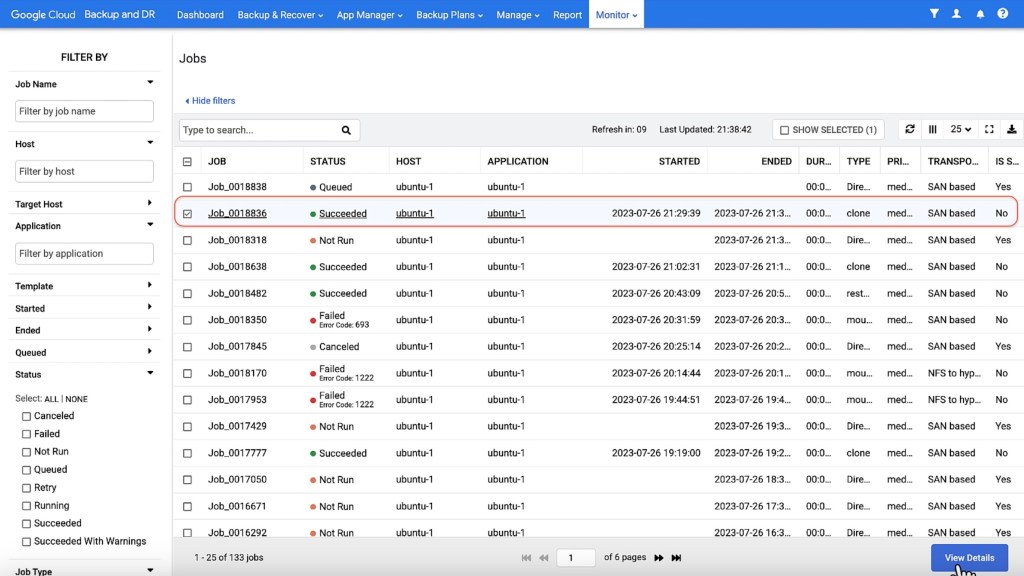
You can verify that the restore operation is successful by viewing the job status in the Monitor.

click “View Details” to see the detail of the job.
Login to ubuntu-1 VM and check ‘louis.txt. file has been recovered!
This concluded our Restore processes.
Clone a VM
We are going to see how we can create a new identical VM using an image of a VM in GCBDR.
In my GCVE, I have originally two VMs and I’d like to create a new VM from previous GCBDR backup of my ubuntu-1 VM, you can think of this new VM is a total clone of ubuntu-1 VM.
Click App Manager and select Applications from the drop-down list.
Select the application with the image you want to clone, then choose Access from the pop-up list at the bottom right corner of the Applications page.
Select an image and then select Clone from the list of access operations.

Enter a name for the VM that you want to clone in VM Name.
Select a vCenter from the VCENTER drop-down for the VM you want to clone.
Select an ESX host from the Choose Server drop-down where you want to clone the VM.
Select a datastore from the Datastore drop-down that has the required storage available.
specify Provisioning Type.

Click “Submit”. A pop-up window will show up and contain success or error information.

Check detail in GCBDR Jobs:
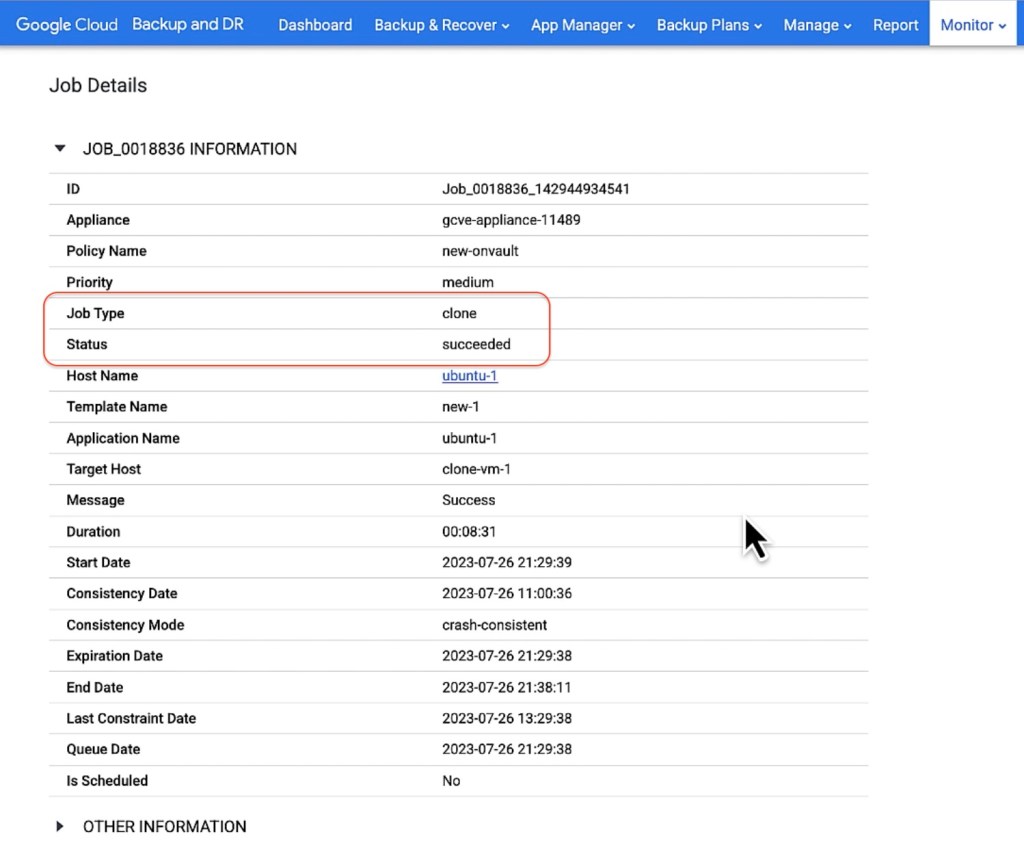
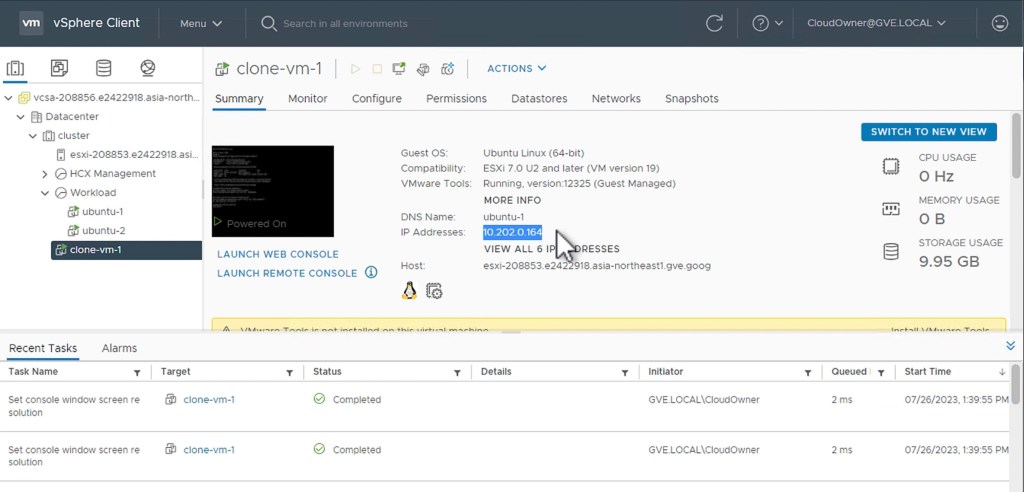
Now we can see there is a new VM “clone-vm-1” created in vCenter and it’s a clone from ‘ubuntu-1’.
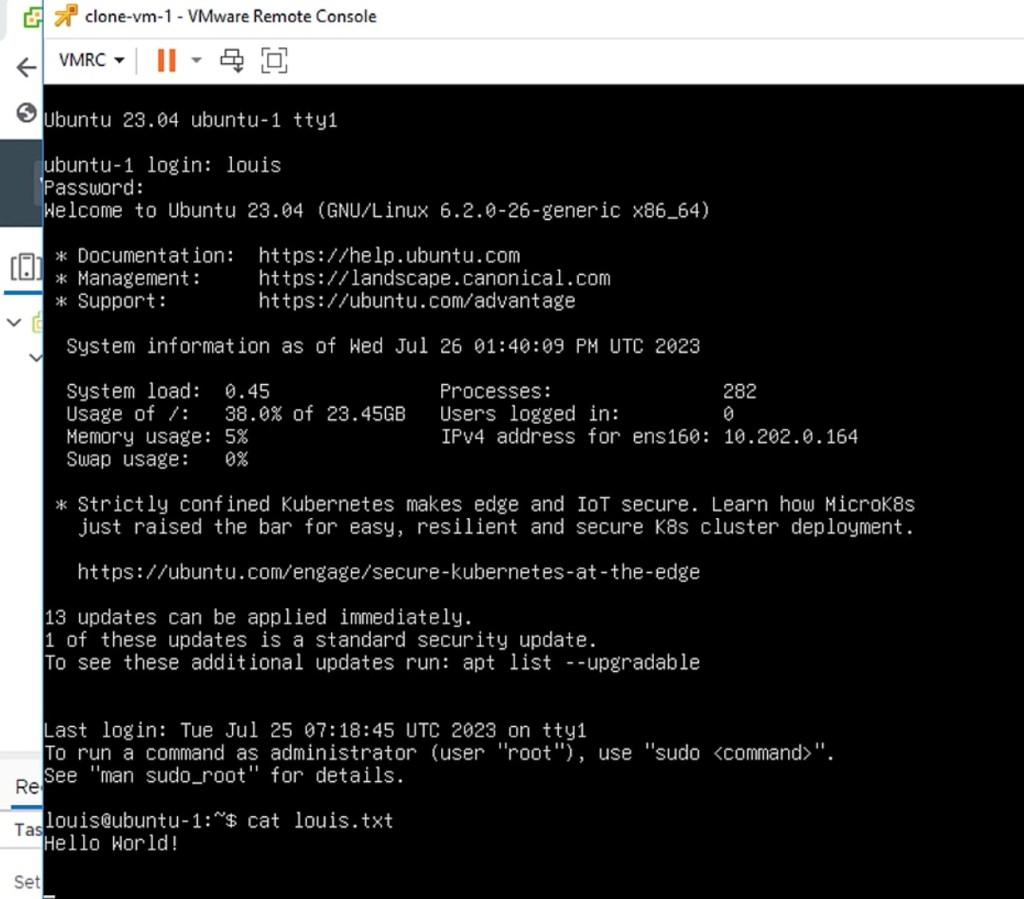
Login to clone-vm-1 and check it contains everything of ubuntu-1.
Summary
Why use Google Backup and DR for VMware VM?
You can see that there are lots of benefits in using GCBDR to protect and recover (or migrate, if you wish) your VMs. Below is a simple diagram showing what you can do with GCBDR with GCVE.

