When you have implemented the vCloud Availability for Cloud-to-Cloud DR (vCAV for C2C DR) solutions across your data centers, you can manage vCAV for C2C DR in the following two different approaches:
First, you can use the vCAV for C2C DR portal as a service provider to view and monitor tenant organizations, services health, and system’s resources. You can also perform vCAV for C2C DR administration and DR operations by using the vCAV for C2C DR portal.
Second, tenant users can log in to the vCAV for C2C DR portal by using the standalone user interface that is embedded into the vCloud Availability vApp Replication Manager appliance, or by using the vCloud Director Tenant Portal.
Here I’ll show you how to manage this both from the service provider side and from the tenant side.
Managing from the Service Provider Side
Service providers can log in to the vCAV for C2C DR portal by using the standalone user interface that is embedded into the vCloud Availability vApp Replication Manager appliance, or by using the vCloud Director Service Provider Admin Portal.
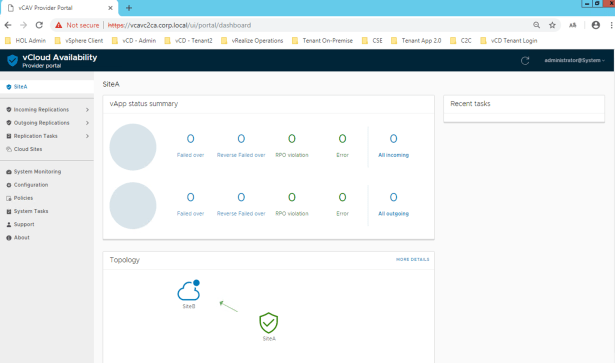
By using the standalone UI, login to https://vApp-Replication-Manager-IP-Address/ui. here in my environment, my vCAV for C2C vApp is vcavc2ca.corp.local, so I login to https://vcavc2ca.corp.local/ui

after login, you can see the home page of vCAV for C2C DR:
or by using the vCloud Director Service Provider Admin Portal:
My vCloud Director’s HTML5 login url is https://vcd-01a.corp.local/provider

you can see there’s a “Availability” item in the drop-down menu of “Cloud Resources”,
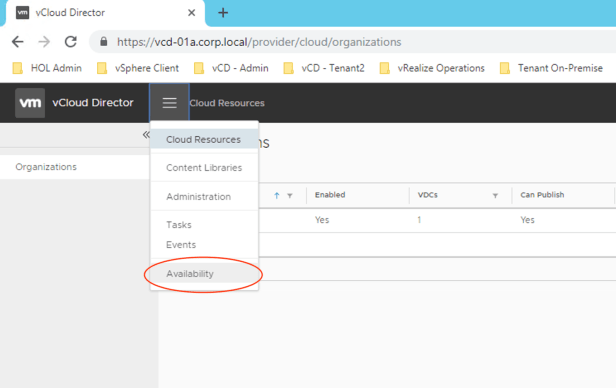
just click that item, you will see something very similar as what we saw in the previous login method, the only difference is it’s showing this is from within vCloud Director’s UI, so you know vCAV for C2C DR is completely integrated with vCloud Director now.

from here, you can perform the following tasks:
- Authenticate to Remote Sites as a Service Provider
- Working with the vCAV for C2C DR Portal from the Service Provider Side
- Getting Information from the Local Site Home Page
- Viewing Protected vApps
- Monitoring vCAV for C2C DR Components and System Health
- Editing vCAV for C2C DR Configuration
- Working with Replication Policies
- Create a Replication Policy
- Assign a Replication Policy to an Organization
- Edit a Replication Policy
- Delete a Replication Policy
- Replication Policy Conflicts
- Review Replication Policy Compliance Status
- Review Replication Policy Assignments
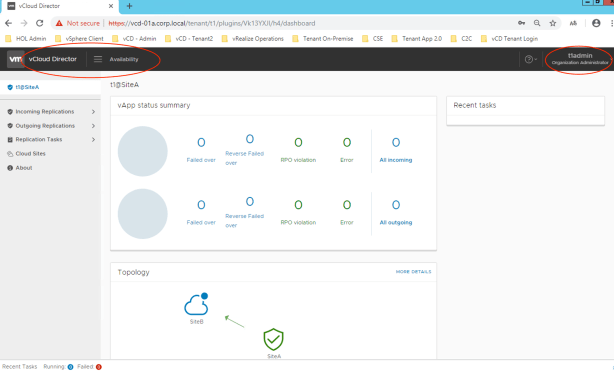
Managing from the Tenant Side
The vCAV for C2C DR portal allows tenants to connect to remote vCloud Director sites and their organizations as a single entity, and perform replication tasks within these sites.
Tenants can log in to the vCloud Availability for Cloud-to-Cloud DR portal to operate workloads enabled for replication from vCloud Director instances (sites).
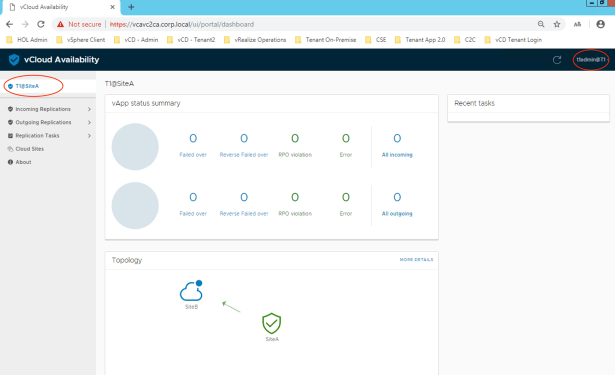
In a Web Browser, enter the URL of the vCloud Availability for Cloud-to-Cloud DR portal, for example, https://vcavc2ca.corp.local/ui, all tenants will have to access through this unified single entry portal URL by using the id followed by their organization name after @.

in my case, t1admin is the organization administrator in T1 company who has been configured with the vCAV for C2C DR login credential, so he could just login as t1admin@t1


- Authenticate to Remote Sites as a Tenant
- Working with the vCAV for C2C DR Portal from the Tenant Side
- Getting Information from the Local Site Home Page
- Viewing Protected vApps
- Performing DR Tasks
- Workflows
- Configuring a New Replication
- Test Failover
- Perform a Failover Task
- Perform a Reverse Task
- Check Replication States
- Data Connection States
- Recovery States
- Replication Overall Health States
Configuring a New Replication
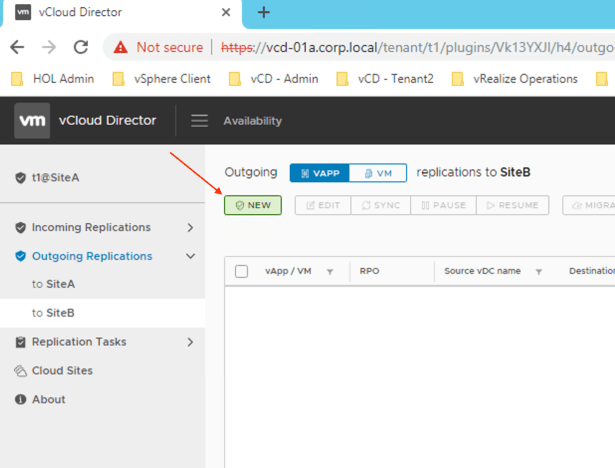
in the Outgoing Replications pane, click New.
Select the vApp that you are protecting and click Next.

In the Target Site tab, select the remote site and click Next. If you have not authenticated against the remote site, provide your organization administrator credentials.

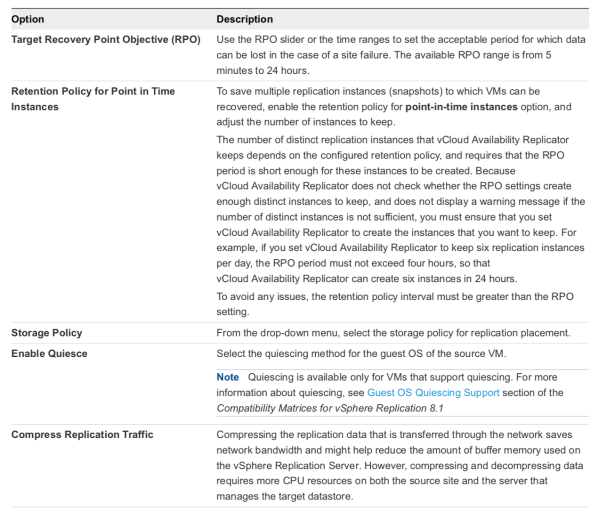
On the Protection Settings page, select the configurations for the replication data and click Next.

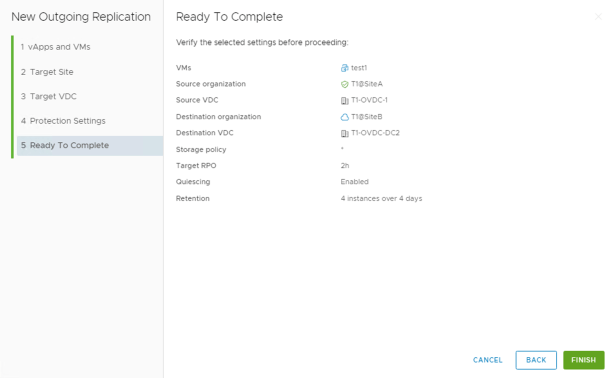
review the replication details and click Finish.
You can monitor the configuration progress in the Outgoing Replications pane.
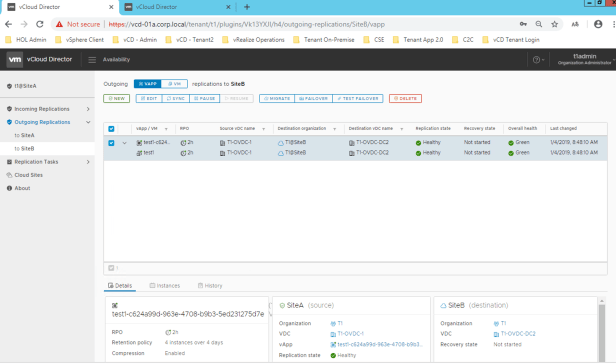
A replication task appears in the Outgoing Replications pane and in the Replication Tasks list in the vCloud Availability for Cloud-to-Cloud DR portal.

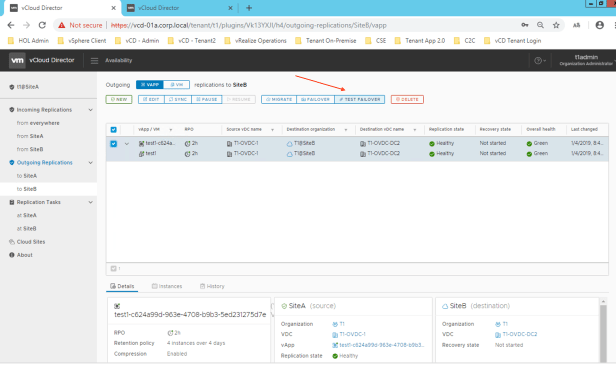
- Select the protected vApp that you want to test from Outgoing Replications pane.
- Click Test Failover.
In the Recovery Settings tab, use the options to configure the test task and click Next.

Enter the test network to which the replicated VM on the target site connects to. This configuration lets you access the target VM and verify it operates as expected, and that data is replicated correctly per your replication settings.

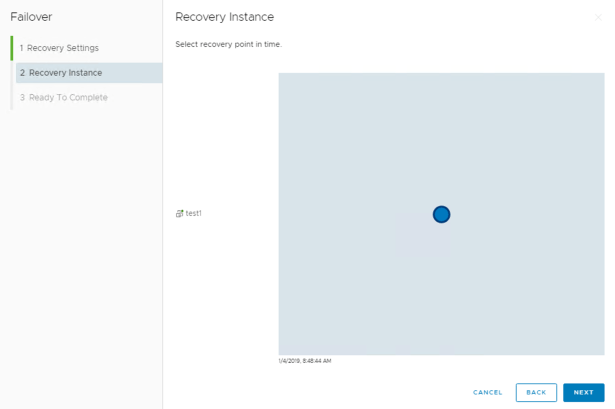
In the Recovery Instance pane, select the recovery point in time option and click Next.

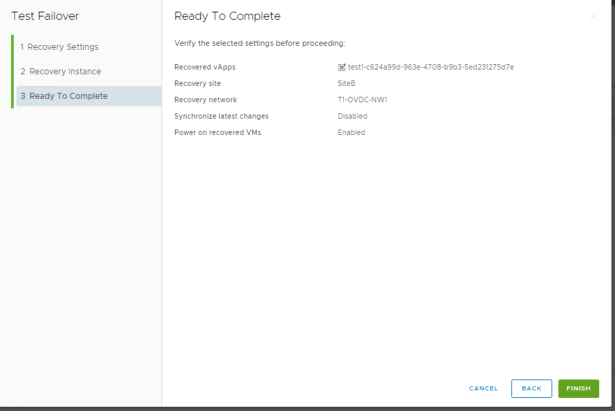
In the Ready To Complete tab, review the test details and click Finish to initiate the Test Failover task.
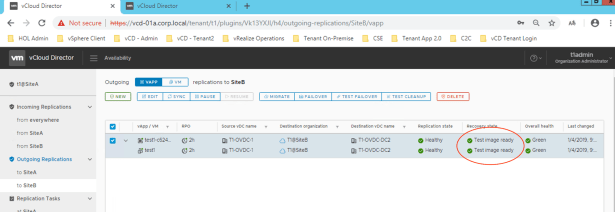
You can monitor the progress of the task in the Outgoing Replications pane.

A successful completion of the task results with a Test Image Ready Recovery state for the vApp and its virtual machines in the Incoming Replications or the Outgoing Replications pane.


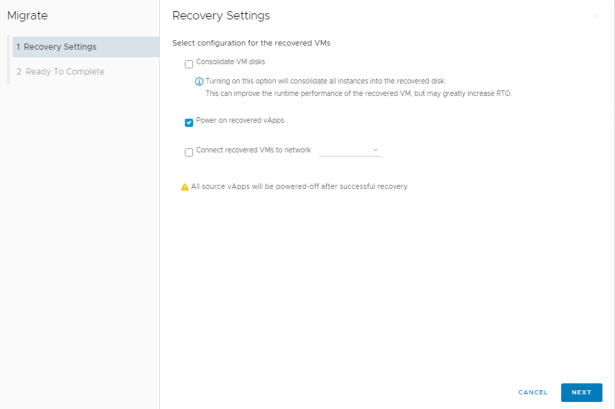
You start a Failover task to recover a protected vApp and its virtual machines from a local to a remote site, or recover a reversed vApp from the remote site back to the original source site.

After you perform a failover migration from the source siteA to the target siteB, the migrated VM is running on the target siteB. A subsequent Reverse task synchronizes and protects data from the destination siteB back to the source siteA.
