Prior to vCloud Director 10, if Cloud Administrators would like to configure the CPoM feature for its tenants, they need to add SDDC objects, publish and then enable the vCenter objects to their tenants by issuing some vCloud Director APIs, details can be found here; In vCloud Director 10 connecting and publishing of vCenters can be done through UI or API.
Today I’m going to walk you through the configuration steps for this CPoM feature in vCloud Director 10 UI and you’ll see how easy it is using this new version.
The infrastructure of an attached vCenter Server instance is encapsulated as a SDDC type and is fully dedicated to a single tenant. You create a dedicated vCenter Server instance by enabling the tenant access for that instance. After you enable the tenant access, you can publish a dedicated vCenter Server instance to a tenant.
The steps required to add the dedicated VC for specific tenant in vCloud Director 10 are as below:
- Create a dedicated vCenter Server instance
- Add a proxy
- Get the certificate and the thumbprint of the created proxies
- Publish the dedicated vCenter Server instance
- Enable the tenants to access the dedicated vCenter Server instances
Create a dedicated vCenter Server instance
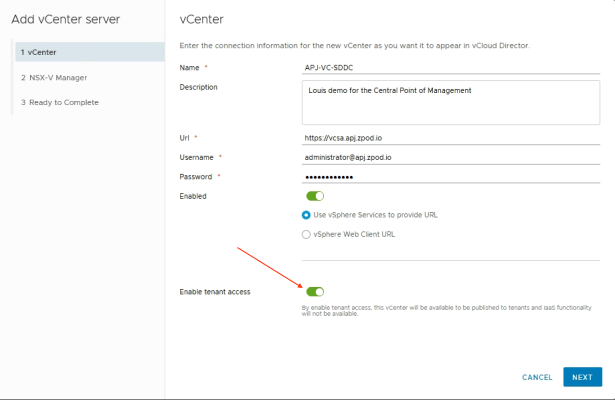
As a System Administrator, you add a vCenter Server instance to the vCloud Director environment.
- From the main menu (
 ), select “vSphere Resources”.
 - In the left panel, click vCenters.
- add the vCenter Server which you want to publish to your tenant. Please remember to enable the “Enable tenant access” toggle.
I disabled the NSX-V configuration settings.
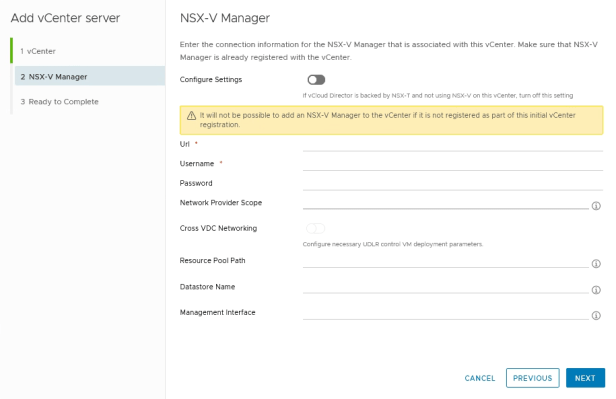
Check the detail of your input information, click “FINISH” button.

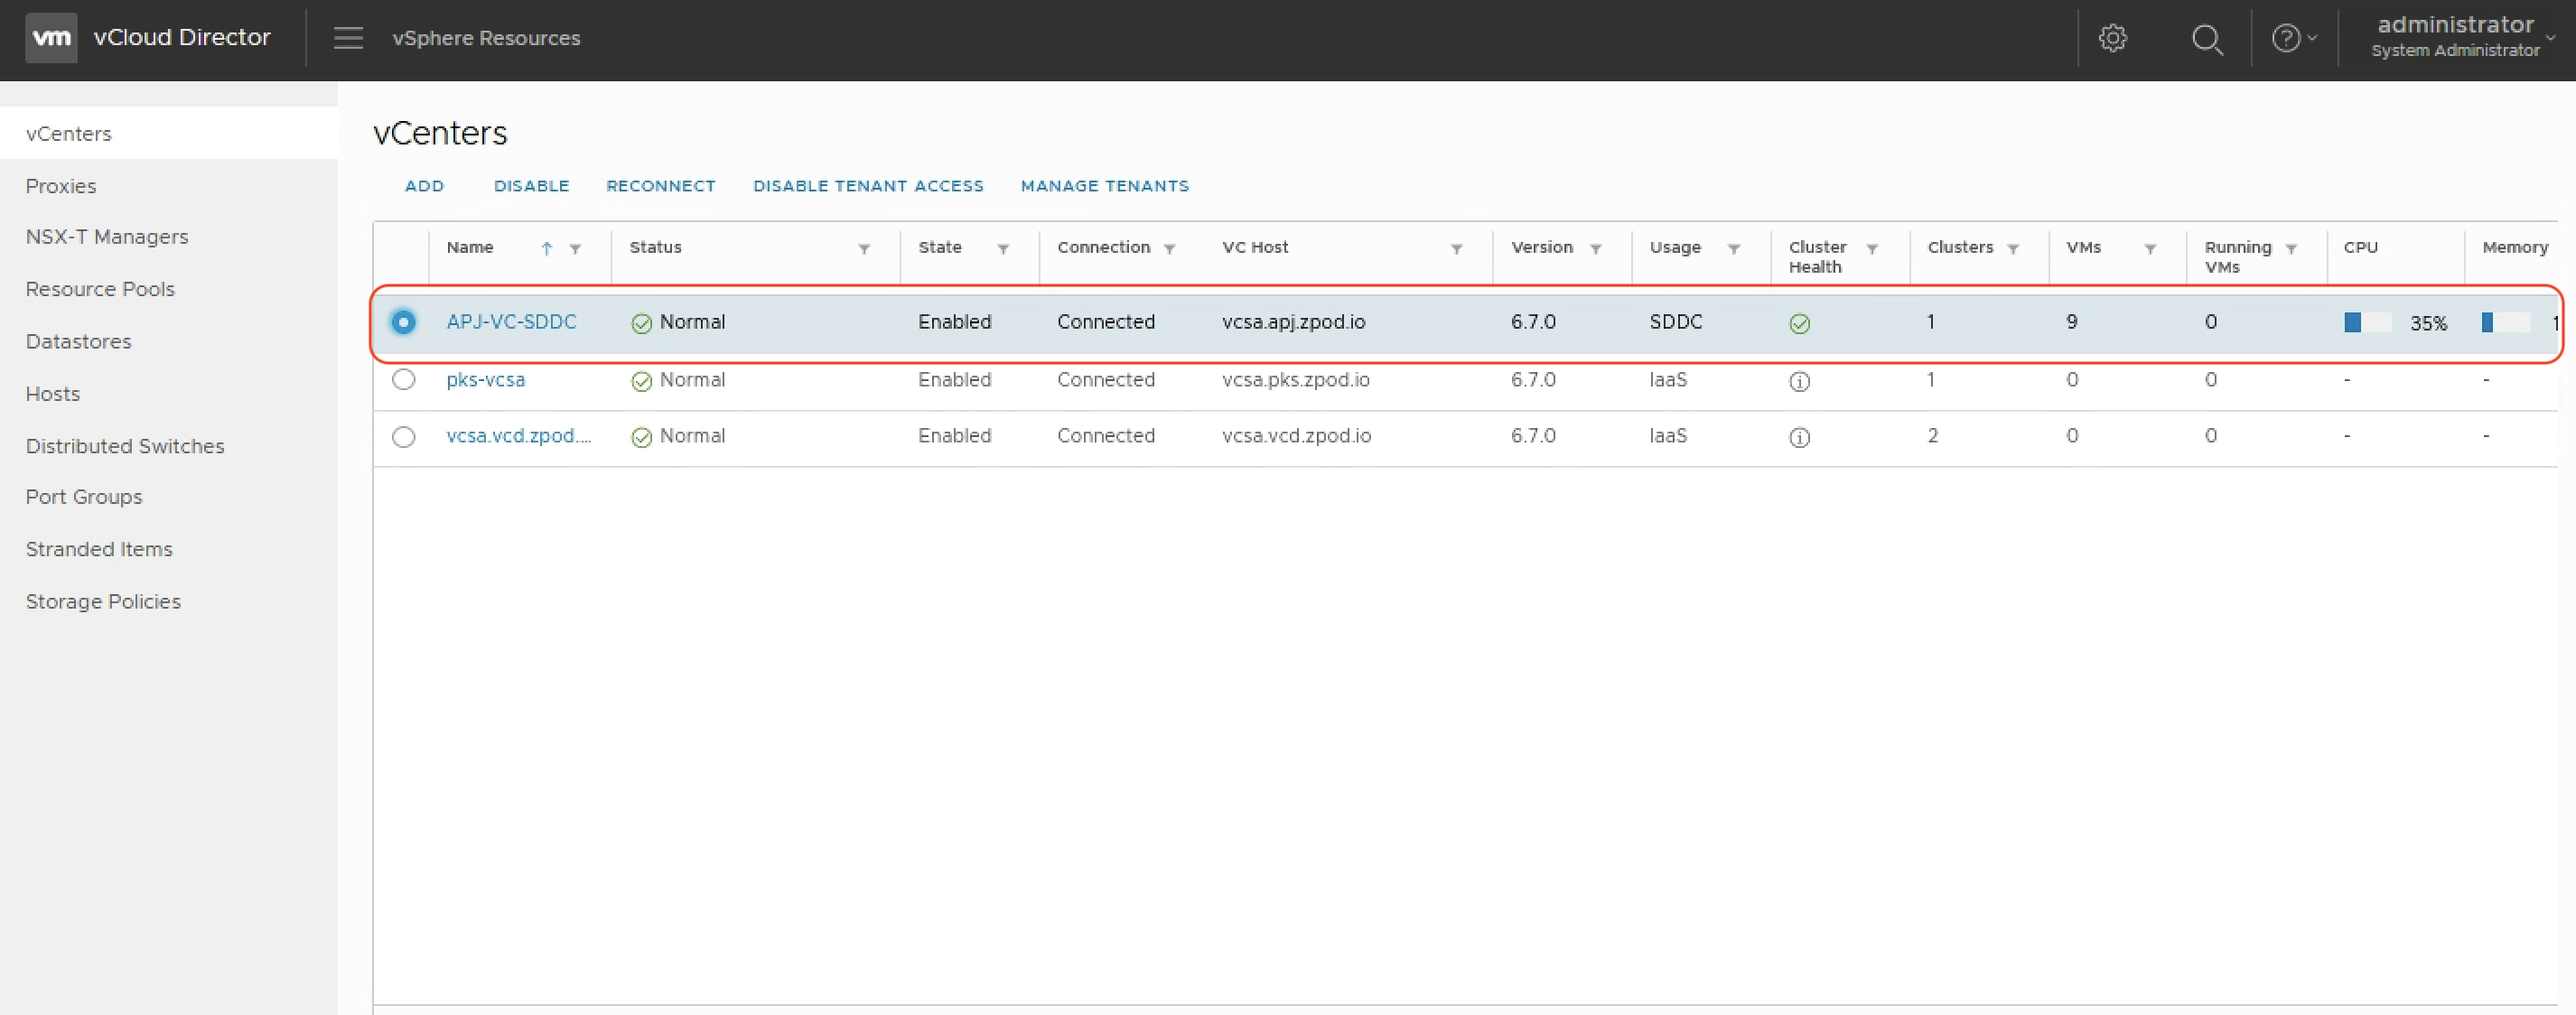
You’ll see a new VC showing up as the SDDC usage type, this is your newly created VC which you want to publish to your tenant.
Add a proxy
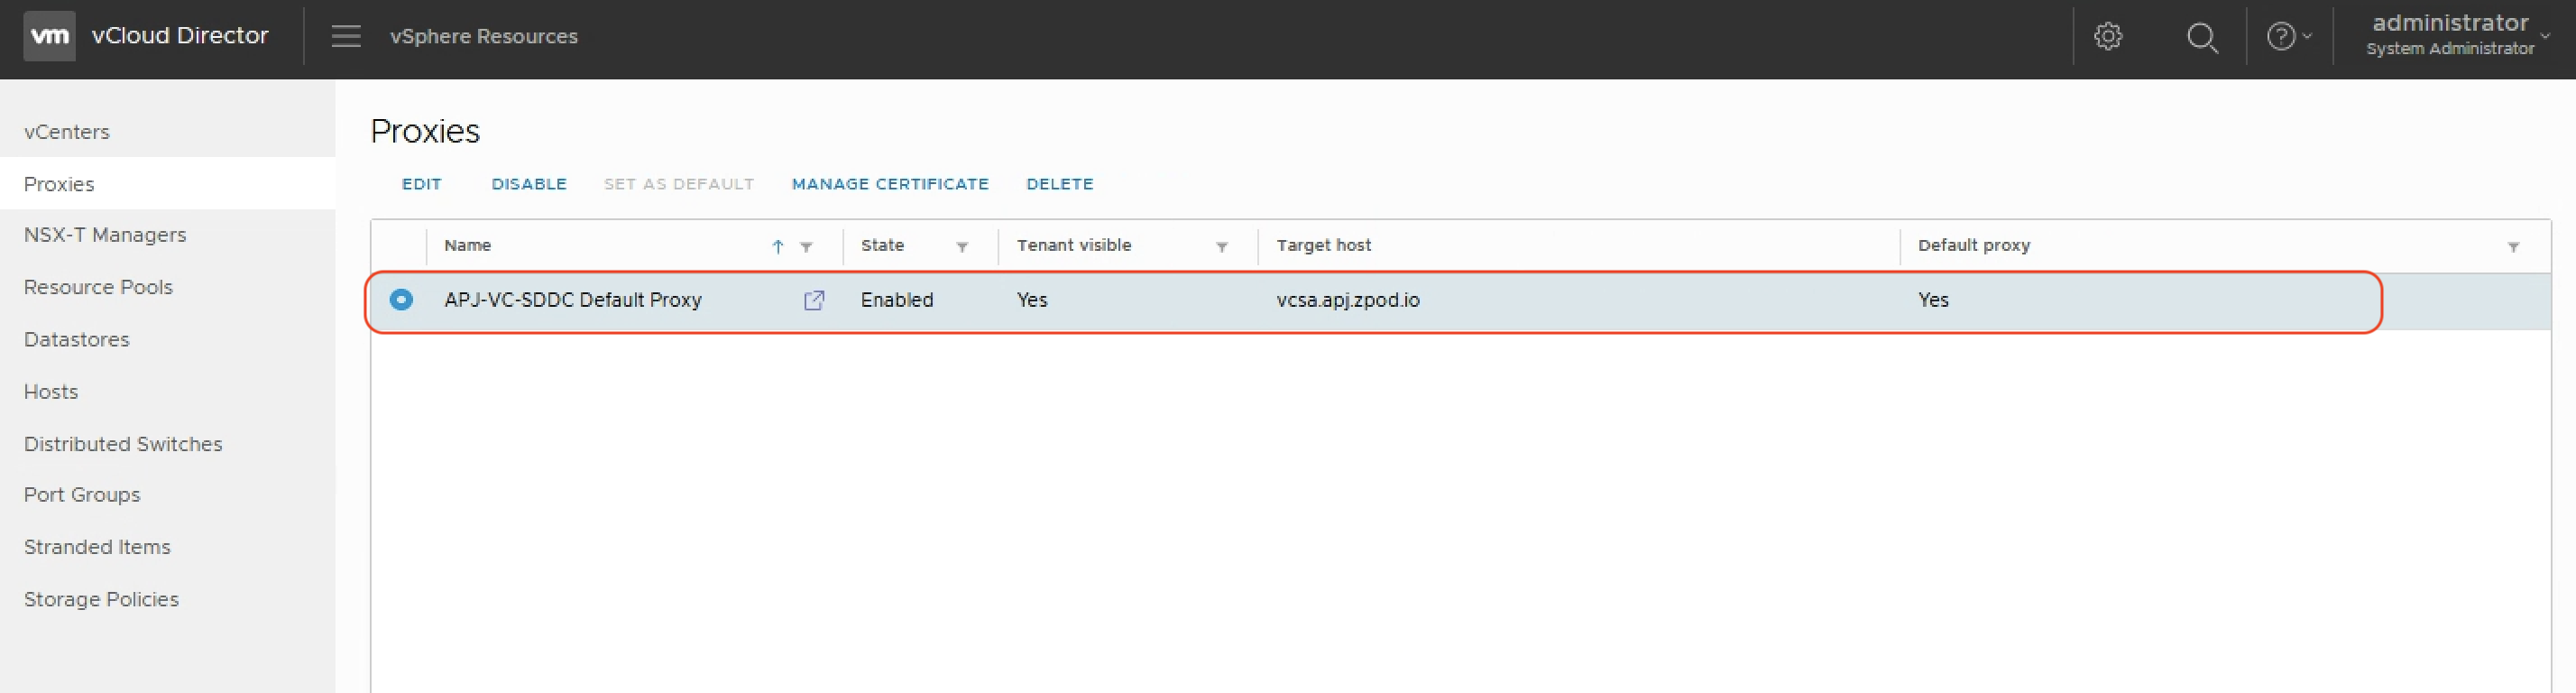
While attaching the vCenter Server instance, you can also create a proxy for it. When we choose to “Enable tenant access” when adding the VC in previous step, we’ve already added this proxy.
If we did not choose that when adding the VC, we cloud still enable it by:
- Select a vCenter Server without a specified purpose in the Usage column.
- Click “Enable Tenant Access”.
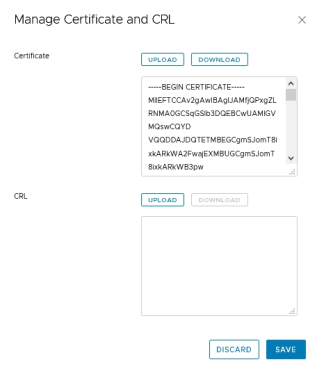
Get the certificate and the thumbprint of the created proxies
upload the proxy certificates and certificate revocation lists (CRLs)
- From the main menu (), select “vSphere Resources”.
- In the left panel, click “Proxies”, and select a proxy.
- Click “Manage Certificate”.
- Upload or download the certificate and CRL.
- Click “Save”.

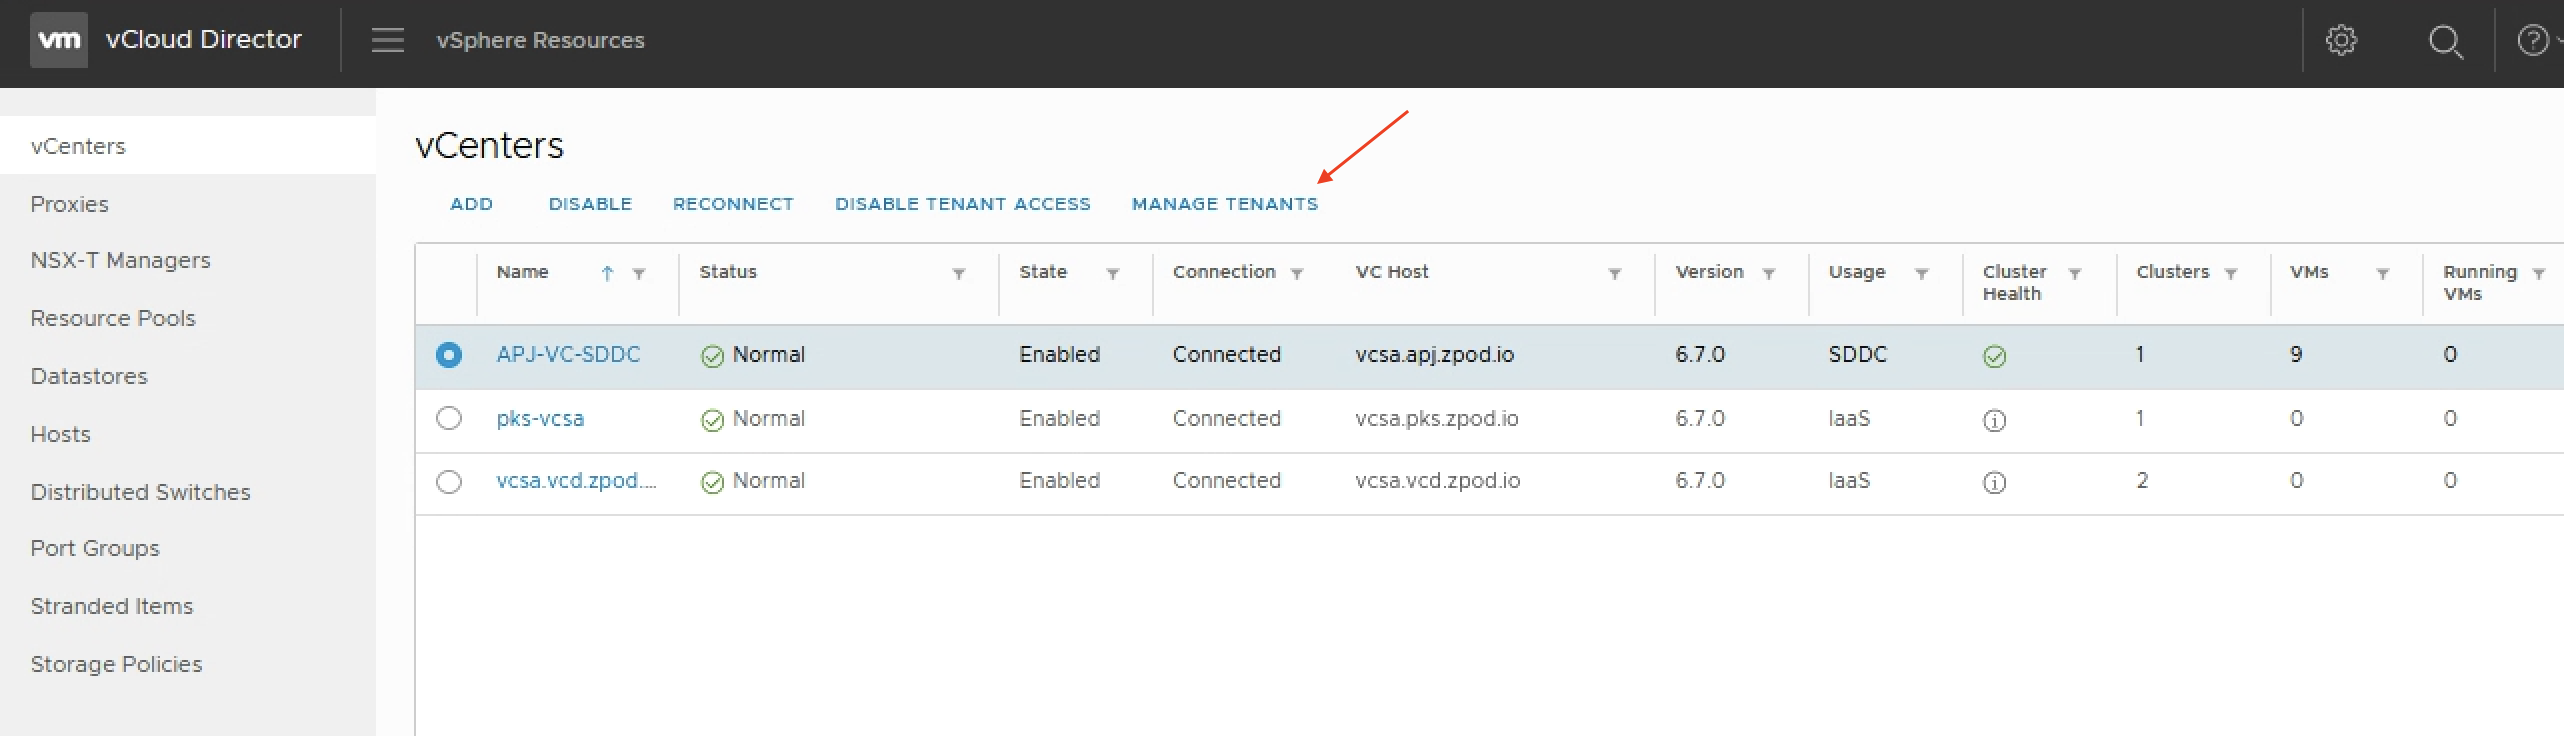
Publish the dedicated vCenter Server instance
You can publish a dedicated vCenter Server instance to a tenant and make it visible in the vCloud Director Tenant Portal.
- From the main menu (), select “vSphere Resources”.
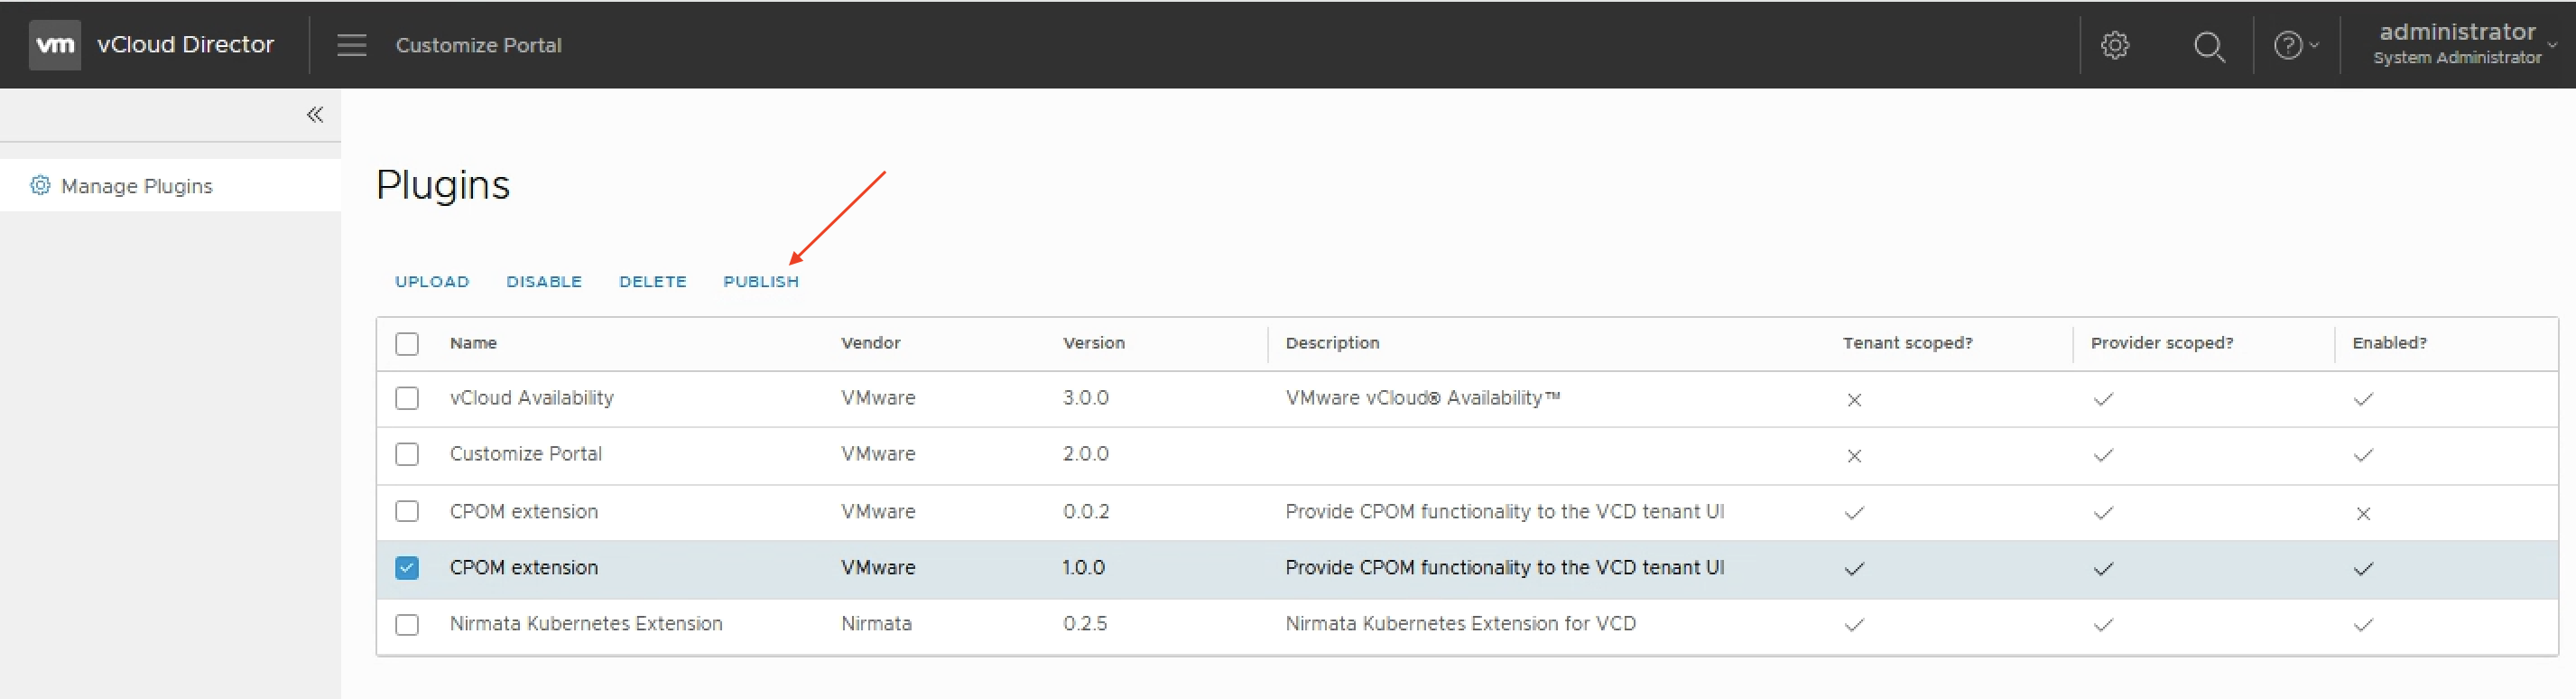
Enable the tenants to access the dedicated vCenter Server instances
you must publish the CPOM extension plug-in to their organizations:
- From the main menu (), select “Customize Portal”.
- Select the check boxes next to the names of the target plug-ins, and click “Publish”.
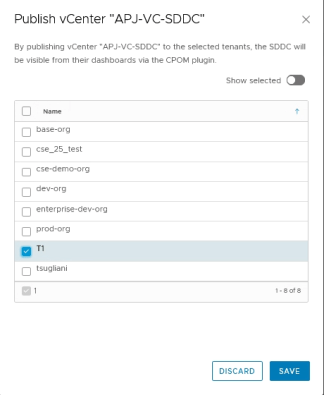
- Select the organizations to which you want to publish this plug-in.
- Click “Save”.
Select the scope for this plug-in to be available for Service Provider Admin Portal or Tenants, here we choose “T1” as the designated organization.

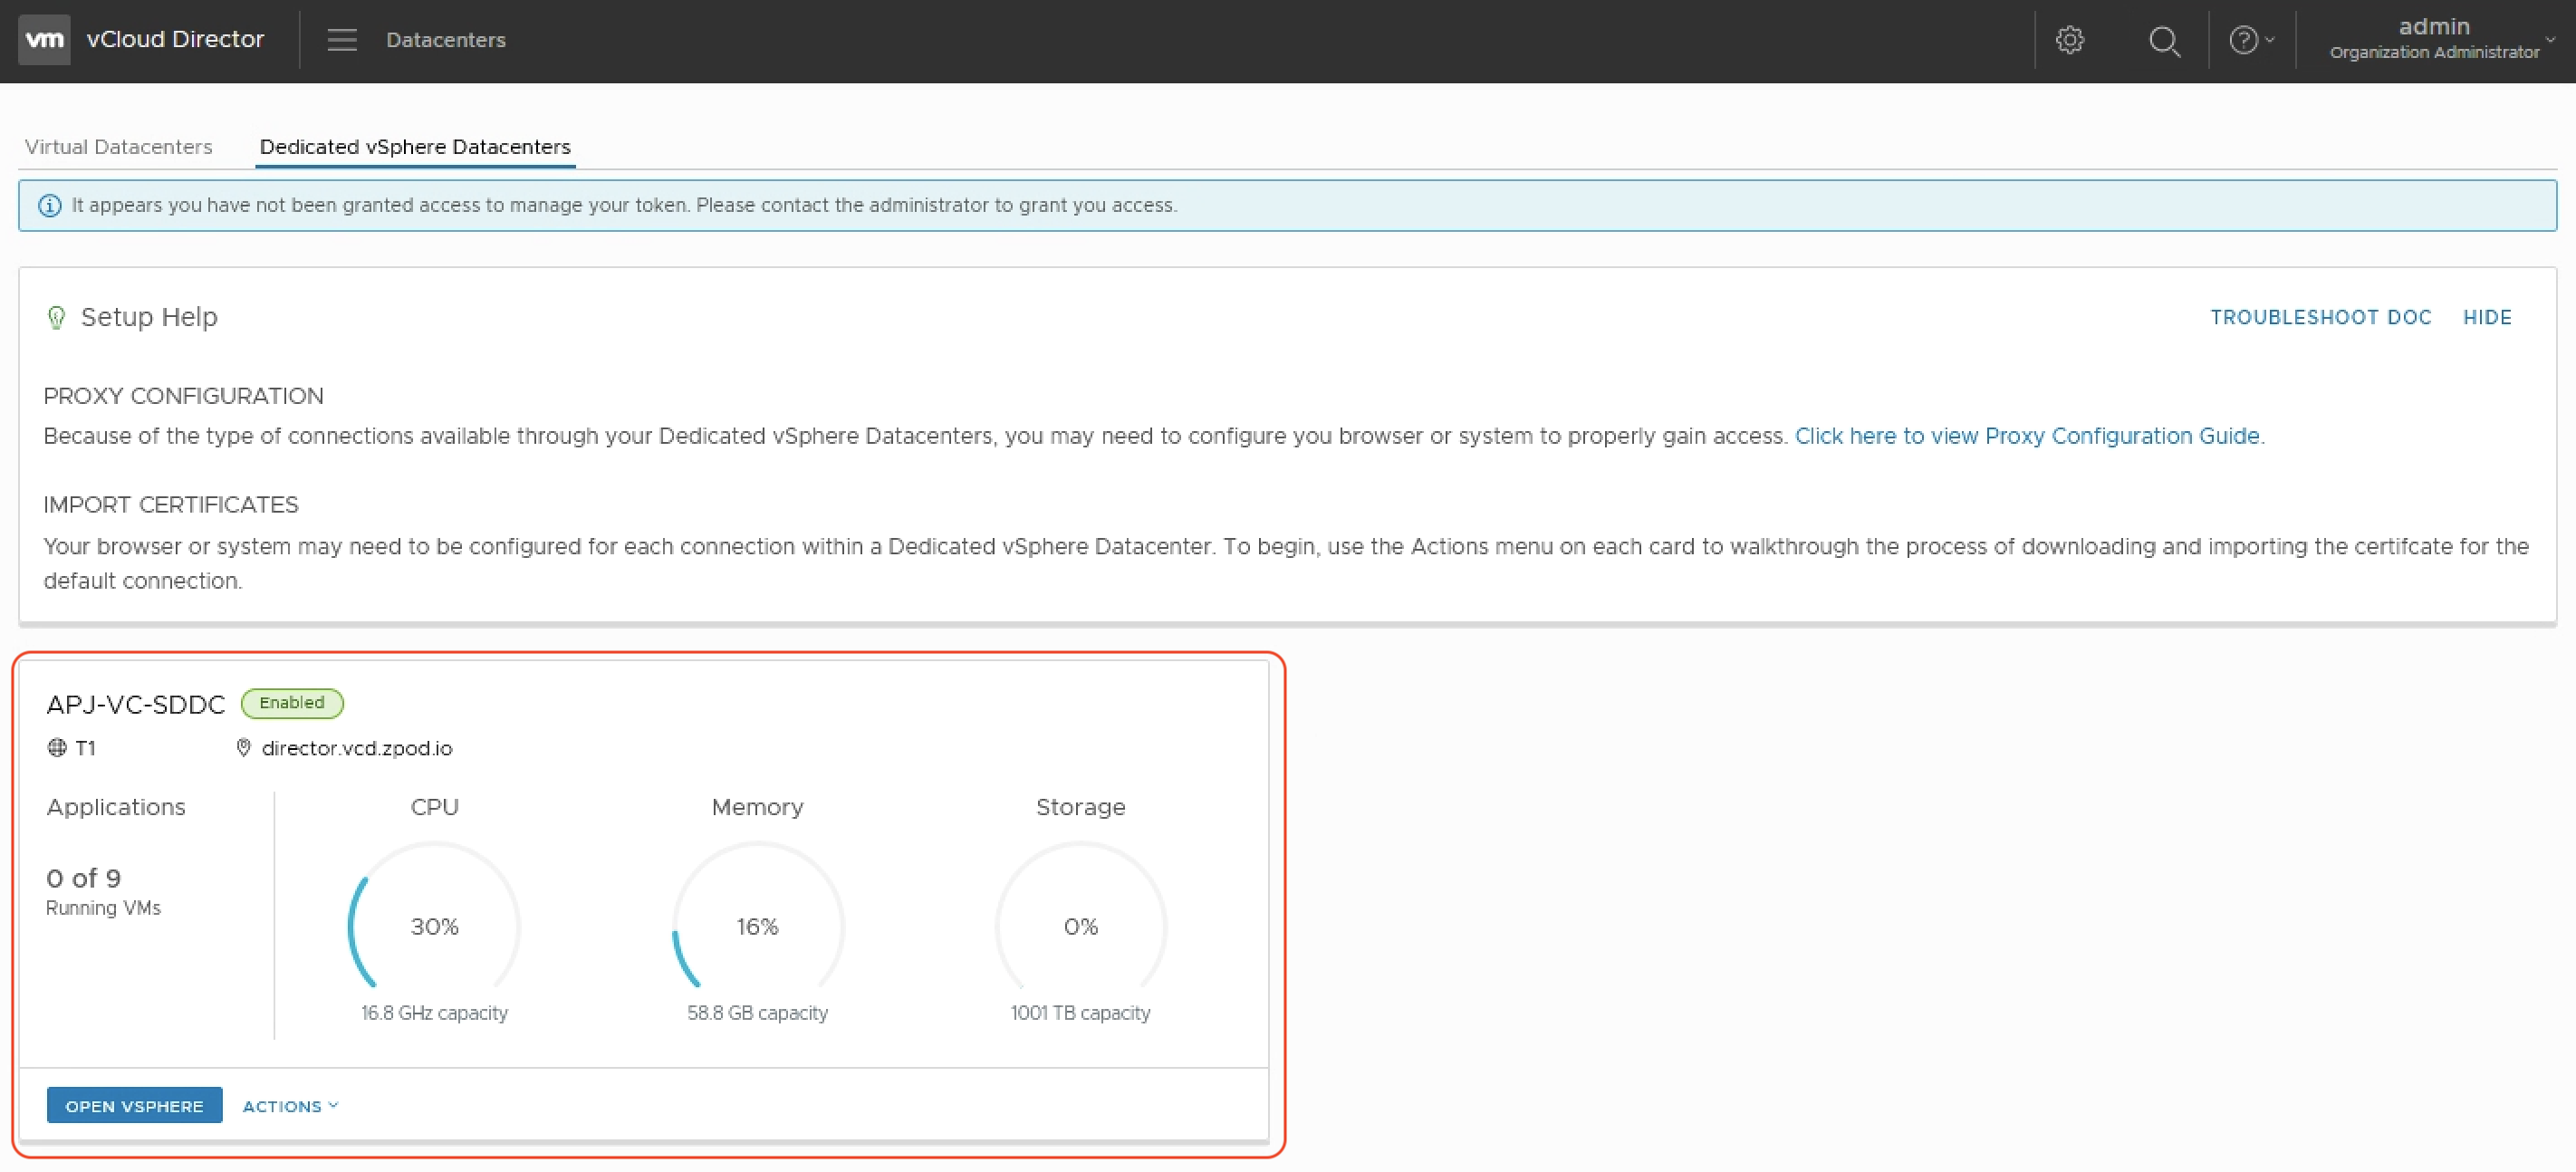
Login as T1 oranization administrator to verify you (tenant) can see the dedicated SDDC proxy VC instance in vCloud Director 10 Datacenter panel. Click the vCenter instance in the tile.
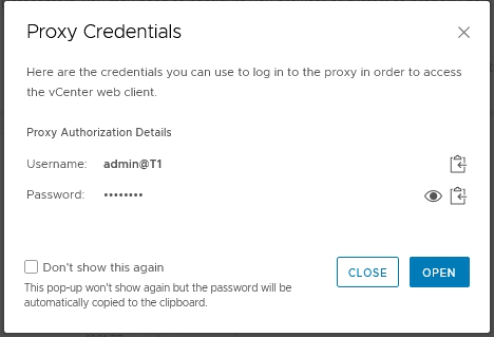
It will show the Proxy Credentials info, click “OPEN” to bring up the vCenter Server UI.
Now we have finished the steps required to add the vCenter as the “Dedicated vSphere Datacenter” resources, all can be done via GUI, it’s quite straight forward and we don’t need to use API anymore to configure this, which make the cloud administrators’ life much easier! Hope you enjoy this blog, see you next time.
Notes:
The official manual to manage the dedicated vCenter Server instances and proxies can be found here.
