In this blog, I’m going to walk you through how to use the new VMC HCX migration GUI to vMotion your local on-premise VM to the VMware Cloud on AWS SDDC (cloud site).
Before we get started, make sure you’ve met all the requirements from here.
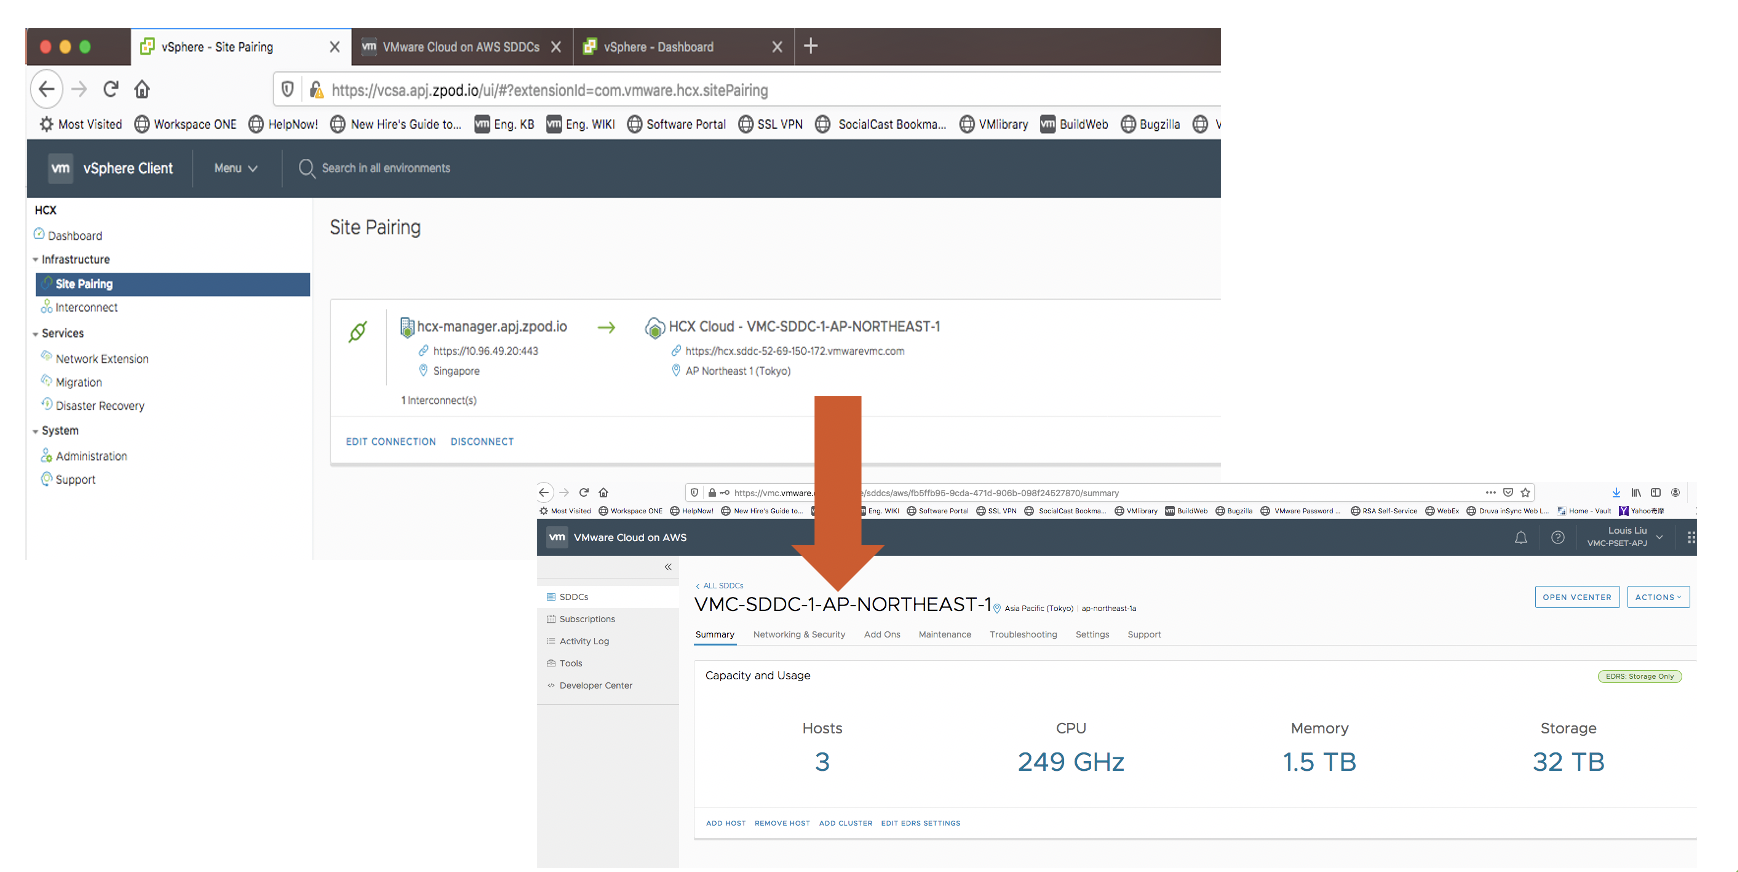
Suppose in HCX, you have already paired your on-premise vCenter Sever with the VMC SDDC vCenter Server.
Also all the HCX related appliances are running and Tunnel status are all “up”, then we can proceed with the vMotion task,

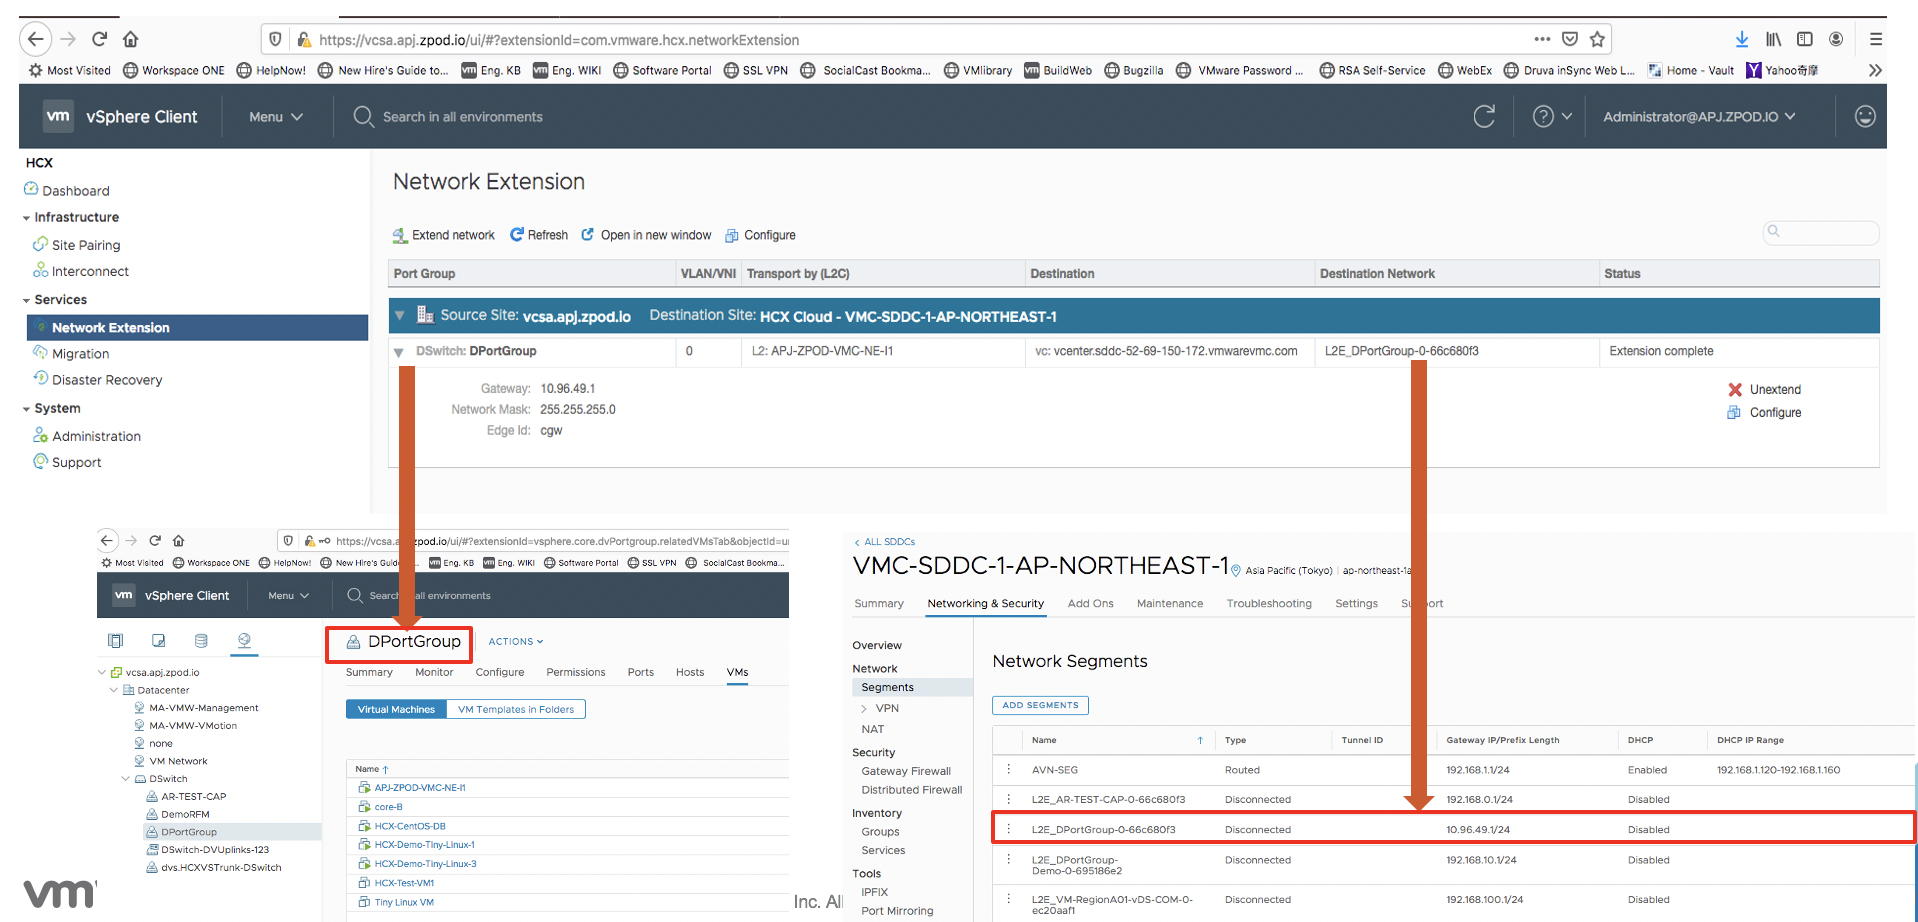
The L2 Extension (L2 VPN) has been established by using HCX.
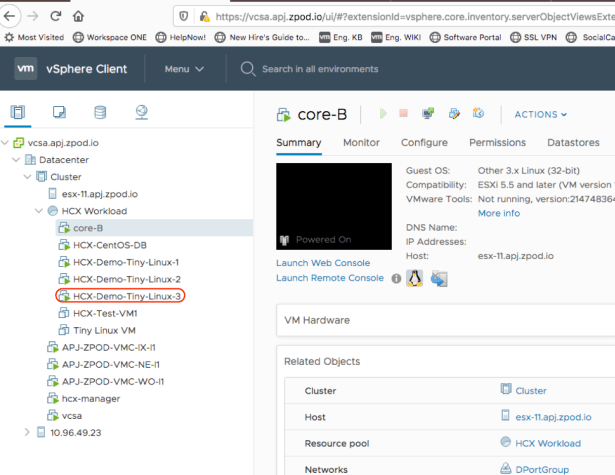
Now we want to vMotion “HCX-Demo-Tiny-Linux-3” VM from local to cloud.
•HCX-Demo-Tiny-Linux-2 : 10.96.49.140
•HCX-Demo-Tiny-Linux-3 : 10.96.49.127
From on-premise VC, open “HCX-Demo-Tiny-Linux-2” and “HCX-Demo-Tiny-Linux-3” VMs web console, ping each other, observe if there is any network packet loss during the migration period.
Please check the following video for the steps involved to initiate the vMotion task from HCX.
In case you want to bring back the workload, you can perform the “reverse migration” task to live migrate your workload from VMC SDDC to on-premise datacenter, see how easy it is in the following video.
Thanks for reading and watching this blog/videos, see you next time!
