Dedicated vSphere Data Centers
In VMware Cloud Director, a Software-Defined Data Center (SDDC) encapsulates an entire dedicated vCenter Server environment. Starting with VMware Cloud Director 9.7, you can access a dedicated vCenter Server environment from VMware Cloud Director.
Dedicated vCenter Server instances in VMware Cloud Director remove the requirement for a vCenter Server instance to be publicly accessible.
The Cloud Director system administrator can publish one or more dedicated vCenter Server instances to your organization, then as the tenant organization administrator, you can use the proxies to access the UI or API of the proxied components (vCenter Server).
Proxies
VMware Cloud Director can act as an HTTPS proxy server and provide access to a dedicated vCenter Server instance which can include one or more proxies that provide access points to different components from the underlying environment.
You can log in to the UI or API of the proxied components by using your VMware Cloud Director account.
To access the proxied components, you can choose one of the following methods:
- Chrome Browser Extension for VMware Cloud Director (New in Cloud Director 10.1)
- Manually configure your browser with your proxy Settings
Chrome Browser Extension for VMware Cloud Director
Today I’m going to base on the info from where Daniel’s great blog here has provided regarding the extension and go one step further to explain how to exactly setup the access via “Chrome Browser Extension for VMware Cloud Director”.
Previously if we want to access the dedicated vCenter Server, you’ll need to configure the proxy configuration details manually, i.e: you need to deal with some PAC and certificates/CRL to your browser. Now you can use Chrome Browser Extension for VMware Cloud Director to log in to the proxied vSphere components in your environment.
The following graph is what we’ll get before we setup the extension.

It’s very easy and straightforward for the setup, first you can just search Google for the key words or click here to get this extension.
Click “Add to Chrome” blue button to add this extension to your Chrome browser:

Click “Add extension” in the pop-up window:

After that you can see the following job done information.

Confirm this extension has been added in Chorme:
If you like, you can check this extension detail.

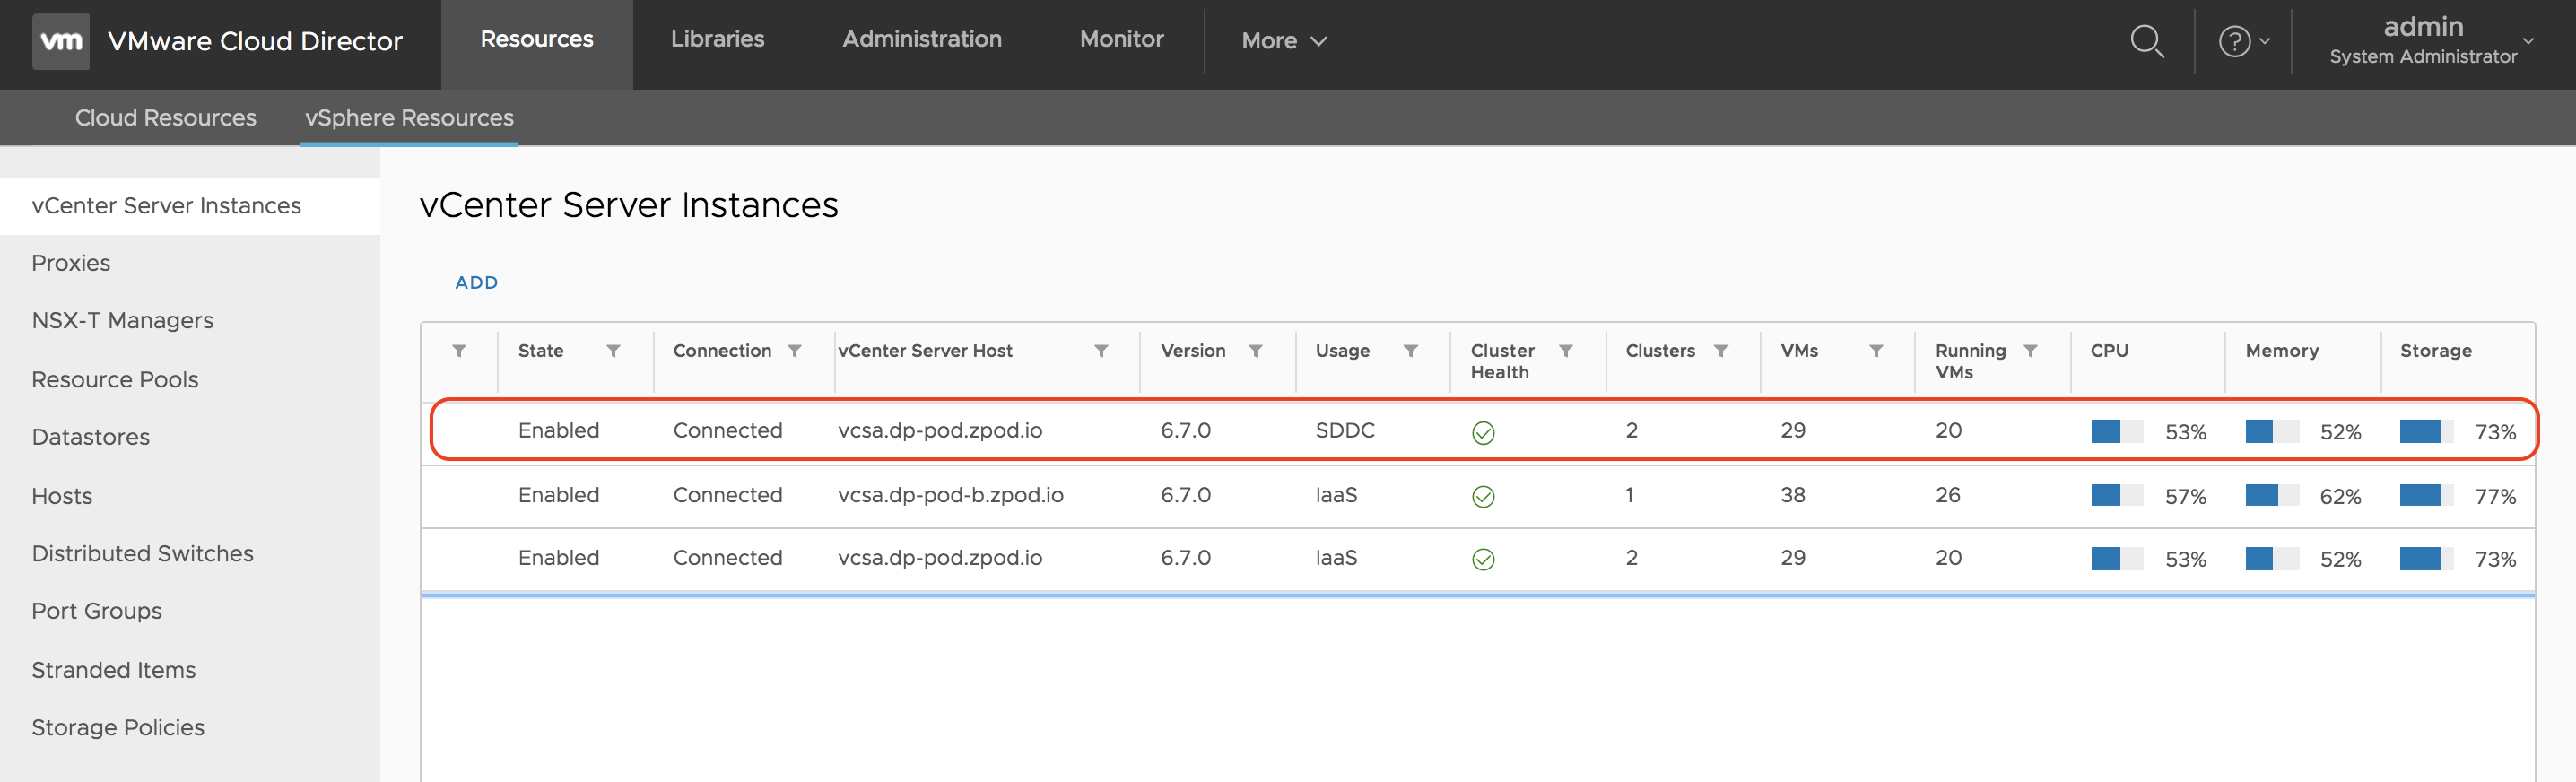
Login by using Chrome browser to Cloud Director tenant portal and click “Data Centers” –> “Dedicated vSphere Data Centers” tab, in the far east-north side of your browser, you’ll see an special icon showing up like below, click that one:

Tick the “Trust site” to enable this proxy capability.

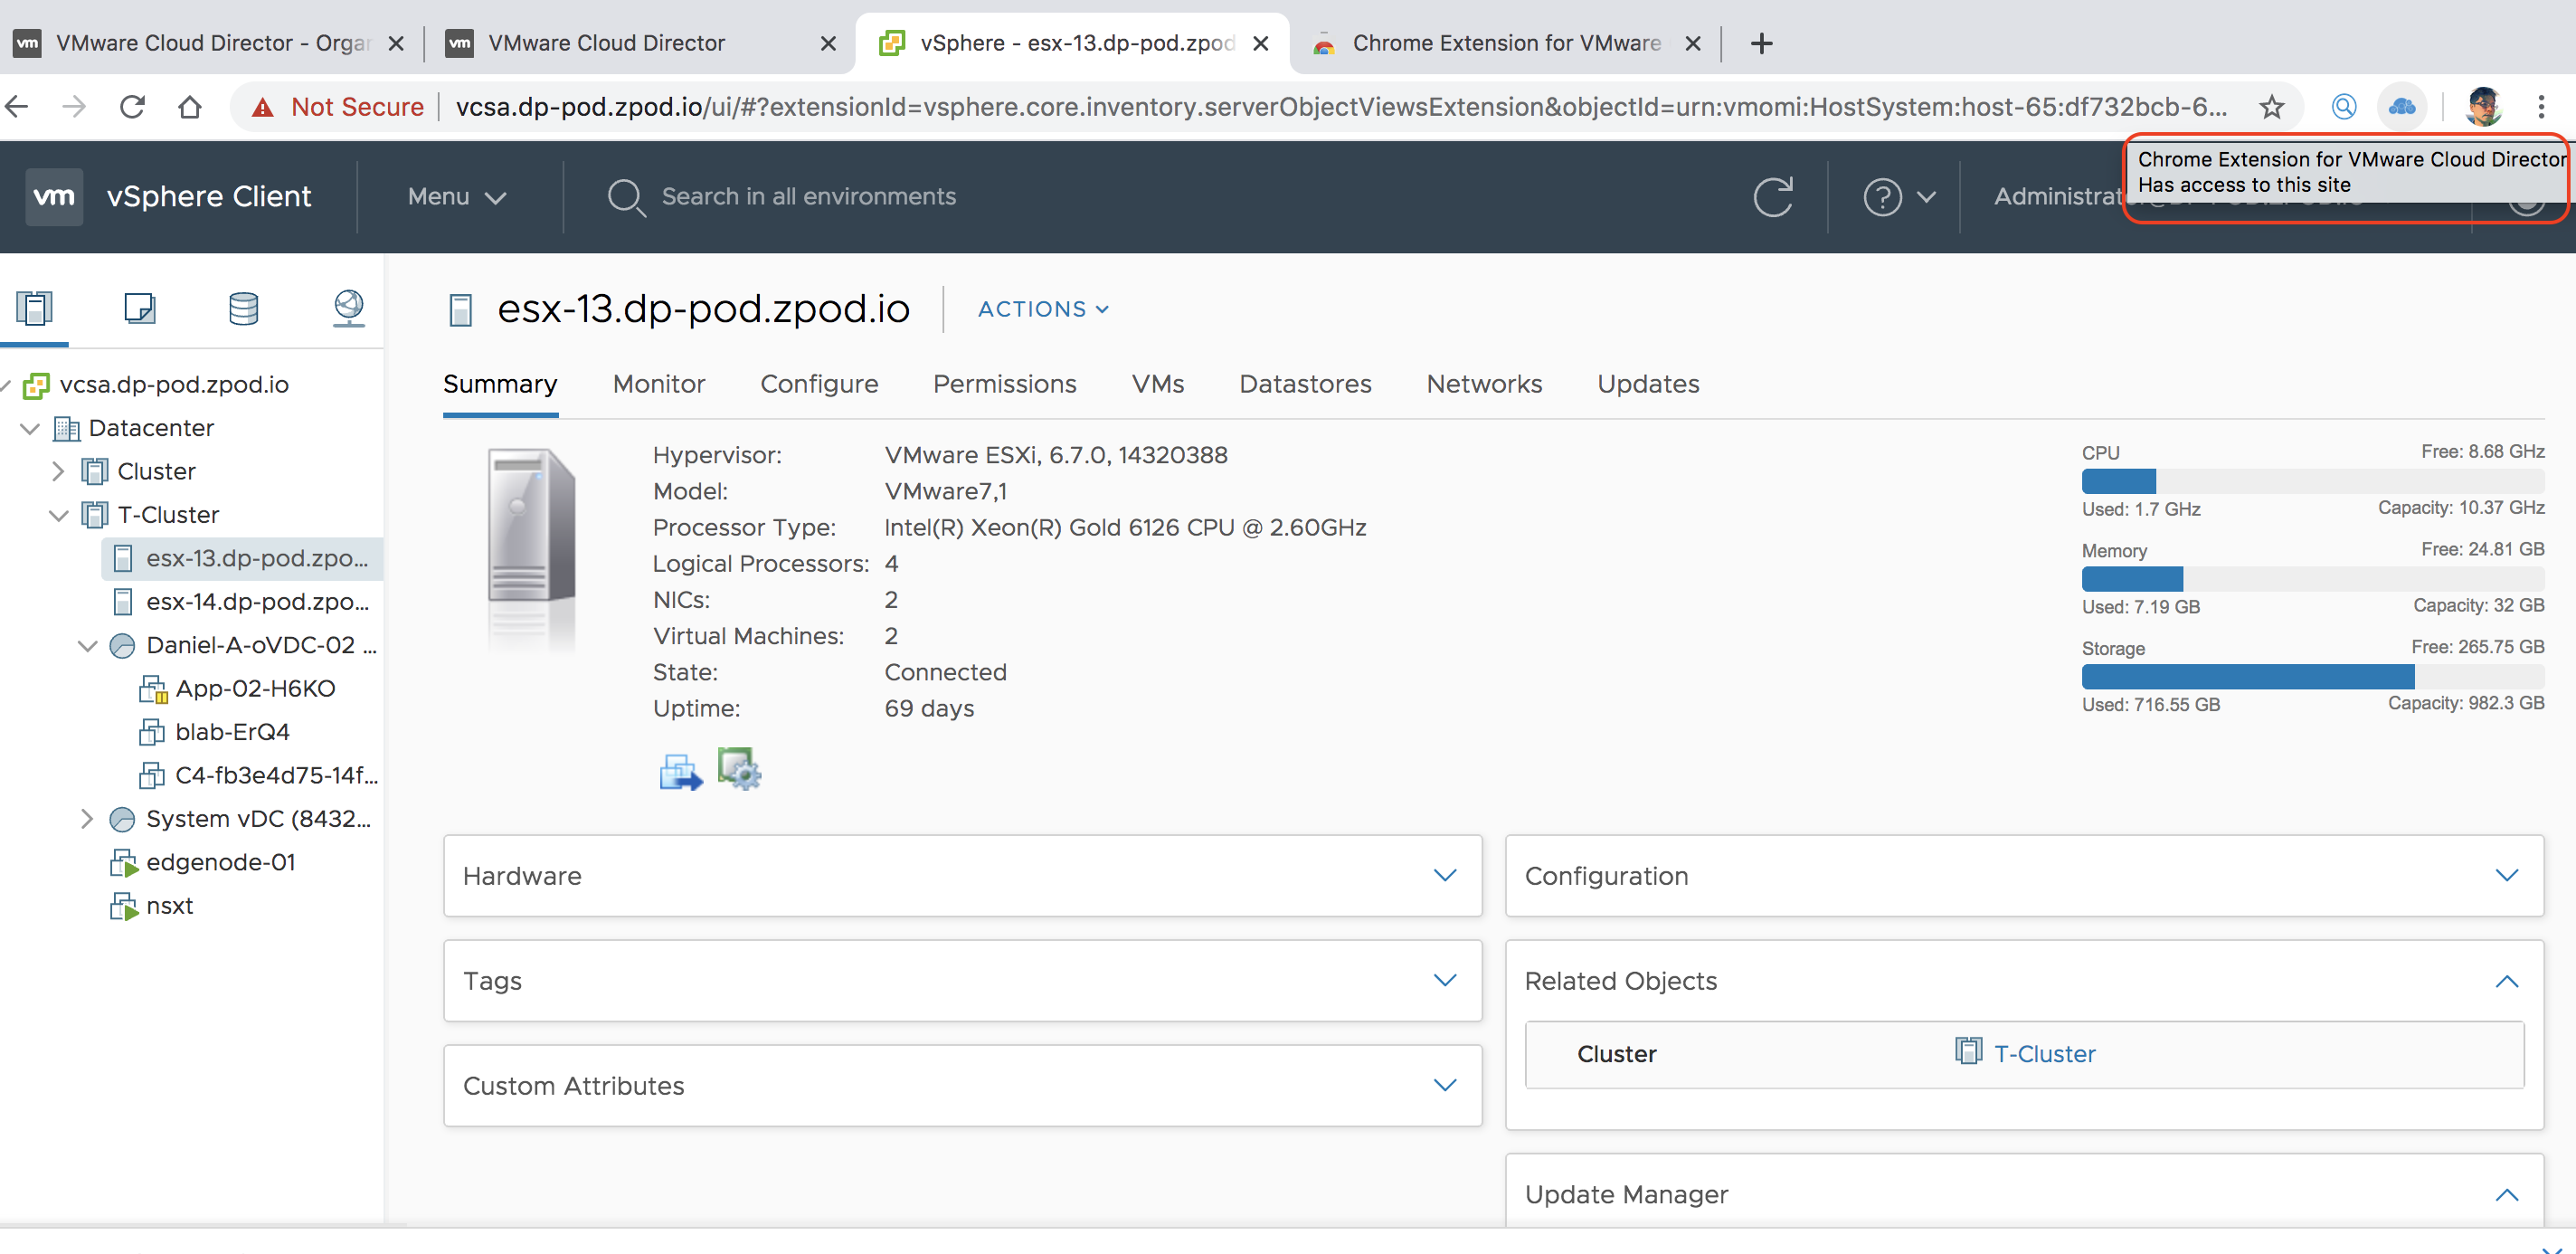
After that you can see the proxy “Setup help” windows previously exists has disappeared, which means all the following tasks triggered from within this current webpage will be proxied by the extension.

Now when you click the dedicated vCenter server instance, it will bring up the vSphere web client GUI without showing the proxy login ID and password authentication information again.
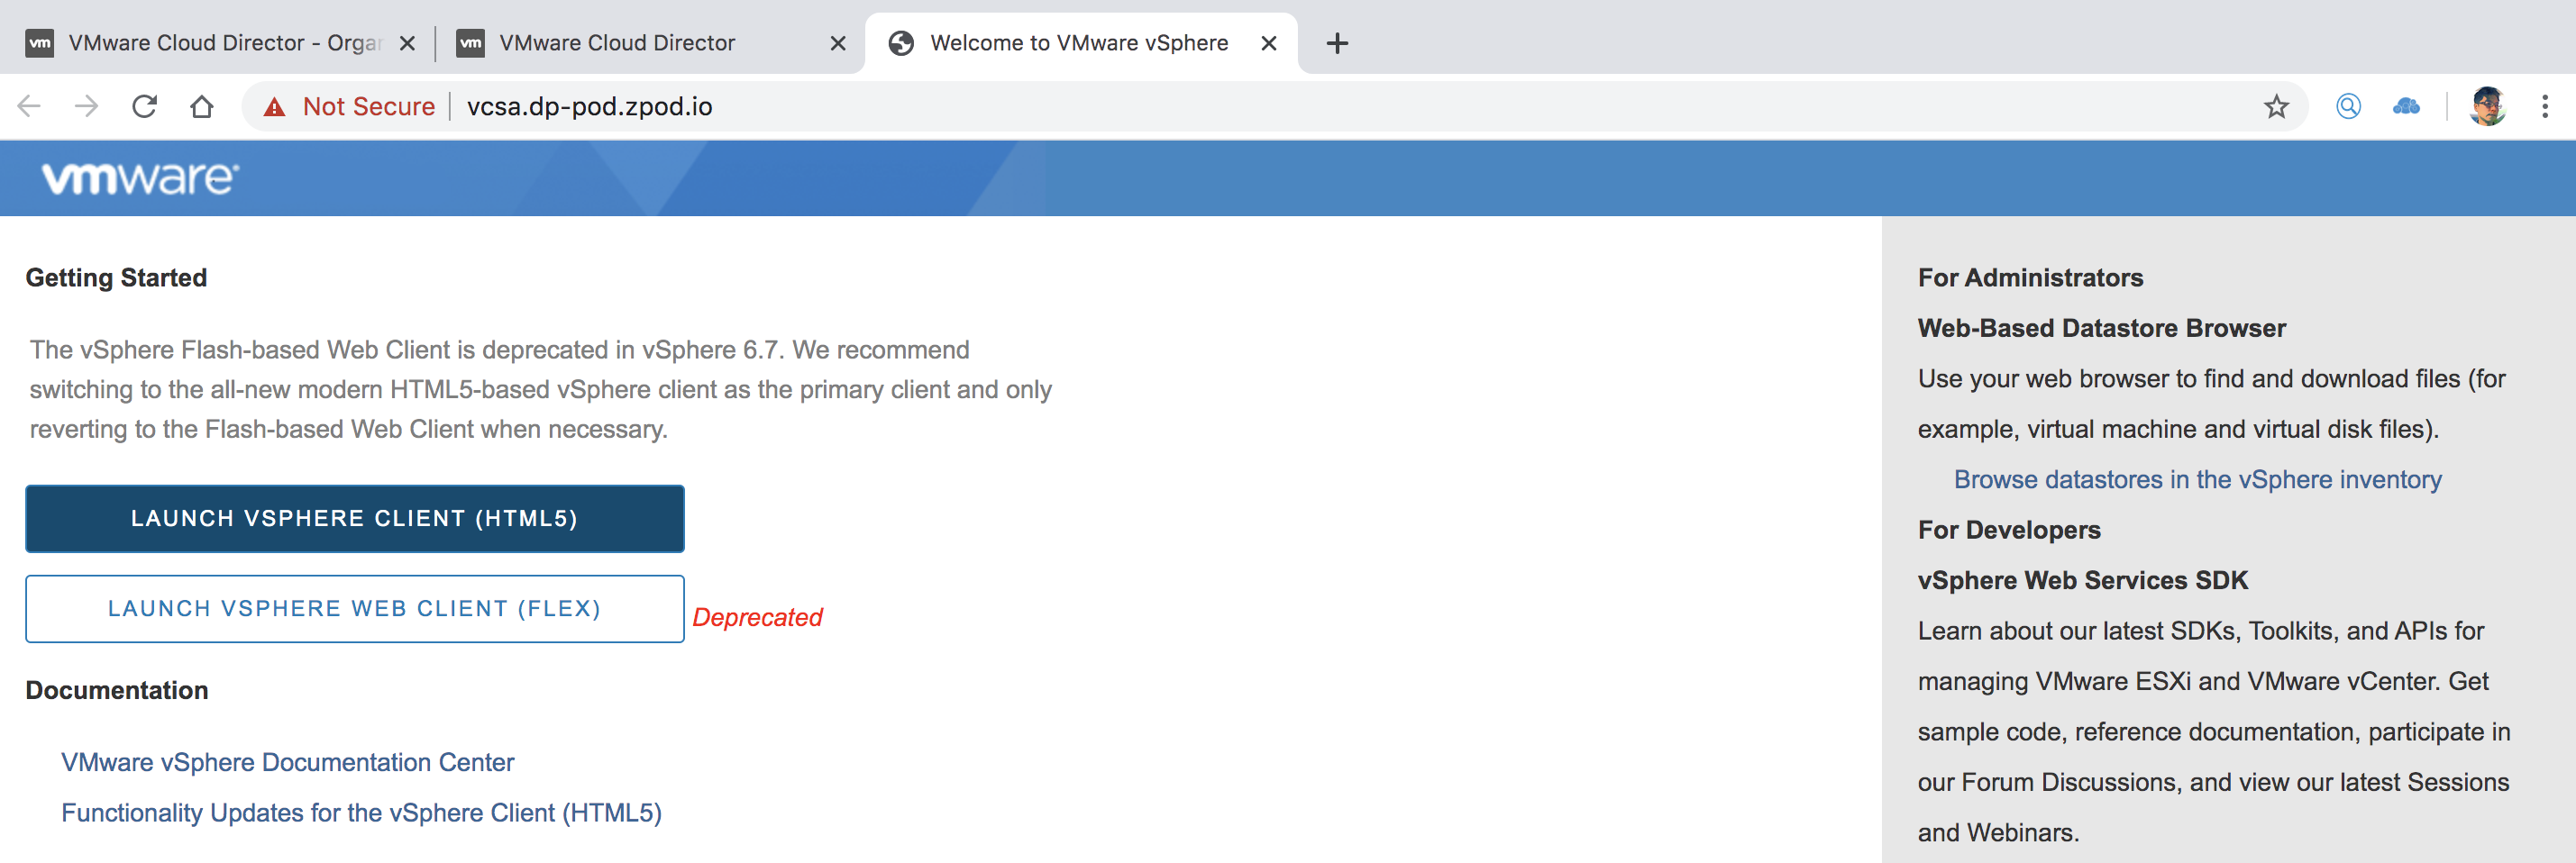
Click “Launch vSphere Client” and it will login to the GUI directly, cool!
This concludes this blog, thank you for reading!
