
You have a running vCenter in your On-Premise datacenter, and also you already have some workload running in the VMware Cloud as what depicted here.

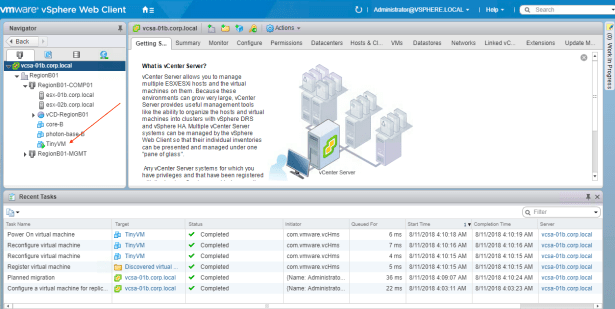
in you On-Premise DC:

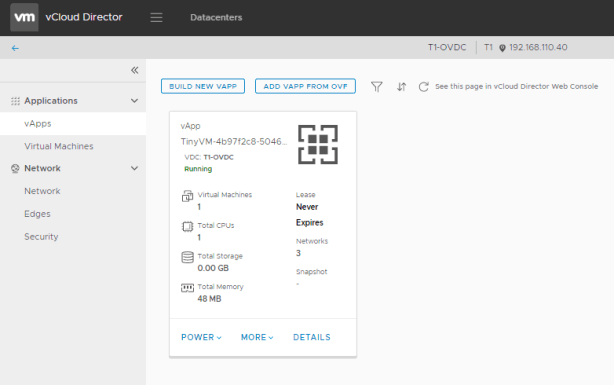
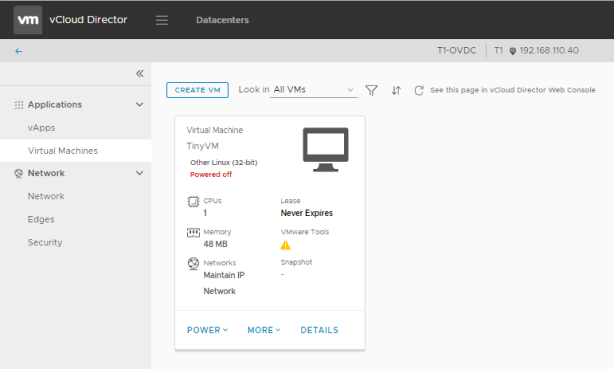
in VMware Cloud Provider Cloud:
You want your workload which you migrated before to the cloud to be moved back again to your On-Premise DC for some reasons, but the size of the VM could be very large, how could we do this very quickly?
if your VMware Cloud Provider proving you DRaaS, then not only you can do the migration/DR to the cloud, but also you can perform migration and failback your workload back to your on-premise location, this is bi-directional!
You can perform this very easy in the integrated vSphere Web Client GUI, here I’m going to walk you through how you can quickly bring back those heavy workload from the cloud by leveraging VMware’s vSphere Replication solution.

First, you just upload or import your previously migrated VM’s vmdk to your datastore, for example you imported this to the following storage file folder, TinyVM2, which will be served as the “Seeding” disk for your “from the cloud” VM.

Go “Home” –> “Site Recovery”.

Click “OPEN Site Recovery”.

choose which site your public cloud VM is running in, click “VIEW DETAILS”:

you may need to input your ID/Password to access your public cloud virtual datacenter information.

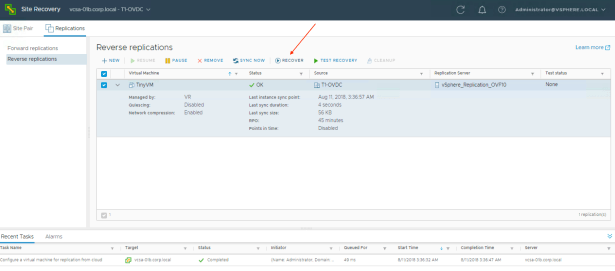
Assuming you have already done the required one-time settings networking mapping, you can just click “Replications” tab. Because we are going to “move back” our workloads, so we need to choose the “Reverse replications” option, and then we just add a new replication task here by clicking “+” sign.

here, the GUI will bring up the info regarding the current workload exist in our public cloud VDC.

choose the VM we want to bring back, here is “TinyVM”, and click “NEXT”, this will bring up the following screen, you select which vSphere Replication will handle the task.

Here you choose which datastore in your on-premise contain your seed file, and you need to tick “Select seeds” check box.
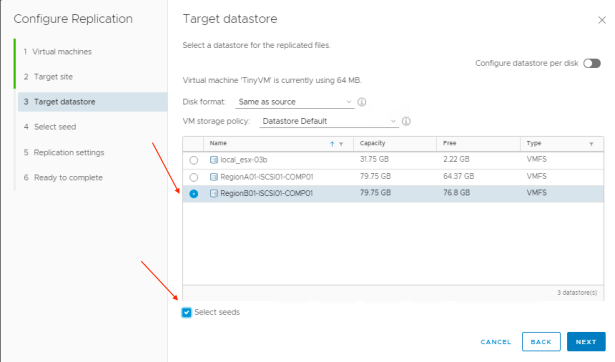
Select “Browse…”

click the folder which contain the seed file (which contain initial data of that VM by shipping a disk from your cloud provider or import from your archived storage system),


review the info and tick “The selected seeds are correct”.

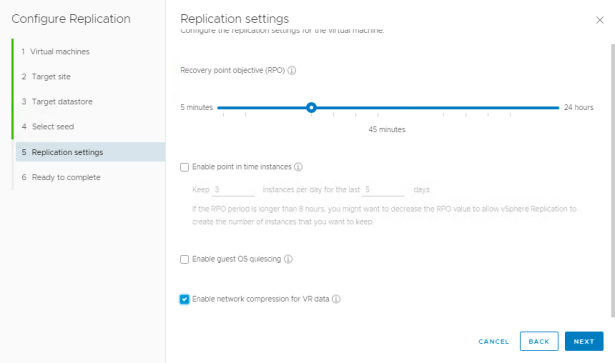
followings settings are all the same with normal vSphere Replication settings.
Review all the info, click “FINISH” button.

After the task completed, you can see the “Reverse replication” task’s status now is showing “OK”.

now you can click “RECOVERY” to cutover the replication and perform delta data synchronization to complete the migration your workload from the cloud task!
here comes the recovery steps:
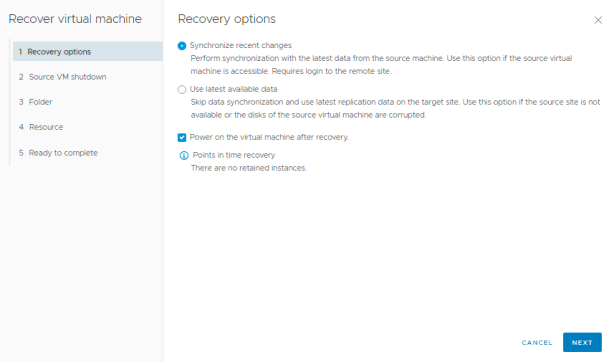
Step 1, you decide to sync the data or just to select from the previously replicated snapshot.
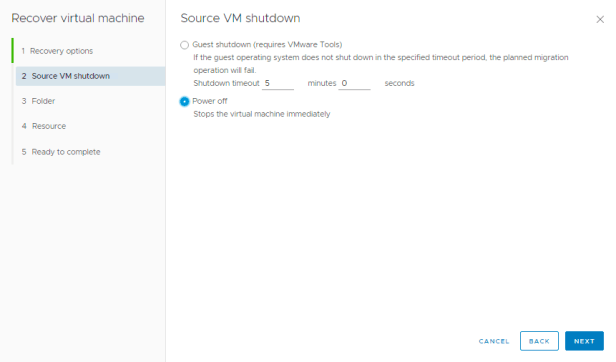
Step 2 to select if you want the VM in the cloud to be shutdown gracefully.
Step 3, you select where you want the recovered VM the folder is going to be.

Step 4, decide the resource in your on-premise datacenter.

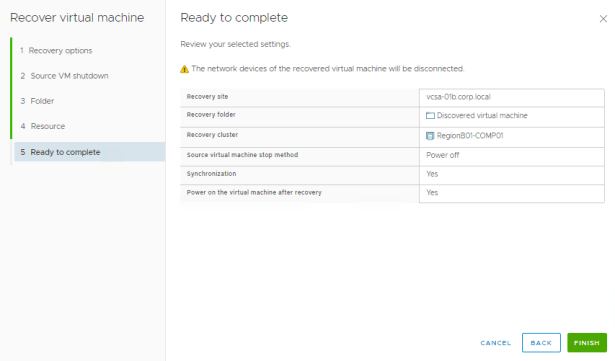
Step 5, review everything and finish the settings, click “FINISH”
After you clicked the “finish” button, you can see from the web client that the “planned migration” task has been starting, this is actually to perform the “from the cloud” to “on-premise” recovery job.

after sometime, you will see the status of that task in Site Recovery windows now is “Recovered”, which mean your workload has been brought back to you private cloud.
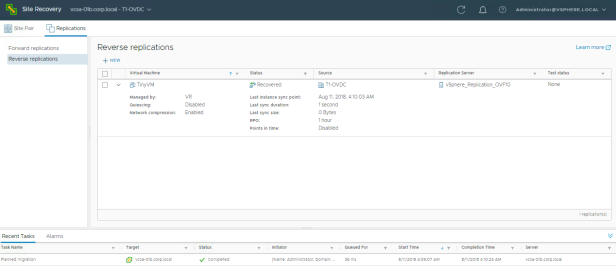
the “source” VM in the cloud also has been powered off.
now you have completed the task to bring back your workload, after you have done everything you need to do in your private cloud, you can now again to migrate your workload to the cloud as you wish!
So you now understand how easy it is to bring back your workload regardless its size (ideally situation here) by using the seeding feature provided in vSphere Replication product, using the same product, you can do migration or disaster recovery to the cloud all together, it’s powerful, easy and reliable.
I hope this blog help you understand the processes and the all the steps needed to bring back your workload from the cloud if you wish! thank you!
Notes:
For how to setup your environment in order to start to use this, please refer to the following video:
