VMware HCX abstracts on-premises versus cloud notions and presents capabilities to Virtual Machines as a continuous hybrid cloud.
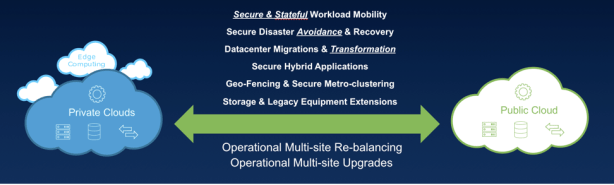
VMware HCX enables:
-
Modernization of Mission-Critical Application Infrastructure with a minimal operational overhead, without requiring a retrofit of your legacy infrastructure.
-
New hybrid data center architectures, where premises/private cloud network topologies are efficiently replicated, accelerating application migration, mobility and business continuity, and at scale.
-
Coherent migration of hundreds of virtual machines, bi-directionally, in parallel, on a secure high-performance overlay, over an existing WAN, VPN, or Private lines.
In my previous blog, we have completed the HCX Cloud preparation for the destination side, now we want to install HCX Enterprise appliance in the source side.
The overall HCX solution installation steps include the following:
- Prepare the deployment configurations using the HCX Pre-Install Checklist. (should be provided and completed with the VMware technical support team)
- Download the HCX Installer for the destination site first. You can download it from here.
- Deploy HCX Manager in the destination environment using the HCX Cloud Manager OVA.
- Activate and Configure the HCX Cloud system.
- Prepare the destination site’s HCX Cloud system for Interconnect Deployments using the Multi-Site Services Mesh. Define Compute and Network Profiles.
- Deploy HCX Enterprise in the source environment using the HCX Manager Enterprise OVA.
- Activate and Configure the HCX Enterprise system.
- Pair HCX Enterprise with the HCX Cloud.
- To deploy the HCX Interconnect, enable HCX services at the source site with the Multi-Site Services Mesh.
- Testing Migration and vMotion from source to the Cloud.
We need to go through the above 6~10 steps to complete the HCX installation in the source environment.
Before we get started to install, please make sure your source environment comply the following software version requirements.
Minimum Software Version Requirements for the HCX Environments


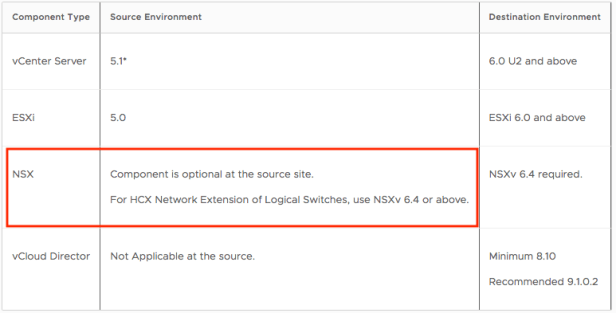
The HCX Plugin/UI at the source site requires vCenter Server 5.5 U2 to be displayed correctly in vCenter. It is still possible to use HCX for Bulk Migration operations on vCenter Server running 5.1—5.5 U1 (without a UI) by using the HCX PowerCLI module, or the HCX REST API.
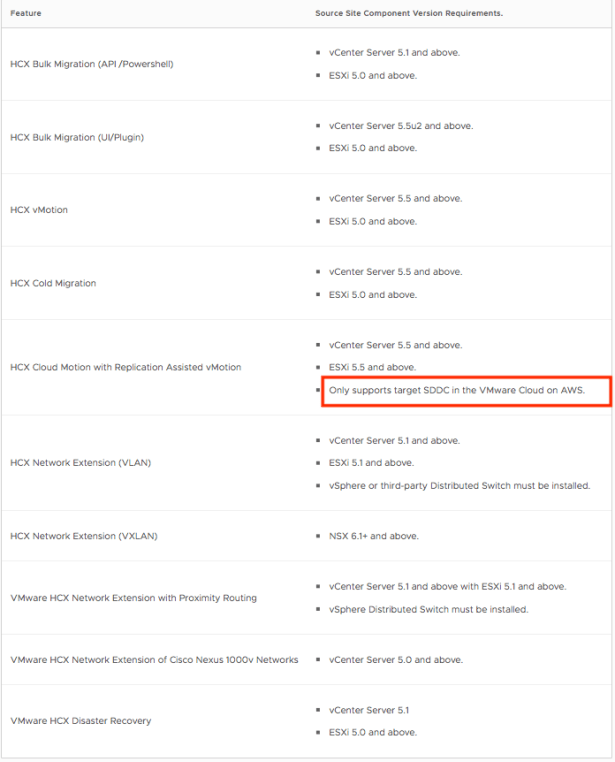
HCX Feature Software Version Requirements
Deploy HCX Enterprise
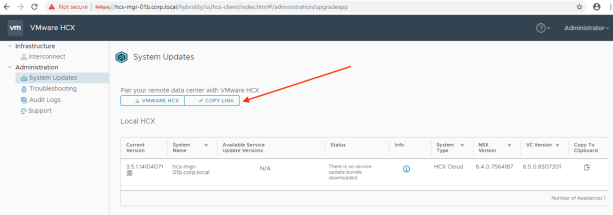
The HCX Enterprise Manager OVA is used when deploying HCX at the source site.
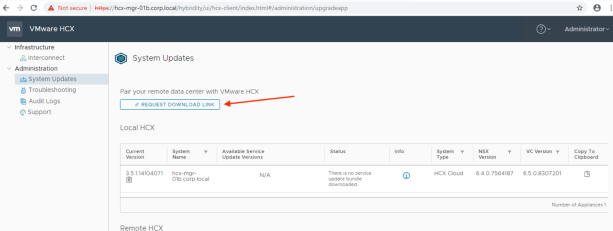
Click “COPY LINK” to get the “VMware-HCX-Enterprise-3.5.1-xxxxxxxx,ova”download link.
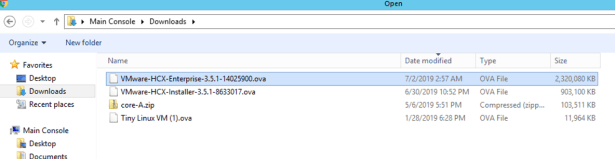
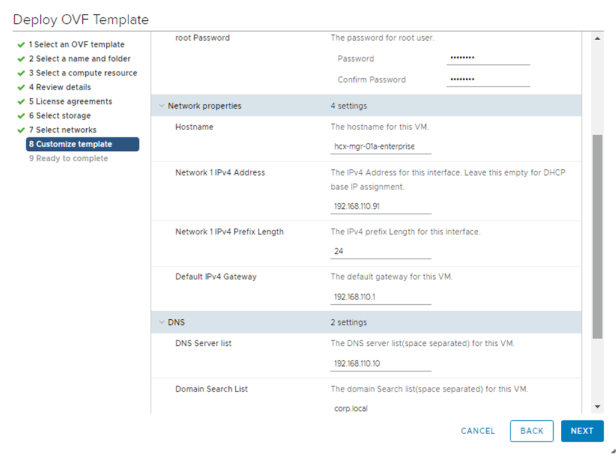
Connect to the vCenter Server client and deploy the OVF Template.
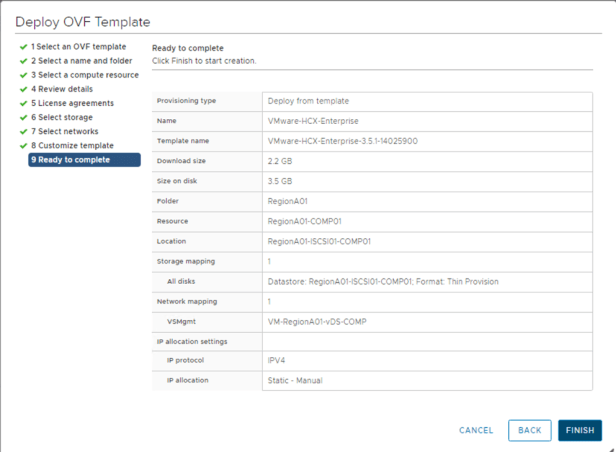
After you click “Finish” button, system will begin the deployment processes, allow up to five minutes after the HCX OVA deployment for the services to initialize then you’ll see the HCX Manager login page showing up, please use “admin” ID and correspondence password to login the HCX Enterprise manager system.
Activate and Configure the HCX Enterprise system
https://hcx-manager-ip-or-fqdn:9443

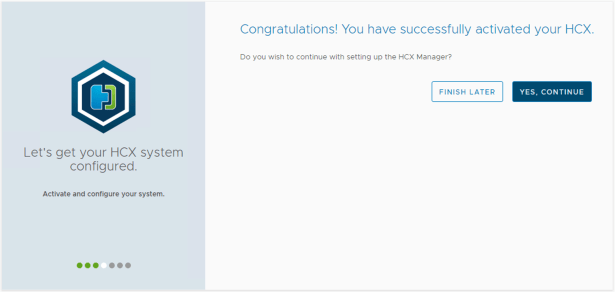
Enter the Activation Key and click “ACTIVATE”.
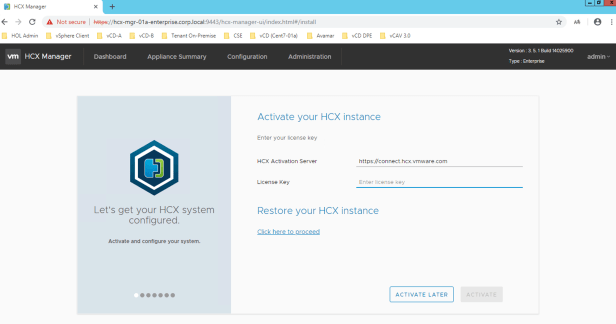
<Notes>
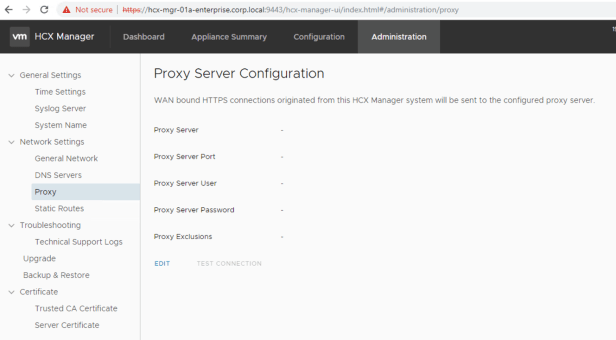
- If there is a proxy server in the environment in the path for outbound HTTPS connections, click “Activate Later” and provide the proxy server configuration in the administration tab.
- If a proxy server is entered, local vCenter, ESXi, NSX, SSO, and HCX-IX systems must be added as exceptions not to be sent to the proxy server.
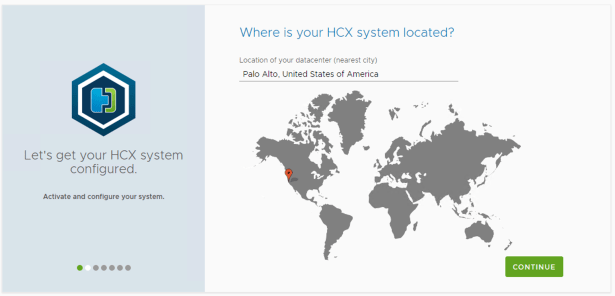
Select the nearest major city to where the HCX Manager system is geographically located. HCX sites are represented visually in the HCX Enterprise dashboard. Click Continue.
Modify the system name of this HCX Manager.
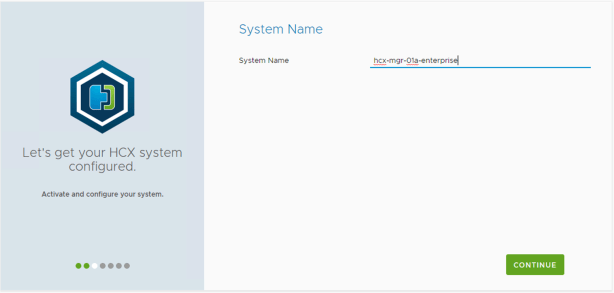
Click CONTINUE to configure vCenter Server and PSO.
If you want to leverage local NSX Logical Switch for the HCX Network Extension as the source network, then you need to tick the NSX checkbox here to configure your NSX server.
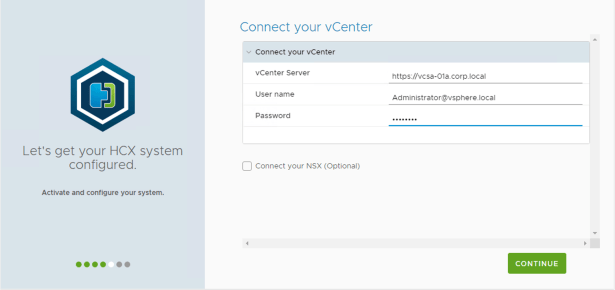
Configure SSO/PSO.

Last step is to restart the services.
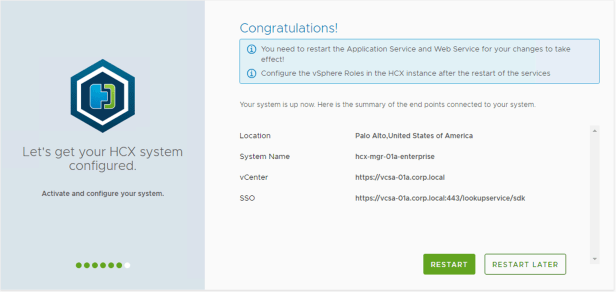
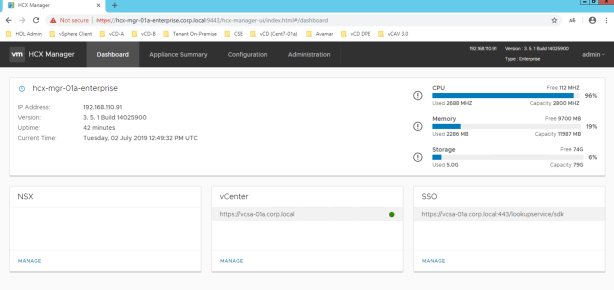
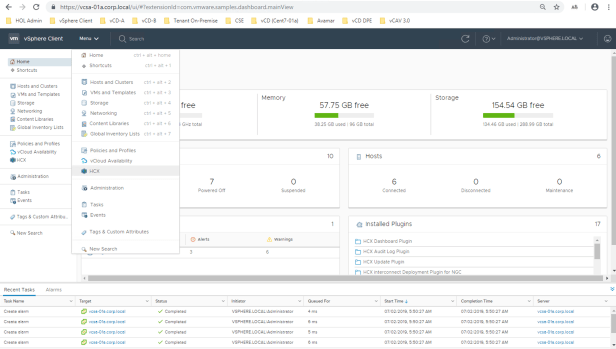
After the restart, login to HCX Manager management interface to check the overall system health status.
https://hcx-manager-ip-or-fqdn:9443
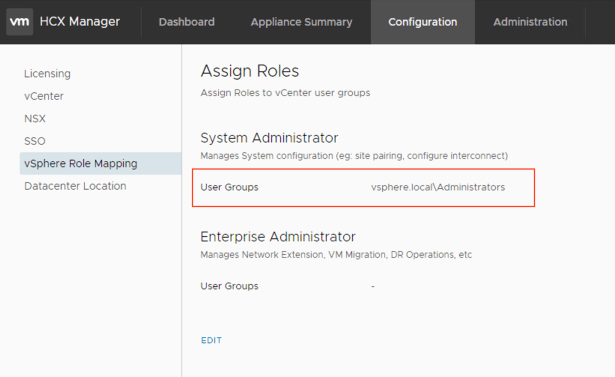
make sure you edited the “User Groups” in the HCX System Administrator part to map to your own domain setting, or you can not successfully login into the HCX Enterprise 443 port.
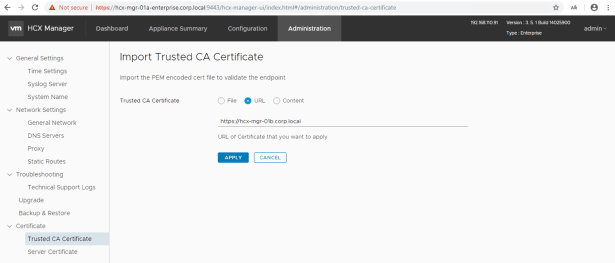
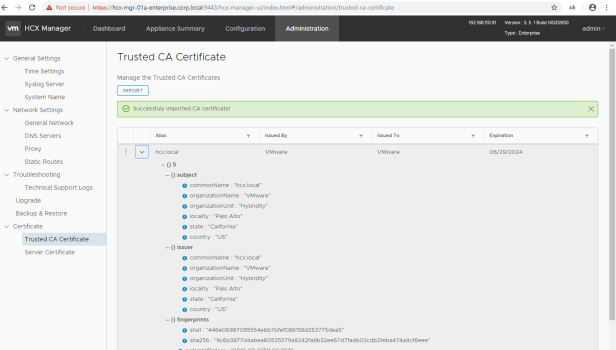
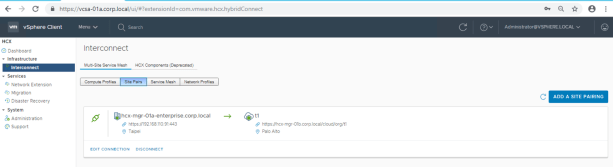
Pair HCX Enterprise with the HCX Cloud
First we need to import HCX cloud manager’s Trusted CA Certificate, You need to go to local HCX Enterprise url port 9443 (see below graph) and to enter the URL for the target HCX system: https://hcx-manager-ip-or-fqdn
Register the destination HCX system at the source.

When registering a vCloud Director Organization as the HCX destination endpoint, the Site URL refers to the HCX Cloud system with a suffix referencing the Org:
https://hcx-cloud-manager-ip-or-fqdn/cloud/org/<org-name>
Provide a Local or LDAP Organization User with the Organization Administrator role. Use the format username@orgname.


Enable HCX services with the Multi-Site Services Mesh
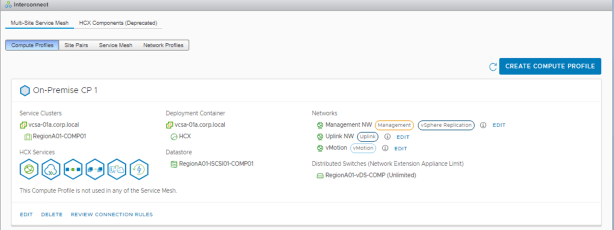
Create a Compute Profile in the source.
A Compute Profile contains the compute, storage, and network settings that HCX uses on this site to deploy the Interconnect-dedicated virtual appliances when a Service Mesh is added.
Create at least one Compute Profile, verify Compute Profile settings.
Creating a Service Mesh
A Service Mesh can be added to a connected Site Pair that has a valid Compute Profile created on both of the sites.
Adding a Service Mesh initiates the deployment of HCX Interconnect virtual appliances on both of the sites. An interconnect Service Mesh is always created at the source site.
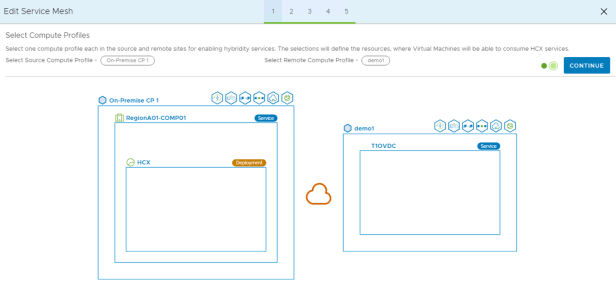
Click “CREATE SERVICE MESH” button.

Select a source and destination site, select Compute Profiles for source and remote site.
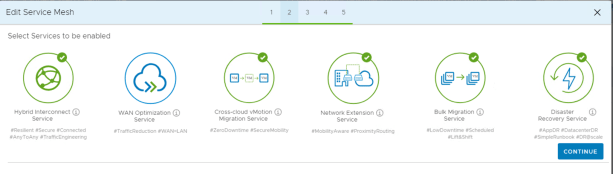
Select the HCX services to be enabled. Click Continue:
Services explanation in the GUI: (when you mouse hover over the exclamation mark on each service icon)
- The HCX Service provides resilient access over the Internet and private lines to the target site while providing strong encryption, traffic engineering and extending the datacenter. This service simplifies secure pairing of sites and management of HCX components. The service is deployed as an HCX virtual appliance (HCX-WAN-IX).
- The WAN Optimization service improves performance characteristics of the private lines or Internet paths by leveraging WAN Optimization techniques like data deduplication and line-conditioning. The service is deployed as an HCX virtual appliance (HCX-WAN-OPT).
- The vMotion Migration service provides zero-downtime, bi-directional Virtual Machine mobility. The service is deployed as an embedded function on the HCX-WAN-IX virtual appliance.
- High throughput Network Extension service with integrated Proximity Routing unlocks seamless mobility and simple disaster recovery plans across sites with IP/MAC address retention. The service is deployed as an HCX virtual appliance (HCX-NET-EXT).
- The HCX Bulk Migration service provides low-downtime, bi-directional, Virtual Machine mobility using VMware vSphere Replication technology. The service is deployed as an embedded function on the HCX-WAN-IX virtual appliance.
- The Disaster Recovery service is a business continuity solution, used to protect workloads from app-level to site-wide disasters. The service is deployed as an embedded function on the HCX-WAN-IX appliance or in a scale out fashion (HCX-DR).
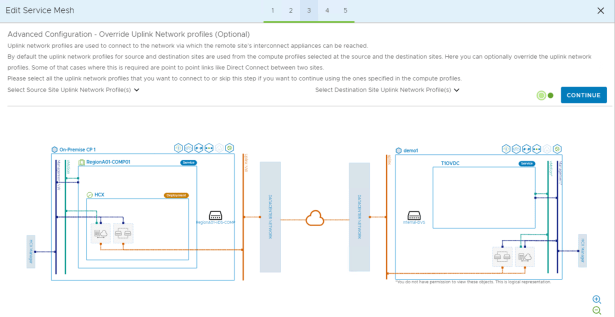
Override the Uplink Network Profiles: an override can be useful in vCloud Director-based deployments where an uplink network that deviates from a common configuration created for an Organization to consume during the Service Mesh creation.
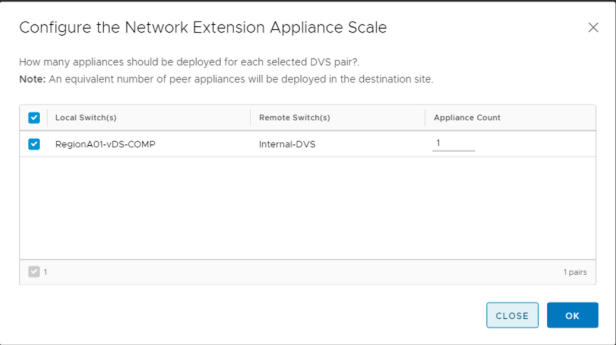
Advanced Configuration – Configure Network Extension Appliance Count, this advanced configuration can be useful when deploying Network Extension appliances to extend high volume source networks.
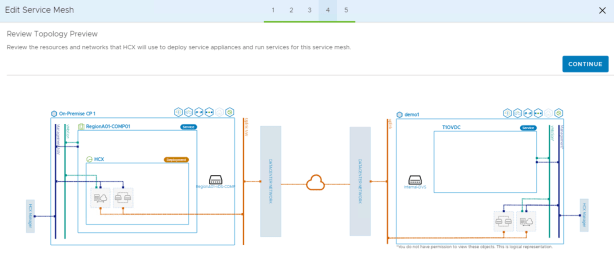
Review Topology Preview:
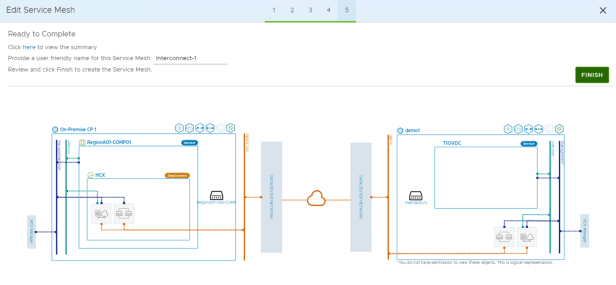
Ready to Complete:
We can see the overall deployments processes in Service Mesh “Tasks” tab.
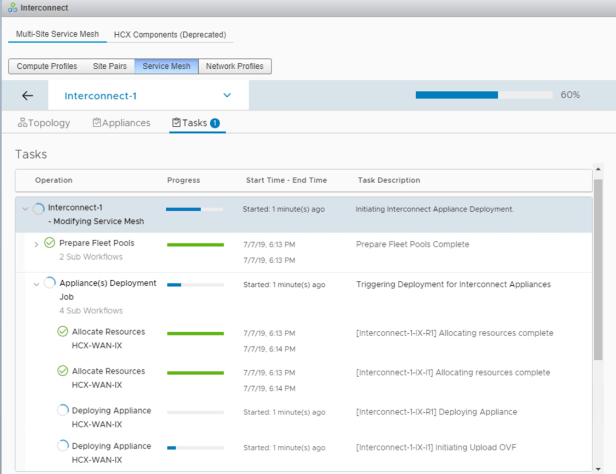
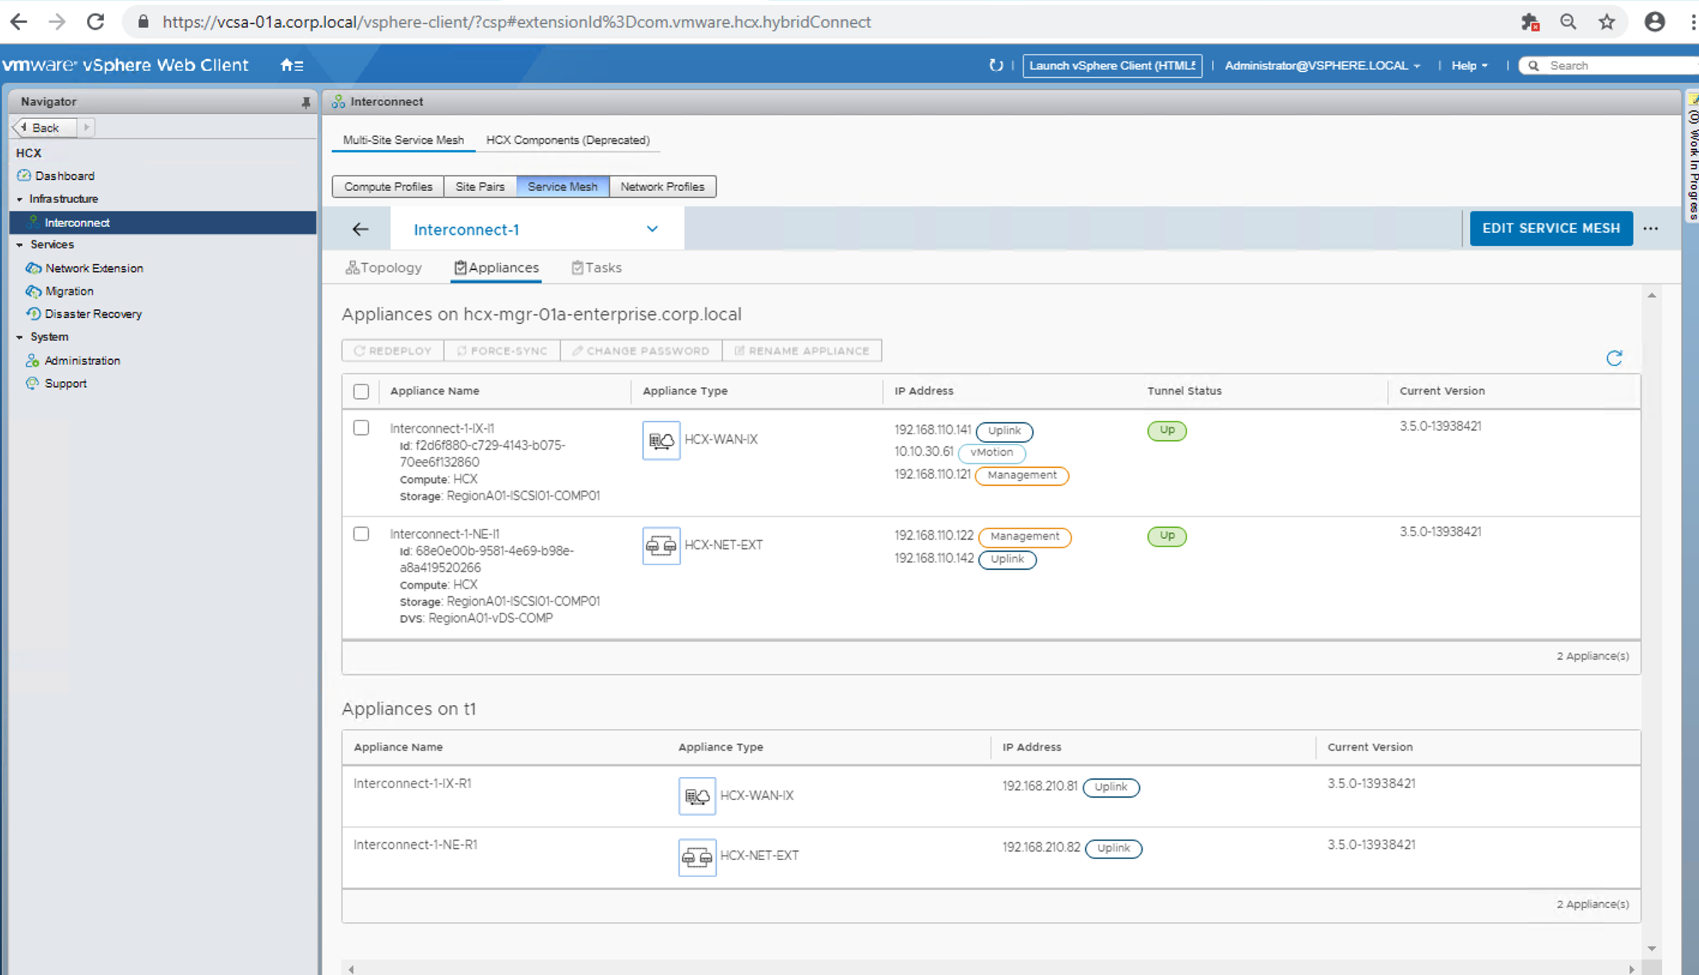
The following screen shows a successful “Service Mesh” deployment.

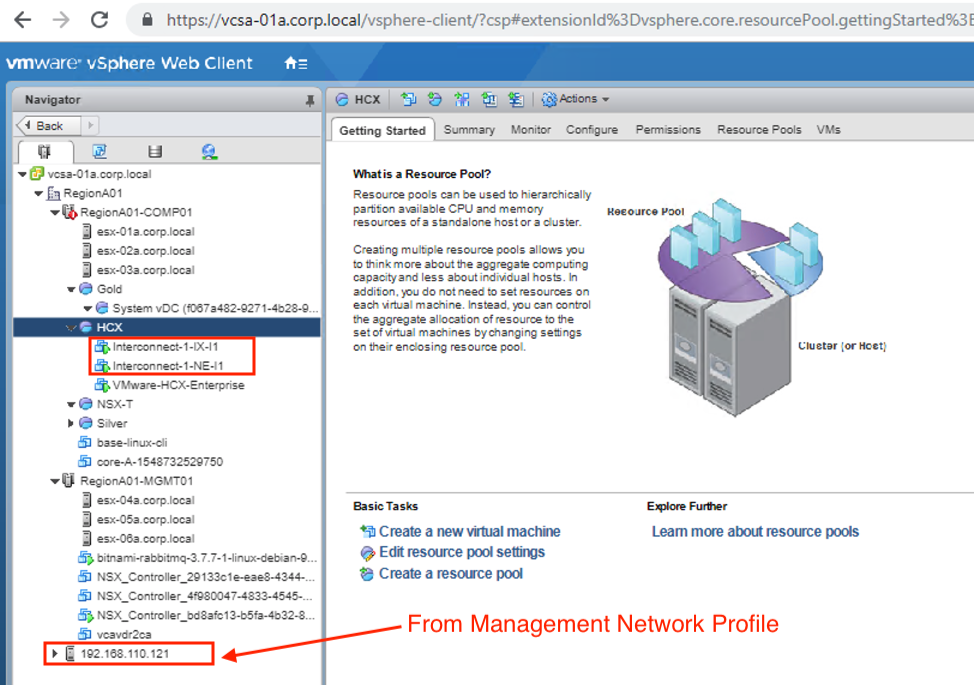
In the source side, you will see two new interconnect virtual machines (Appliances) have been created for running HCX-WAN-IX and HCX-NET-EXT services.
One virtual ESXi will also be created in both source and cloud sites, there’s no real resource consumption from those server, you also can not perform any power actions to those servers.
<Source site>
<Cloud Site>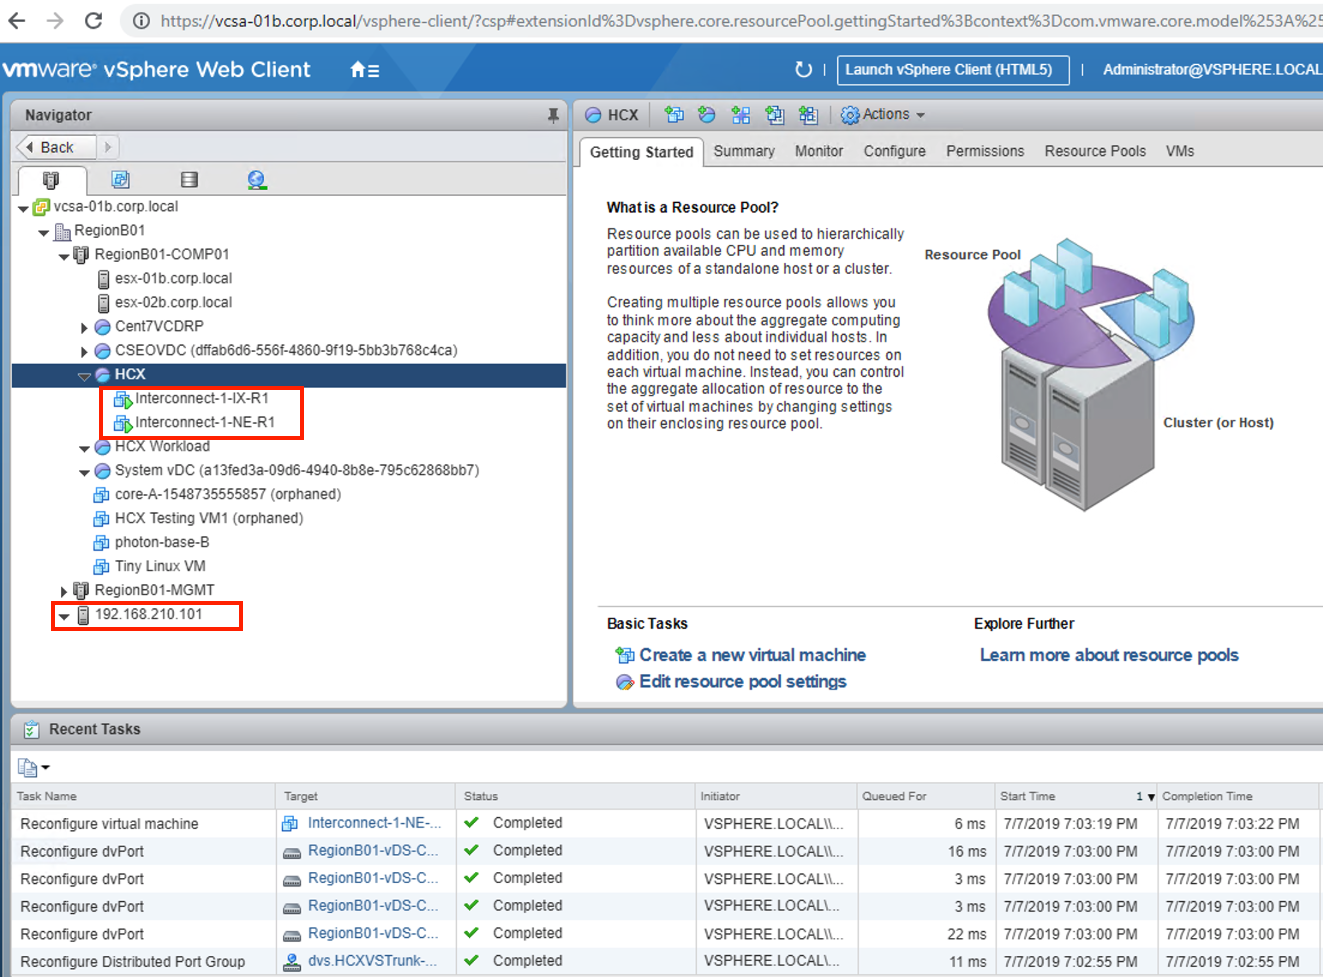
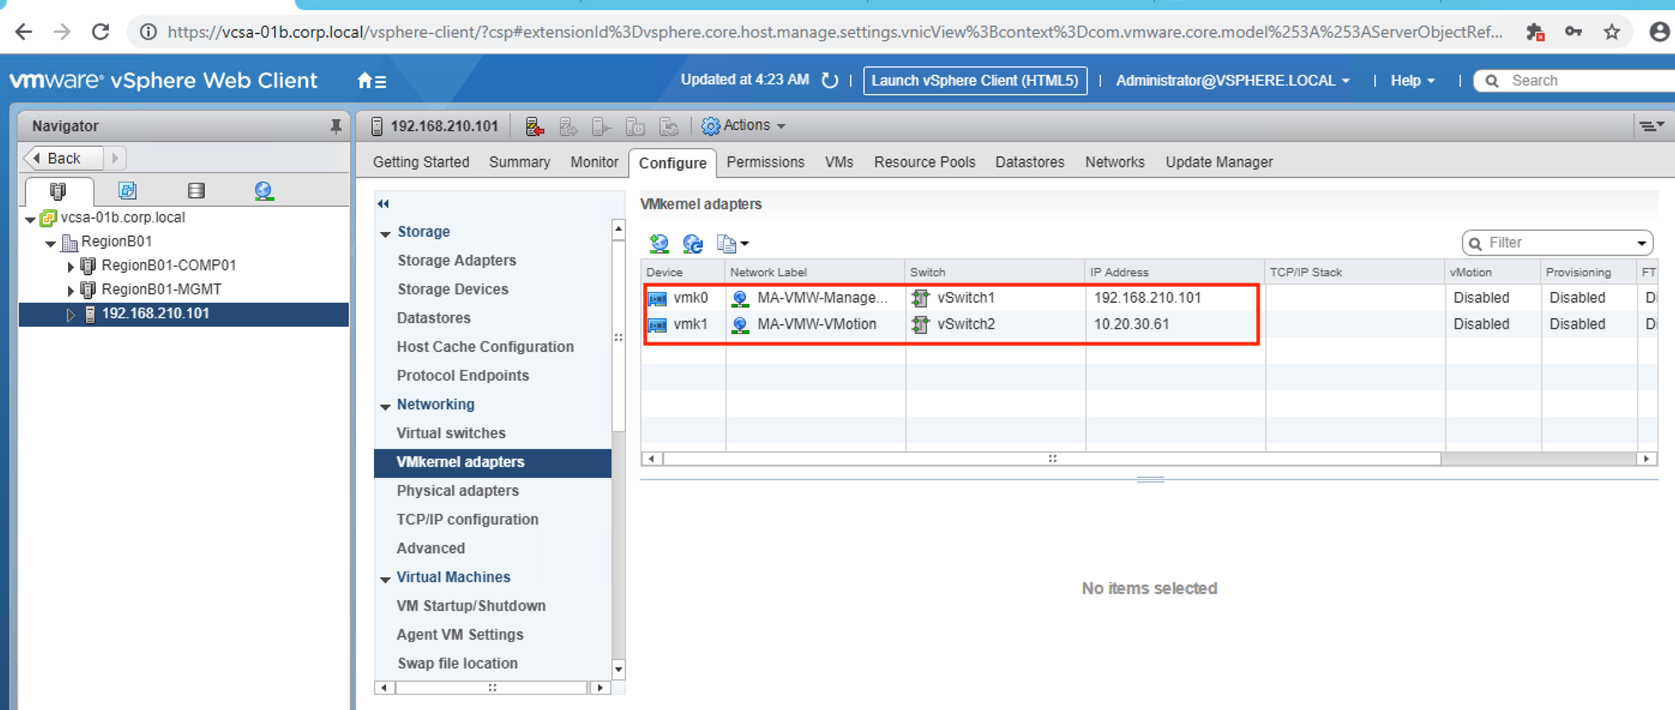
You can check your created Service Mesh Topology and Appliances status in the GUI.

Testing Migration from source to the Cloud
Virtual Machines can be moved to and from VMware HCX-enabled data centers using multiple migration technologies.
VMware HCX Bulk Migration
This migration method uses the VMware vSphere Replication protocols to move the virtual machines to a remote site.
-
The Bulk migration option is designed for moving virtual machines in parallel.
-
This migration type can set to complete on a pre-defined schedule.
-
The virtual machine runs at the source site until the failover begins. The service interruption with bulk migration is equivalent to a reboot.
VMware HCX vMotion
This migration method uses the VMware vMotion protocol to move a virtual machine to a remote site.
-
The vMotion migration option is designed for moving single virtual machine at a time.
-
Virtual machine state is migrated. There is no service interruption during aVMware HCX vMotion migration.
VMware HCX Cold Migration
- This migration method uses the VMware NFC protocol.
- It is automatically selected when the source virtual machine is powered off.
You can migrate a VM from vCenter Context Menu or HCX interface, the VMware HCX interface is used for configuring multiple migrations, or for configuring Reverse Migrations. Reverse Migration refers to the VMware HCX Migration of Virtual Machines in VMware HCX-Enabled Remote to the Local Site. The operation is initiated at the local site.
In the vSphere Web Client, navigate to HCX. Select the “Migration” tab and click “Migrate Virtual Machines”. The “HCX Migrate Virtual Machines” to Remote Site wizard is displayed. Select the resources where you want to put this VM to the remote site.
Notes:
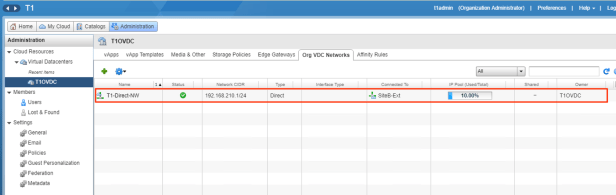
you can check tenant’s Organization Network information in vCloud Director GUI.
HCX will validate if our settings satisfied the prerequisite checking.
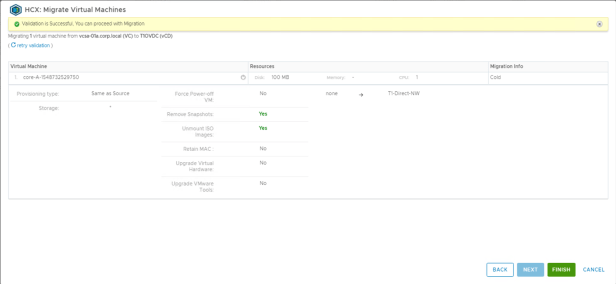
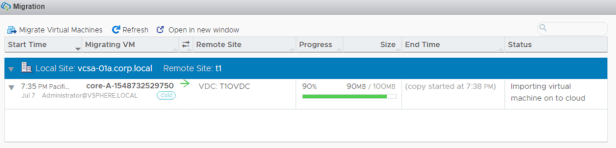
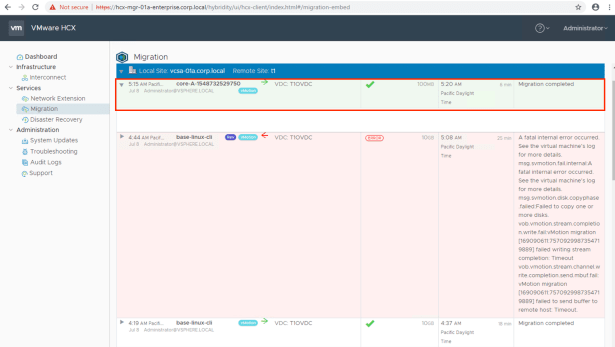
After click “FINISH” button, you can see the task status and progress in the GUI.
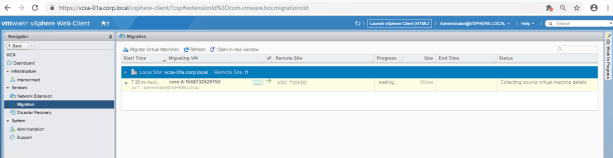
there is a progress bar showing the overall migration status.
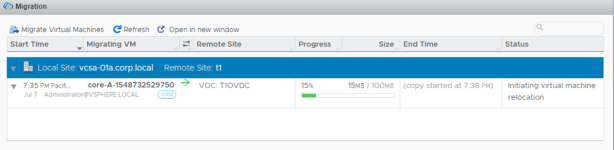
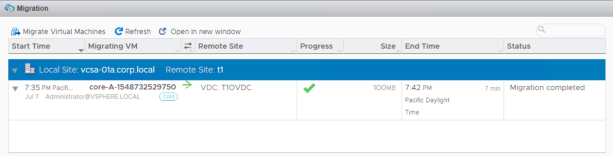
It’s very easy for us to know whether the migration task has succeeded or failed from the progress color sign. Here we can see our task is completed successfully.
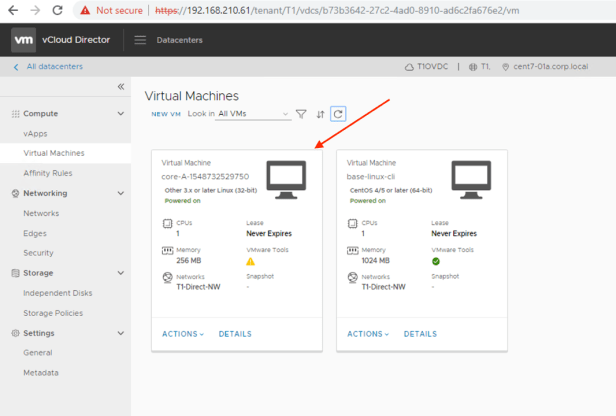
Check from vCloud Director GUI.
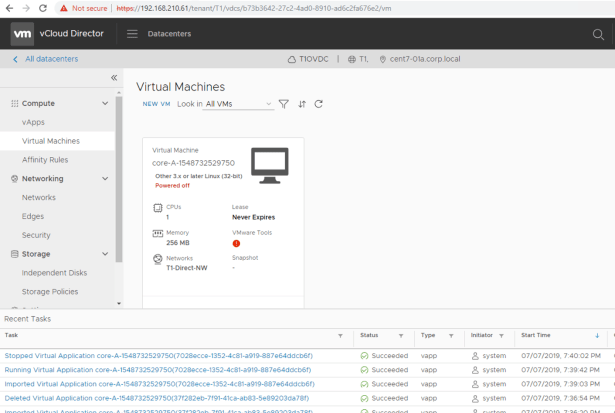
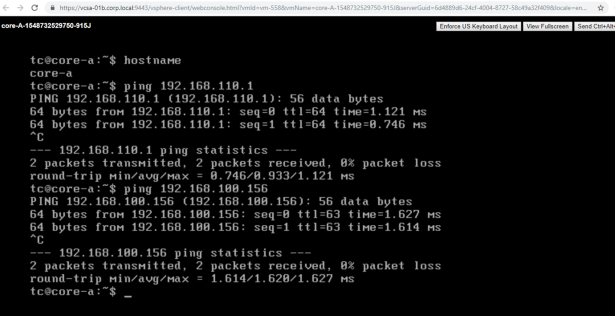
Power on this linux and check it can connect to source VMs.
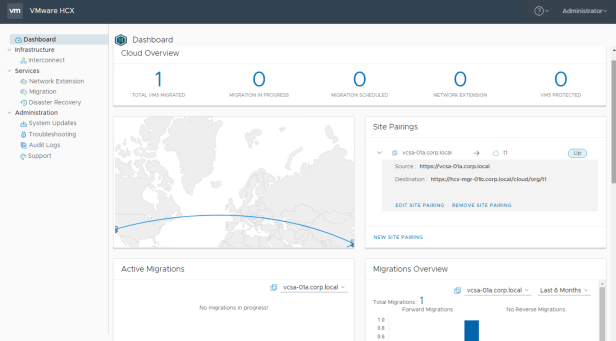
We can login to local HCX Manager to check this migration task as well.

Testing vMotion from source to the Cloud
-
Pre-Requisites for VMware HCX vMotion
-
VMware HCX Interconnect Tunnels must be up/active.
-
VMware HCX vMotion requires 100 Mbps or above throughput capability.
-
The virtual machine hardware version must be at least version 9 or higher.
-
The underlying architecture, regardless of OS, must be x86.
-
VMs with Raw Disk Mapping in compatibility mode (RDM-V) can be migrated.
for detail HCX vMotion requirements and restrictions, please check official manual here.
-
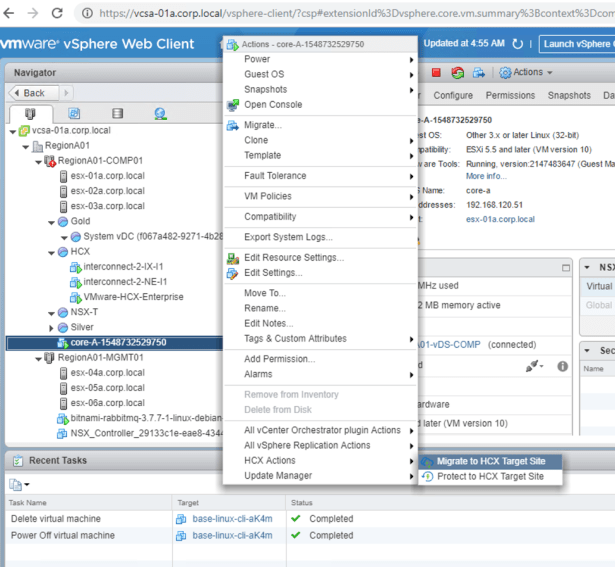
We can migrate a Virtual Machine from the vCenter Context Menu
- In the vSphere Web Client, search for a virtual machine and select it, or select it directly in the VMs and Templates navigator tab.
- Right-click the virtual machine and select Hybridity Actions.
- Select Migrate to the Cloud.

Select “vMotion” migration type.
Select Upgrade “Virtual Hardwares”
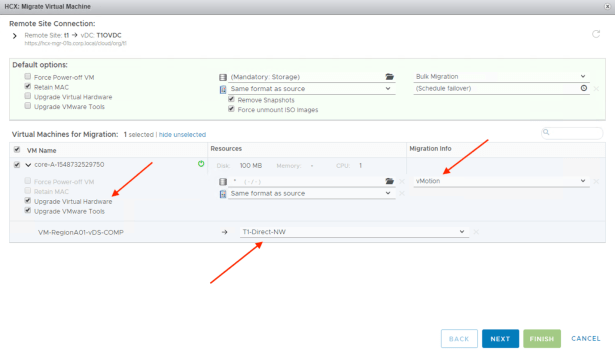
Review the validation information.
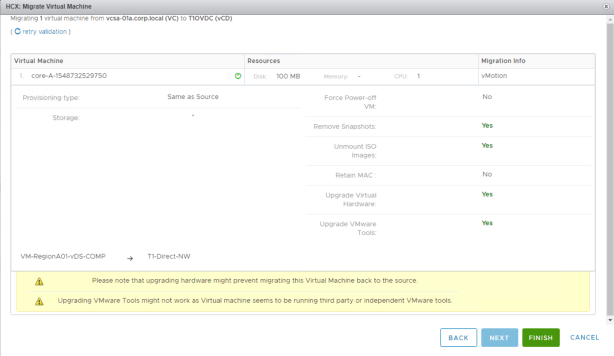
Check if the vMotion task has been performed correctly.
in vCloud Director, this VM has no service interruption and is running O.K.
Now we have done some basic HCX testings, this pretty much concludes our blog’s goal of introducing high-level processes to install HCX Manager in the source side, I hope you can pick up the HCX fundamental knowledge very soon via this blog.
Again, this testing is only for quick testing or POC purposes, if you want to implement this solution in your production environment, I strongly recommend you inviting VMware Professional Services team to plan and design your HCX solution!
