Suppose you have VMs running inside your Mac VMware Fusion or WIndows VMware Workstation (in my case, I have some in VMware Workstation), you now want to release some of your computer’s resources, enjoy the public cloud economic and gain some benefits out of it(scale up, testing, PAYG, etc,.), how to quickly move those VMs into the cloud?
Today’s I’m going to share an easy and practical way of how to migrate your personal VMware VM by merely using command line to the cloud (of course Google Cloud, specifically into Google Compute Engine).
High-level steps:
- Prepare Google SDK Shell environment
- Examine your candidate OS is supported by Google
- Download and run the Google Precheck tool
- Test if you can RDP to your candidate VM
- Locate your candidate VM’s vmdk file location
- Enable related Google Cloud API and assign Service Account permissions
- Issue the gcloud import command
- Check image created in GCE
- Create GCE instance specifying custom image as the boot image
- Connect to the public IP of the GCE instance
1. Prepare Google SDK Shell environment
As usual, you need to prepare the Google SDK Shell in order to for you to be able to launch “gcloud” command and interact with your remote Google Cloud project environment.
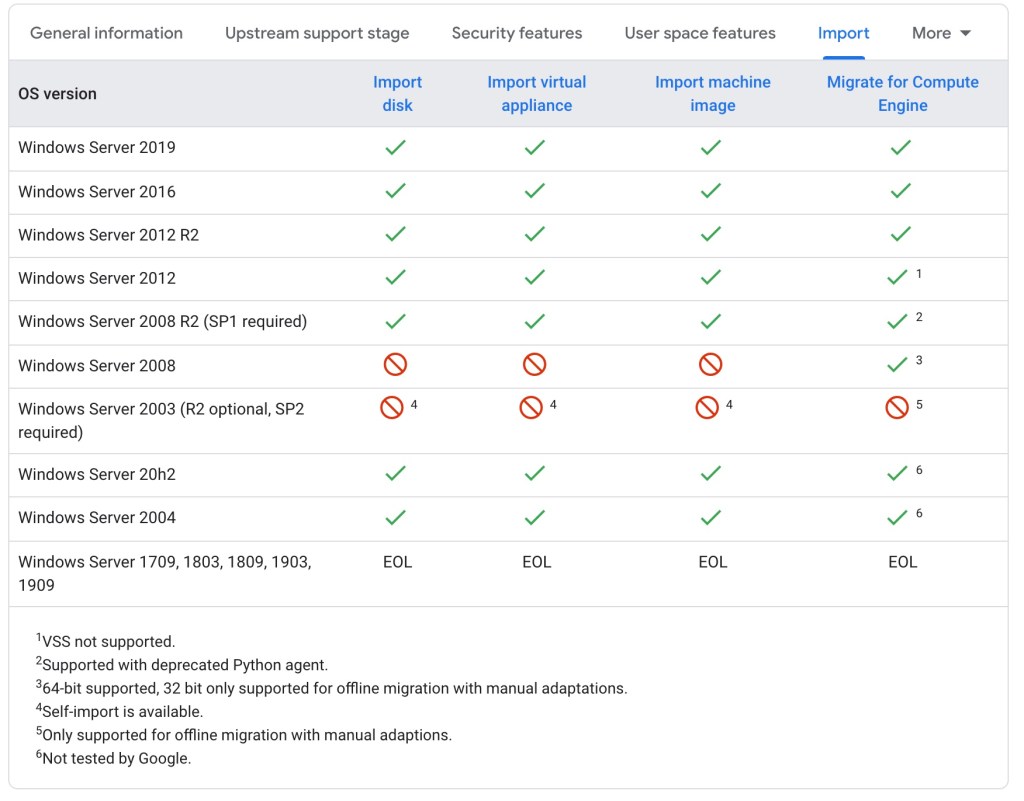
2. Examine your candidate’s OS is supported by Google
Before your migration, it’s better to check whether your target VM is supported, just check it here.
3. Download and run the Google Precheck tool
Based on the Google official documentation, it’s important to run the “precheck” in the VM prior to the migration to check if its output file contains any compatibility issue information, if it does, you need to fix it before executing the import command. The tool will check if the image contain boot MBR and OS type, etc,.
4. Test if you can RDP to your candidate VM
After the migration, we need to use RDP tool to login to the Windows system, so before the migration, you need to check if you are able to RDP to the system or not, allow RDP connection, temporary adjust system firewall settings, in my case, I also change the network interface type from NAT to Bridge type(connect directly to the underlining physical network), before takeoff, we need preflight checks.
5. Locate your candidate VM’s vmdk file location
This step is easy, but you may want your vmdk end up with a single vmdk file instead of having multiple flattened files (this type is given during VM creating processes, “split virtual disk”), in VMware Workstation, you can use “vmware-vdiskmanager.exe” command to merge multiple virtual disks.
6. Enable related Google Cloud API and assign Service Account permissions
Follow Google documentation to enable Google Cloud Build API, so that the Cloud Build service can import instances into Compute Engine; The image import tool needs to have Cloud Storage permissions to automatically perform the importing task which including uploading your file to Cloud Storage, creating a new daisy bucket, downloading the file to Compute Engine, and then creating an image in Compute Engine from the disk file. You need to follow the Google documentation here for those settings.
7. Issue the gcloud import command
After you’ve met all the prerequisites addressed above, you can use the command line to upload the vmdk file to GCE image library, the command should follow the format:
# gcloud compute images import IMAGE_NAME (--source-file=SOURCE_FILE | --source-image=SOURCE_IMAGE)
and several optional flags can be assigned, please refer to the documentation for detail flags explanation.
in my case, I use the following command to upload the vmdk file:
D:\gcp>gcloud compute images import win201601 –source-file win2016.vmdk –os=windows-2016 –network=default –subnet=default –timeout=24h
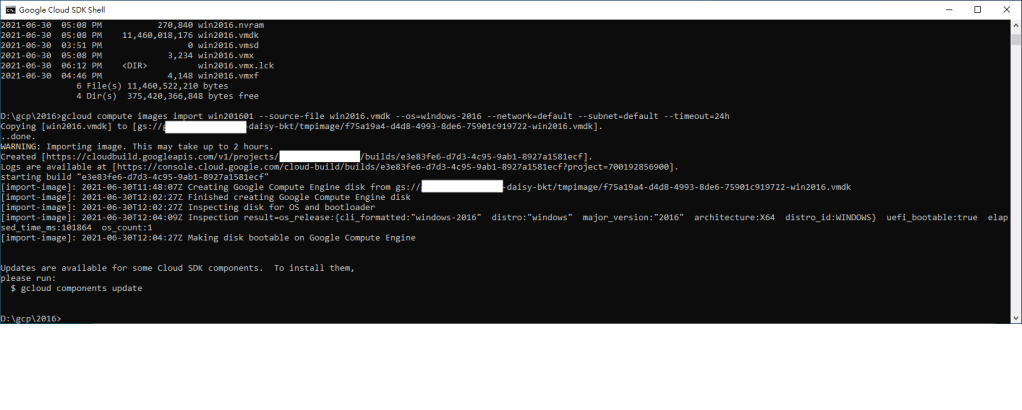
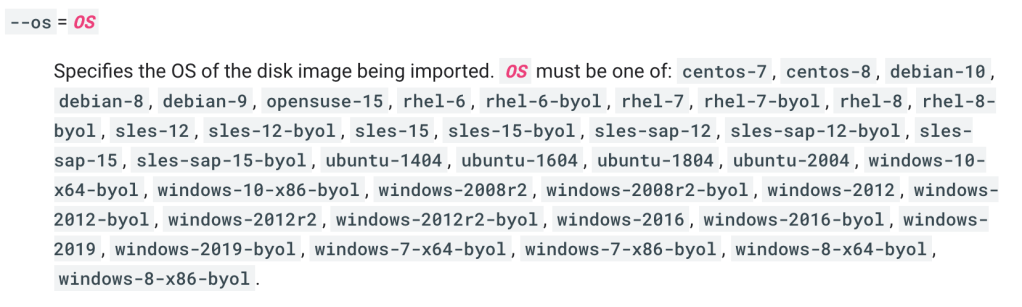
You need to specify what OS version type this vmdk contains, you can find supported OS types specifications here. I put –timeout to 24 hours to prevent large file transfer reach the default timeout value setting.
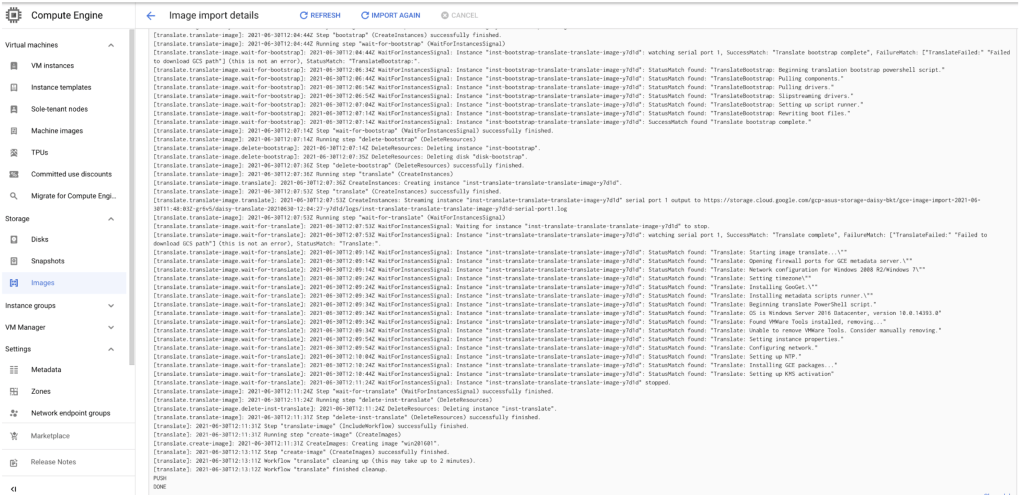
8. Check image created in GCE
If the previous step succeed (or you may need to check the Cloud Build log to find out the failure information), you will get a ready to use GCE image.
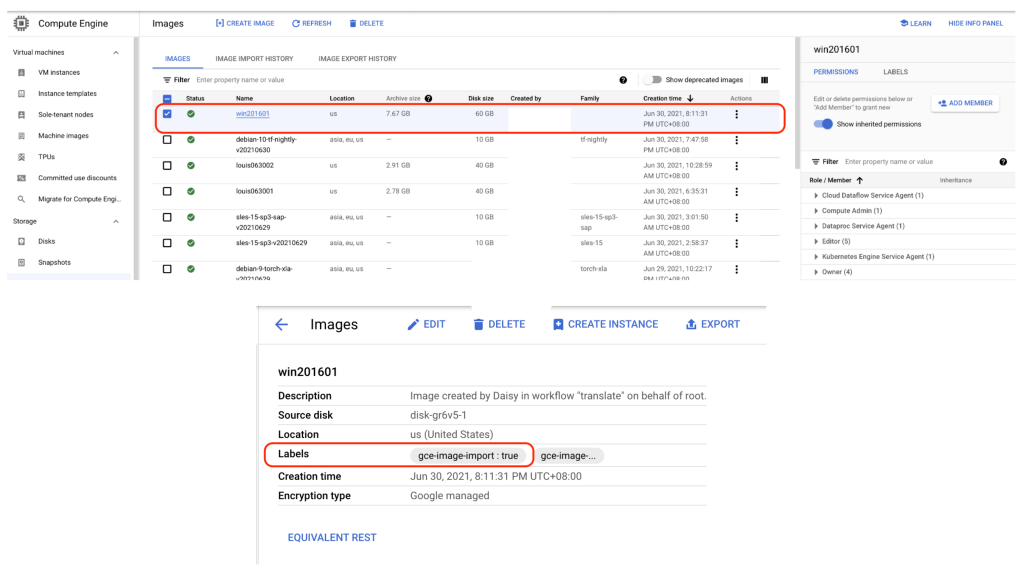
If you want, you can also check image build information in Cloud Build:
9. Create GCE instance specifying custom image as the boot image
Once you have successfully imported your vmdk file to GCE image, you can create your GCE by selecting the instance’s boot image to the imported GCE “custom image”.
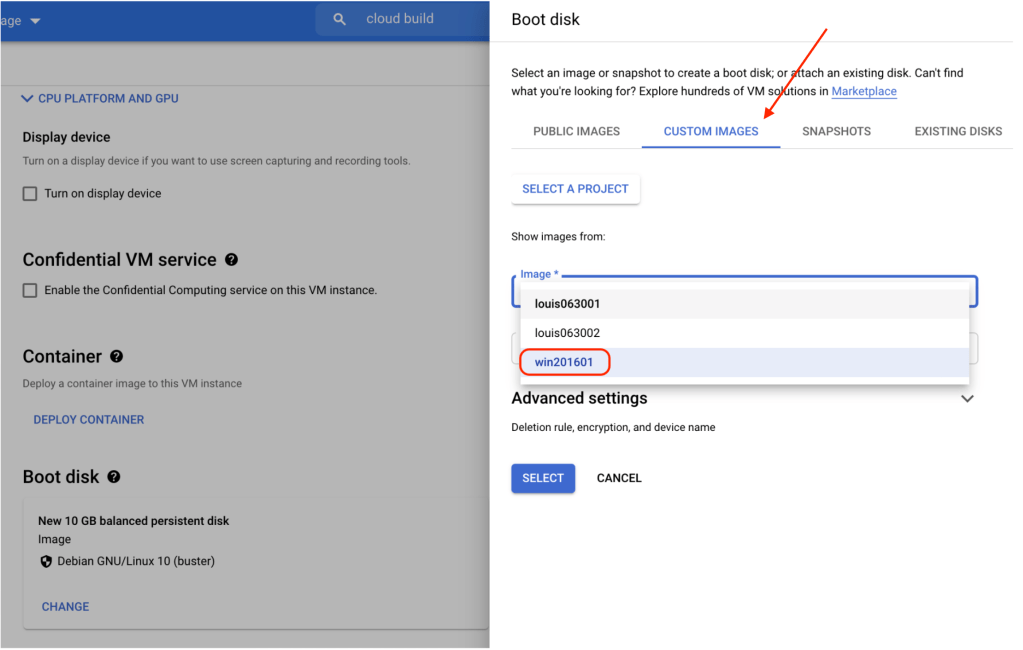
You would also check some VCP firewall rules which should allow adequate Ingress/Egress network connections, i.e: RDP, ICMP, etc,.
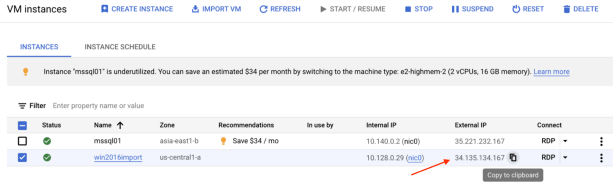
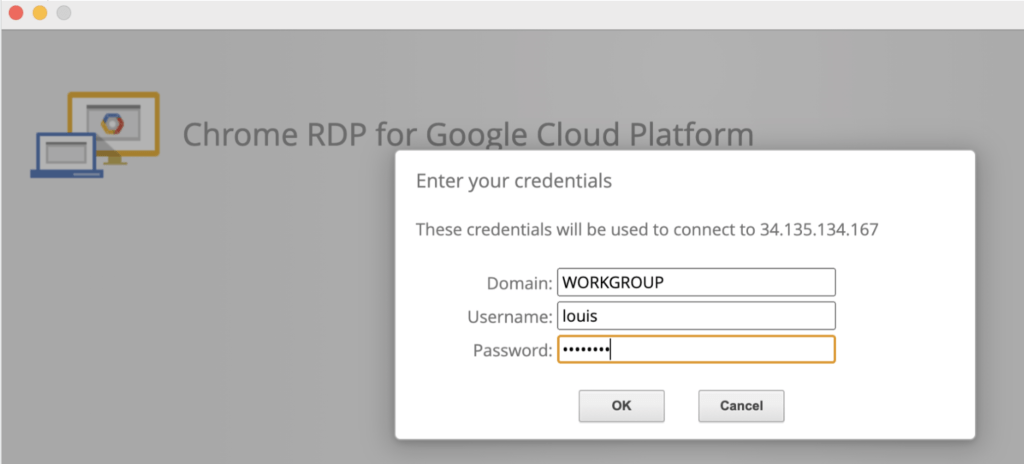
10. Connect to the public IP of the created GCE instance
Once the GCE instance has been created, you can use normal ways to connect to the instance (SSH or RDP)

This concludes our introduction of importing your personal vmdk-based VM to GCE, although this is handy, however in terms of enterprise level data center migration project, Google provides comprehensive migration solutions for company to take a systematic migration approach for their migration plan, for example, StratoZone for the migration assessment, Migrate for Compute Engine tool for migration waves tasks.
Hope this blog helps you better understand the overall “migration” steps if you want to offload your system loading from your personal computer or lab environment, thanks!
